5.2.2 Mounting the humidier
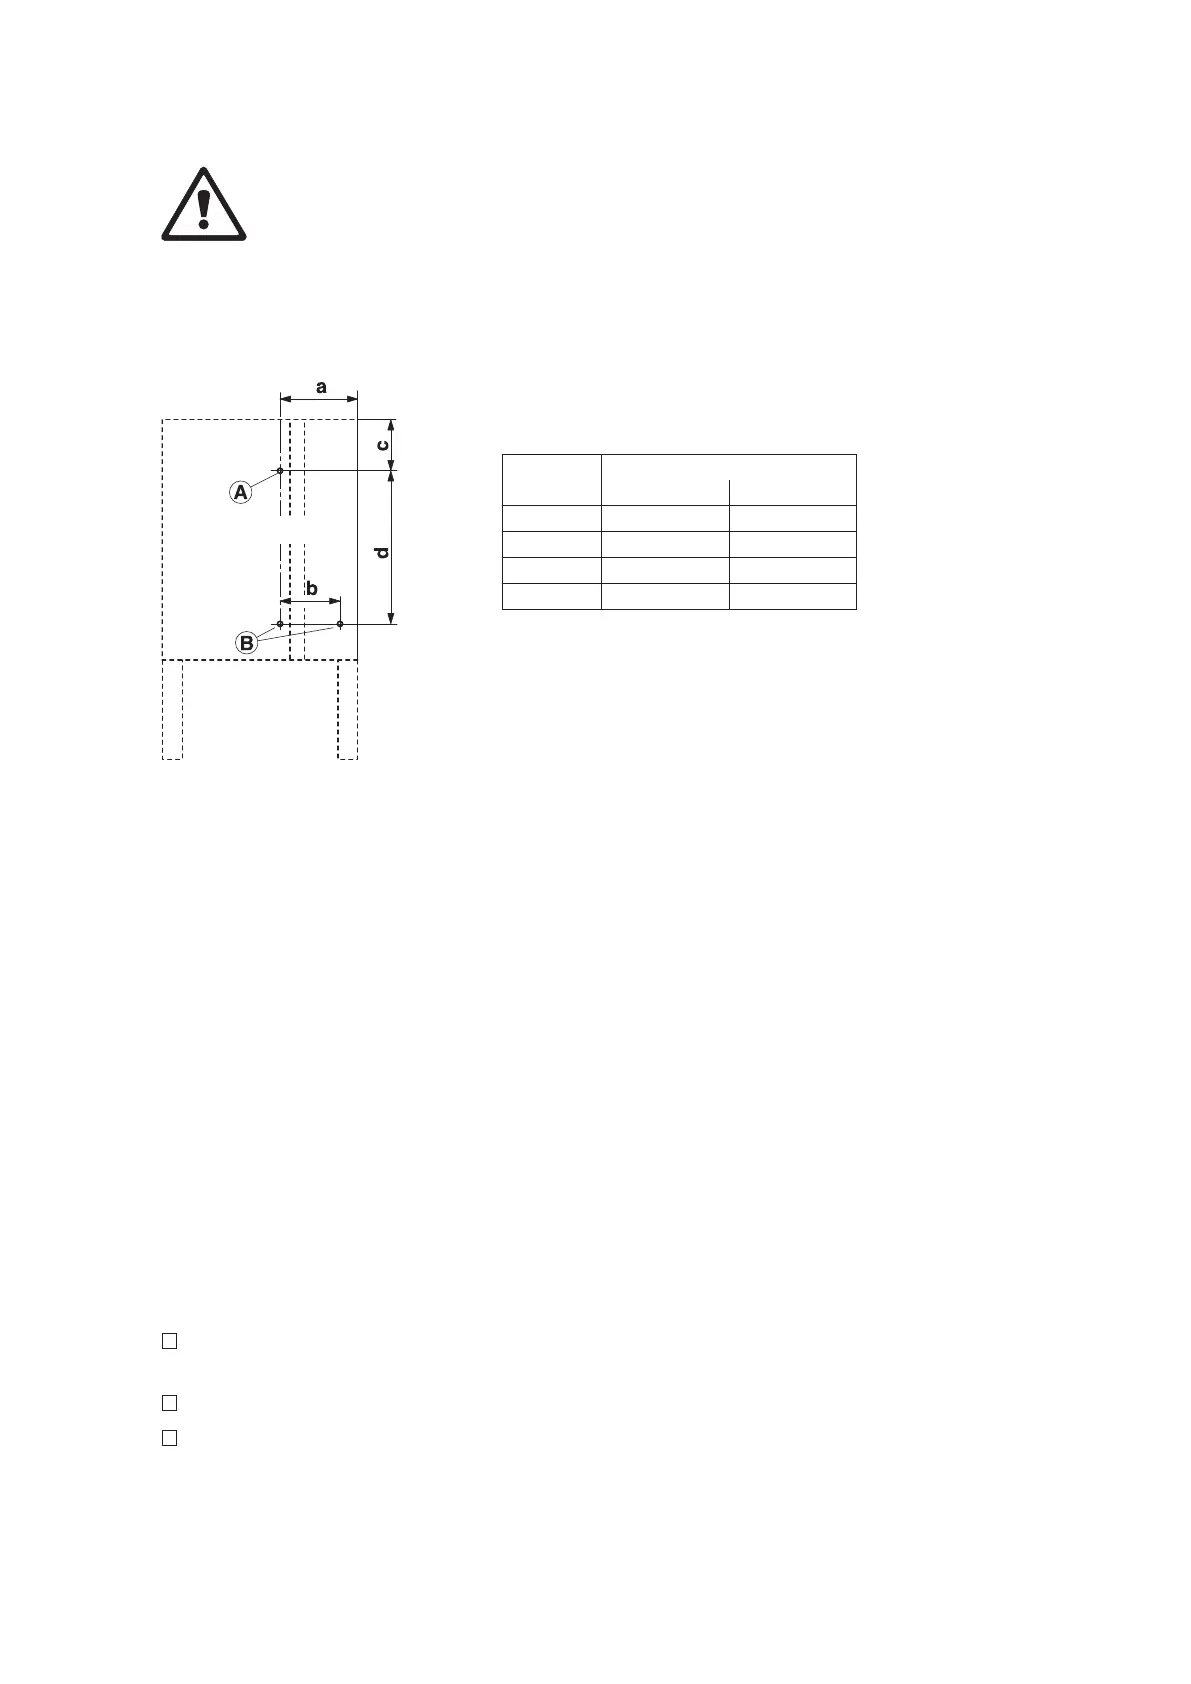
• Usethedrillingtemplate(printedonthepacking)tomarkattachmentpoint“A”onthewall.
Important! Observe location notes.
• Drillholeø10mm,insertthesuppliedplasticplug,andtightenthescrewuntilthedistancebetween
thewallandthescrewheadis5mm.
• Unlockleftfrontpanelandremovebothfrontpanels.Hanguptheunitonthescrew,andusethe
spiritleveltoadjustithorizontallyandvertically.
• Markattachmentpoints“B”.Whennished,removetheunitagain.
• Drillholesø10mmandinsertthesuppliedplasticplugs.
• Hangtheunituponthescrewagainbeforeattachingitwiththeremainingtwoscrews.Beforetight-
eningthescrews,readjusttheunitwiththespiritlevel.
• Reattachthefrontpanelsandlockthem.
5.2.3 Inspecting the installed unit
Usethefollowingchecklisttoascertainthattheinstallationwasperformedcorrectly:
Is/aretheunit(s)inthecorrectplace?
(seechapter5.2.1)
Is/aretheunit(s)correctlyalignedverticallyandhorizontally?
Issteamhumidierproperlysecured?
(stabilityofthecarryingstructure)
Caution!WhenxingtheCondairMk5,useonly the xing materials supplied with the
unit.Ifxingwiththematerialssuppliedisnotpossibleinyourparticularcase,selecta
methodofxingthatisofsimilarstability.Incaseofdoubt,pleasecontactyoursupplier.
Note:Thefollowingexplainshowtoxtheunitwithoutoptionalmountingproles.Toinstalltheunit
withmountingproles,pleasenotethespecialinstructionsprintedonthepackaging.
View from the front
Measure Housing size
small large
a 232,0 mm 237,0 mm
b 175,0 mm 181,0 mm
c 166,5 mm 166,5 mm
d 460,0 mm 460,0 mm