14 | P a g e
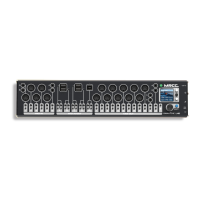
The MRCC can route and filter MIDI messages from any in-port to any out-port regardless of the port
type; 5-Pin, USB HOST, or USB DEVICE over any “virtual cable”. We know this adds a little complexity
but it is what makes the MRCC free from requiring a PC to make routings.
Here are a few examples on how to route the USB ports including the “virtual cables”. Hopefully it’s
easier to do than to read! An alternative is to check out our YouTube channel!
Example: Route in-port A1 (USB HOST A - virtual cable 1) to out-port 5. Choose in-port A1 by
pressing MIDI IN/OUT left-button A. Notice if you hold the left-button A the first four (1-4) MIDI
OUT LEDs light. Yep, the out-port LEDs are being used to show the in-port virtual cables. MIDI
OUT LED 1 bright green (selected) and MIDI OUT LEDs 2-4 are dim white. These four help remind
you that there are 4 virtual cables and enable you to choose a virtual cable, the default is #1.
Make sure to release the left-button A. Next select out-port 5 by pressing MIDI OUT button #5.
Two LEDs shine, in-port A (green) and out-port 5 (bright Blue).
Add another routing in-port A3 (virtual cable 3) to out-port 11
Example continued: Choose inbound port A3 by pressing and holding MIDI IN/OUT left-button
A. The first four (1-4) MIDI OUT LEDs light, select “virtual cable” 3 by pressing MIDI OUT button
#3. MIDI OUT LED 3 shines bright green, LEDs 1, 2 & 4 are dim white. Make sure to release the
left-button A, and select outbound port 11 by pressing MIDI OUT button #11. Two LEDs shine,
in-port A (green) and out-port 11 (bright Blue).
Routing the USB Device Port (PC) and its “virtual cables” is very similar to the routing the USB host ports.
Example: Route in-port 5 to out-port PC9 (virtual cable 9). Choose inbound port 5 by pressing
MIDI IN button #5. Select outbound port PC by pressing and holding MIDI IN/OUT right-button
PC, all 12 (1-12) MIDI OUT LEDs light dim white. Select “virtual cable” 9 by pressing MIDI OUT
button #9. MIDI OUT LED 9 shines bright blue, all the other LEDs are dim white.
Add another outbound PC out-port routing.
Example continued: Add routing in-port 5 to out-port PC4. With in-port 5 chosen (lit green)
press and hold MIDI IN/OUT right-button PC. Now MIDI OUT LED 9 is lit bright blue (because it
was routed in previous example) and all the other MIDI OUT LEDs are lit dim white. Select
“virtual cable” 4 by pressing MIDI OUT button #4. MIDI OUT LED 4 now shines bright blue, MIDI
OUT LED 9 shines dim blue, and all the other LEDs are dim white.
Add another outbound out-port 8 routing.
Example continued: add routing in-port 5 to out-port 8. With in-port 5 still chosen (lit green)
press MIDI OUT button #8. Now three LEDs should shine, in-port 5 (green), out-port PC (dim
Blue), and out-port 8 (bright Blue).
Remote Routing (as of FW 1.1.020)
If there is a MRCC Remote7 connected or there are two MRCC’s connected together routings can be
made by first choosing the in-port (as before) then press and hold the “Y” button to select a remote out-
port. The remote out-ports will light yellow (not blue). See Appendix A for more details.