25 | P a g e
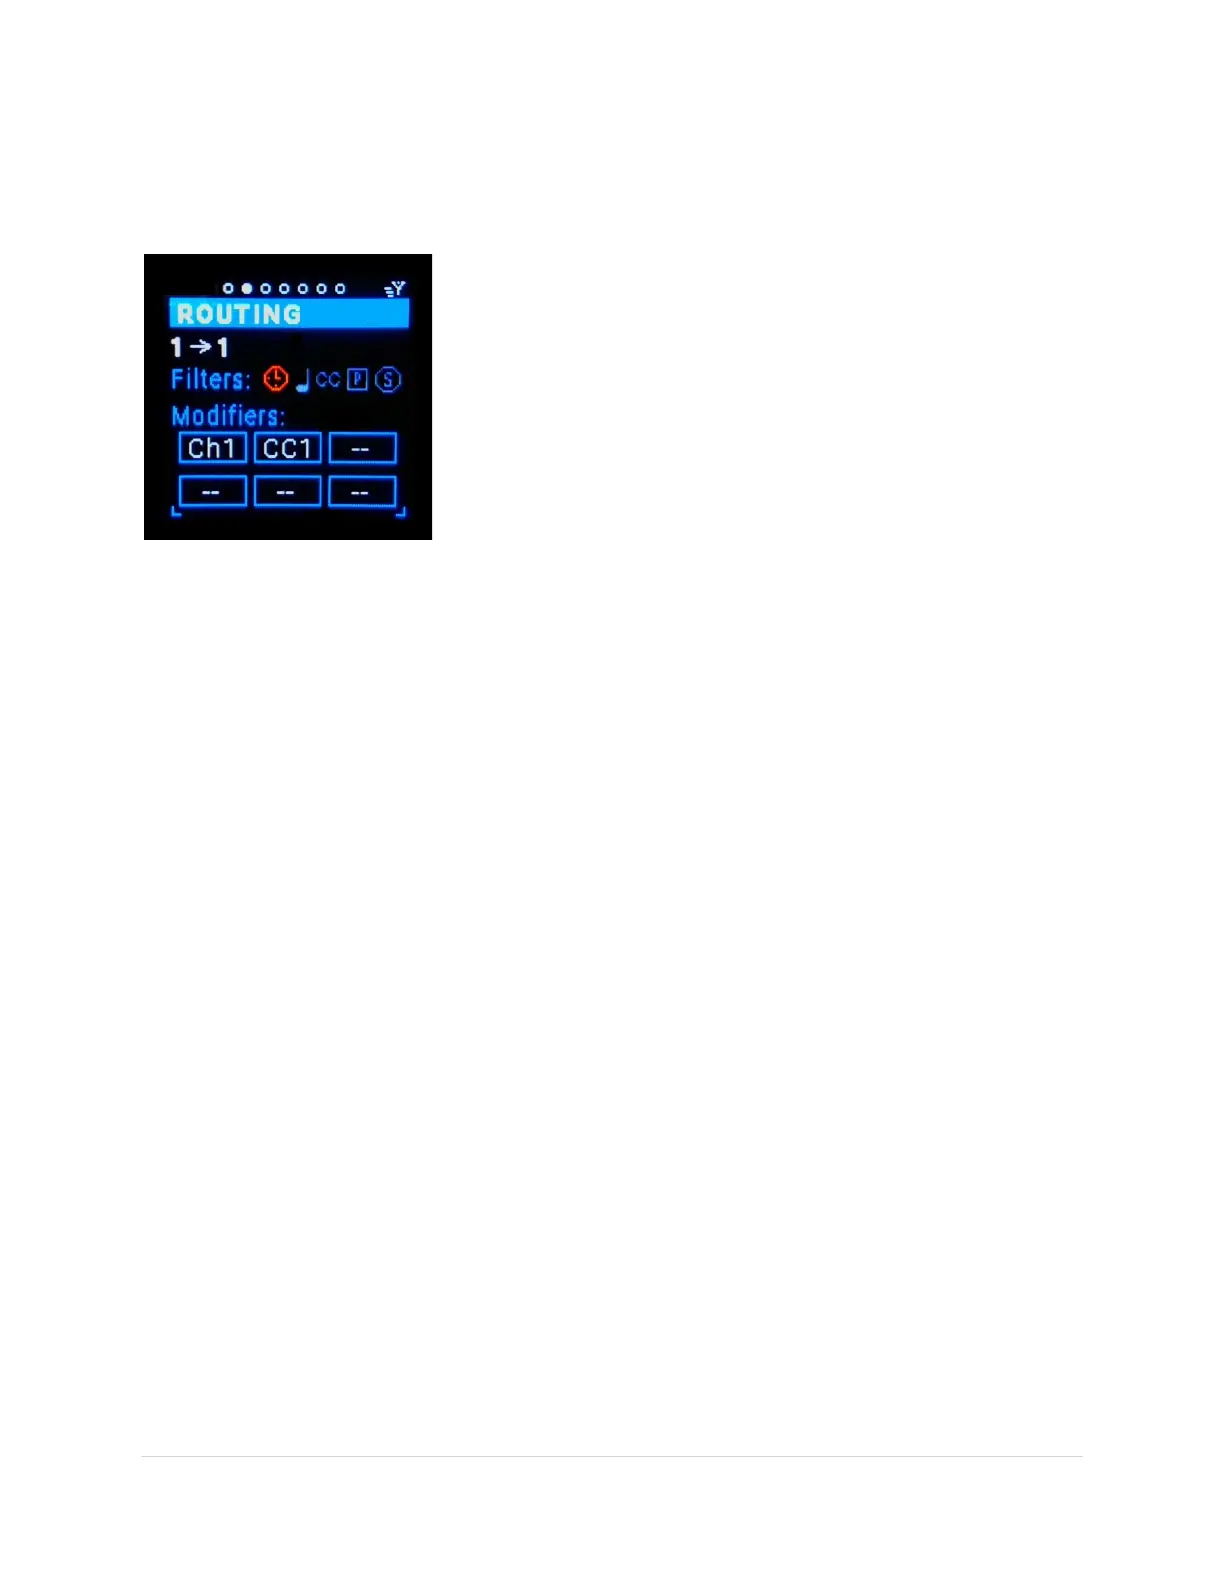
The Routing Screen Page
On this screen you’ll be able to get more detailed MIDI message information as well as filter, map, and
modify the MIDI messages for a specific routing.
In/out-port selector (tab-stop)
The first tab-stop is the in-port selector. Rotating the Encoder will
scroll through all the in-ports. For each in-port the selected out-port
will be shown, there can be more than one out-port per in-port. The
info on the rest of the screen will update for the specific routing.
Notice that when scrolling through the in-ports the MRCC LEDs also
update. This is a quick way to see which Out-ports are routed from
each in-port. You can also choose the in-port by pressing any in-port
button.
The next tab-stop is the out-port selector. If an in-port has no routing
then the out-port shows as “none” and the rest of the screen is
grayed out. No setting can be made if there is no out-port chosen.
Rotating the Encoder knob scrolls through the routed out-ports. The one displayed on the screen
becomes the selected out-port and all the screen fields are updated for that specific routing. Notice
when scrolling through the Out-ports that only one MRCC LED out-port is brightly lit, the newly selected
one. All the other out-ports are dimmed. You can also choose an out-port by simply pressing any dimly
lit out-port button. Pressing a dark out-port button will light it brightly and create an additional routing
that is the selected out-port.
Notice that when you choose a new in-port or out-port the port label name (if one is assigned) briefly
shows up in the banner. More on labeling ports later.
!!! USEFUL FOR NAVIGATION!!!
Shift + Enter button press (Routing Page only) – clears all filters and modifier boxes.
Shift + in-port or out-port button press – shows that port’s label name on the Routing screen banner
without making any routing selection changes.