39 | P a g e
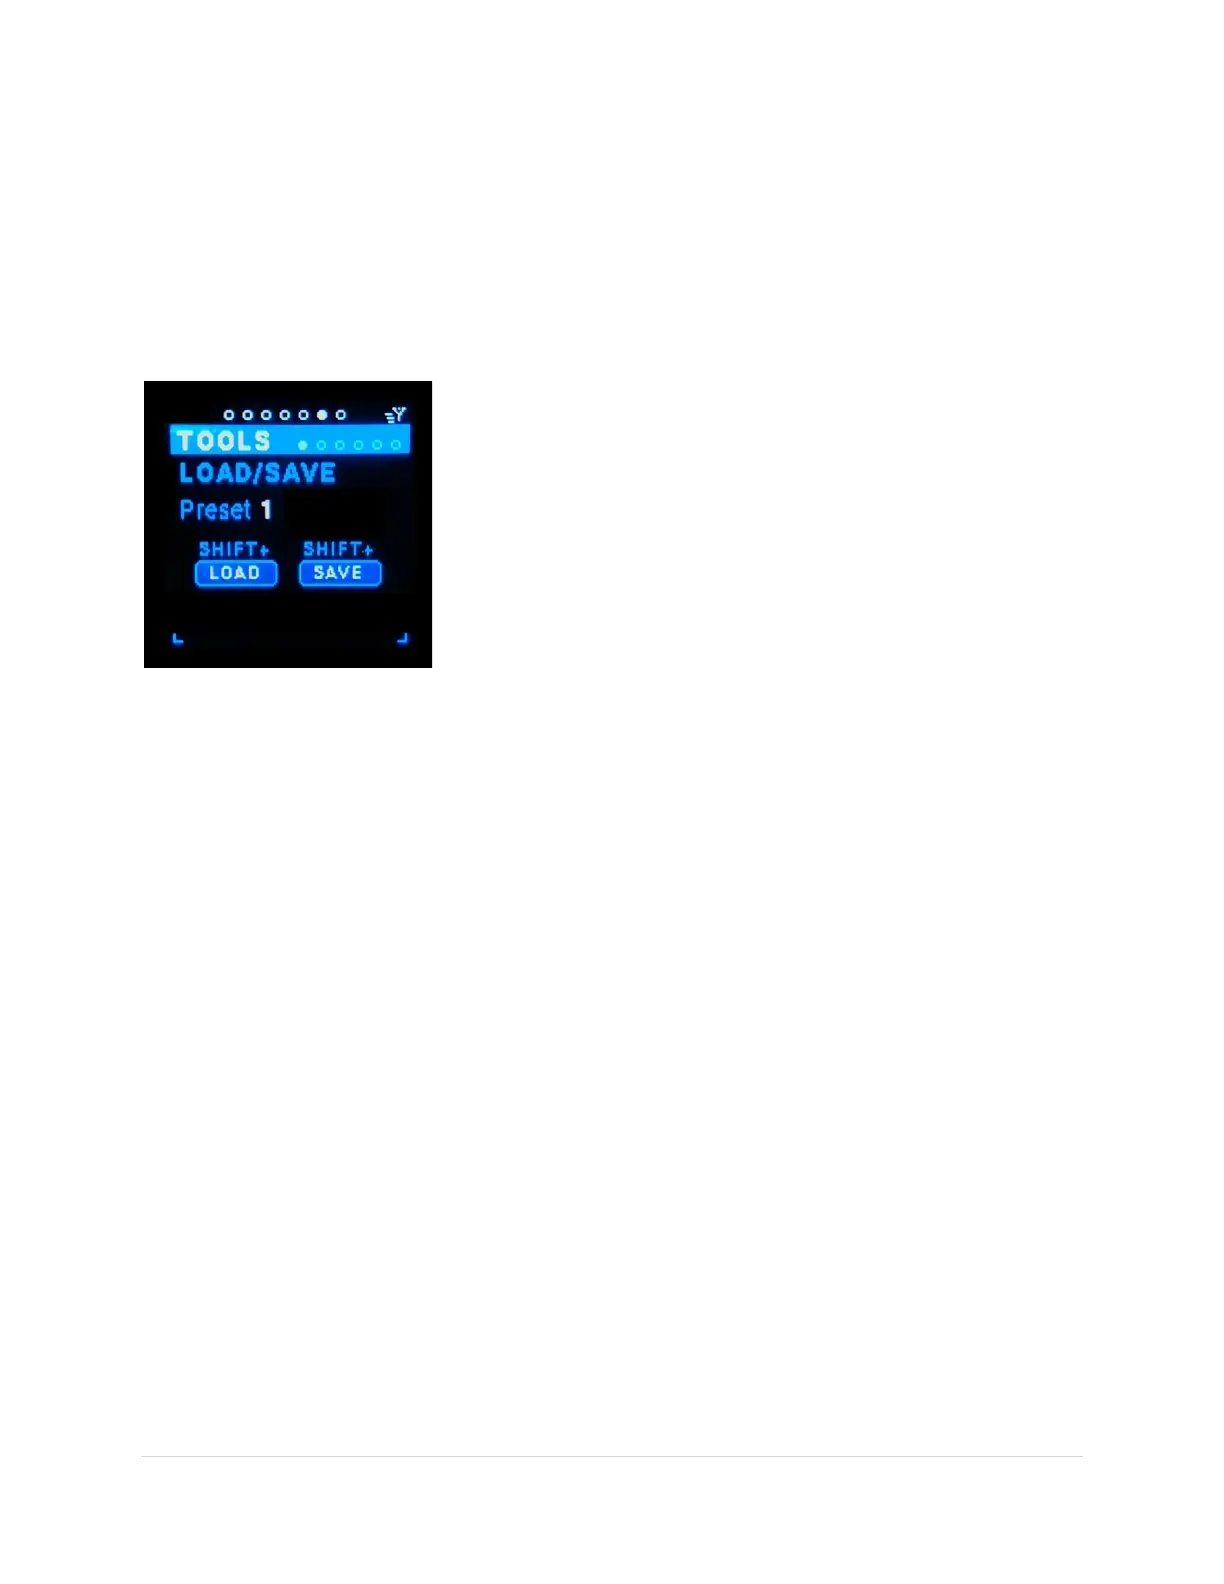
Tools Screen Page
The MRCC Tools are the Load / Save, the Assign Label, Edit Labels, MIDI Monitor, Play Notes, and Play
Notes to Ports.
Load/Save Sub-Page
This is the tool to Save and Load the presets for the MRCC. The presets save all the parameters of the
Routings, Modifiers, Extras and Labels assignments. There are 127 presets. Preset 0 (“FACTORY”) is the
factory parameters and can’t be saved. The next three presets are labeled “User 1-3”. You can store
anything you like in these three slots but is a good place to save your
favorite preset “starting points”. The next 124 preset slots are setup
in “banks” of 20 (“A1-20” – “E1-20”), just to make it easier to
remember. If the preset is empty the preset number will be red, if
previously saved it will be green. The Presets are saved on the
included SD Card (found behind the left side cover). If the SD Card is
removed and not replaced no Presets can be saved. Note the last
Preset saved will be loaded the next time the MRCC is turned on. Any
changes NOT saved will be lost.
If at some point the MicroSD Card needs to be replaced, most typical
inexpensive MicroSD cards will work. Use as small a card as you can find, MRCC requires very little
storage for presets. However, you can use cards up to 32GB. MRCC will create the required data files on
a fresh MicroSD card.
Preset (tab-stop)
The Preset range is: 1-127. Use the Up/Dn buttons to move to the Preset number, the number gets
underlined. Use the Encoder knob to scroll through the values. Note that the Shift + rotation scrolls
faster.
LOAD +shift (tab-stop button)
Loads the Preset from SD Card and updates all the parameters of the MRCC. Use the Up/Dn buttons to
move to the “LOAD” button, the button gets outlined in white. Use the SHIFT + Enter button combo to
press the screen button.
SAVE +shift (tab-stop button)
Saves (& overwrites) the Preset to the SD Card. Use the Up/Dn buttons to move to the “SAVE” button,
the button gets outlined in white. Use the SHIFT + Enter button combo to press the screen button.
Assign Labels Sub-Page
This is the place to Assign port labels to In/out-ports. This is the “digital” version of an original design
concept of “scribble strips” that is typically found on mixing consoles.
Note: this is screen is for assigning only, there is a separate screen for editing the port labels.
Port (tab-stop list box)
Choose the in-port: (1-6, A(1-4)-D(1-4), PC(1-12)) or out-port: (1-12, A-D, PC(1-12)) by rotating the