40 | P a g e
Encoder knob (shift rotate goes faster). Notice that the MRCC LEDs are light purple, this is to remind you
that you can also choose the Assign port by pressing the MRCC In/Out -port buttons and not change the
actual port routings.
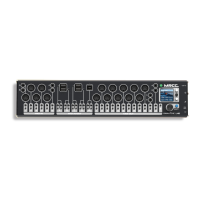
Label (tab-stop list box)
Choose the Label from the label list by rotating the Encoder knob
(shift rotate goes faster). The label list is an alphabetically sorted
combination of three lists: the MRCC built-in labels, the User defined
labels, and the USB labels.
ASSIGN (tab-stop button)
Pressing the Assign button assigns the label to the port. Note that the
MRCC will not remove the label assignment if you remove the MIDI or
USB cable, you must unassign the port label manually. If the label is
already assigned the text will appear purple and the Assign button will
be disabled.
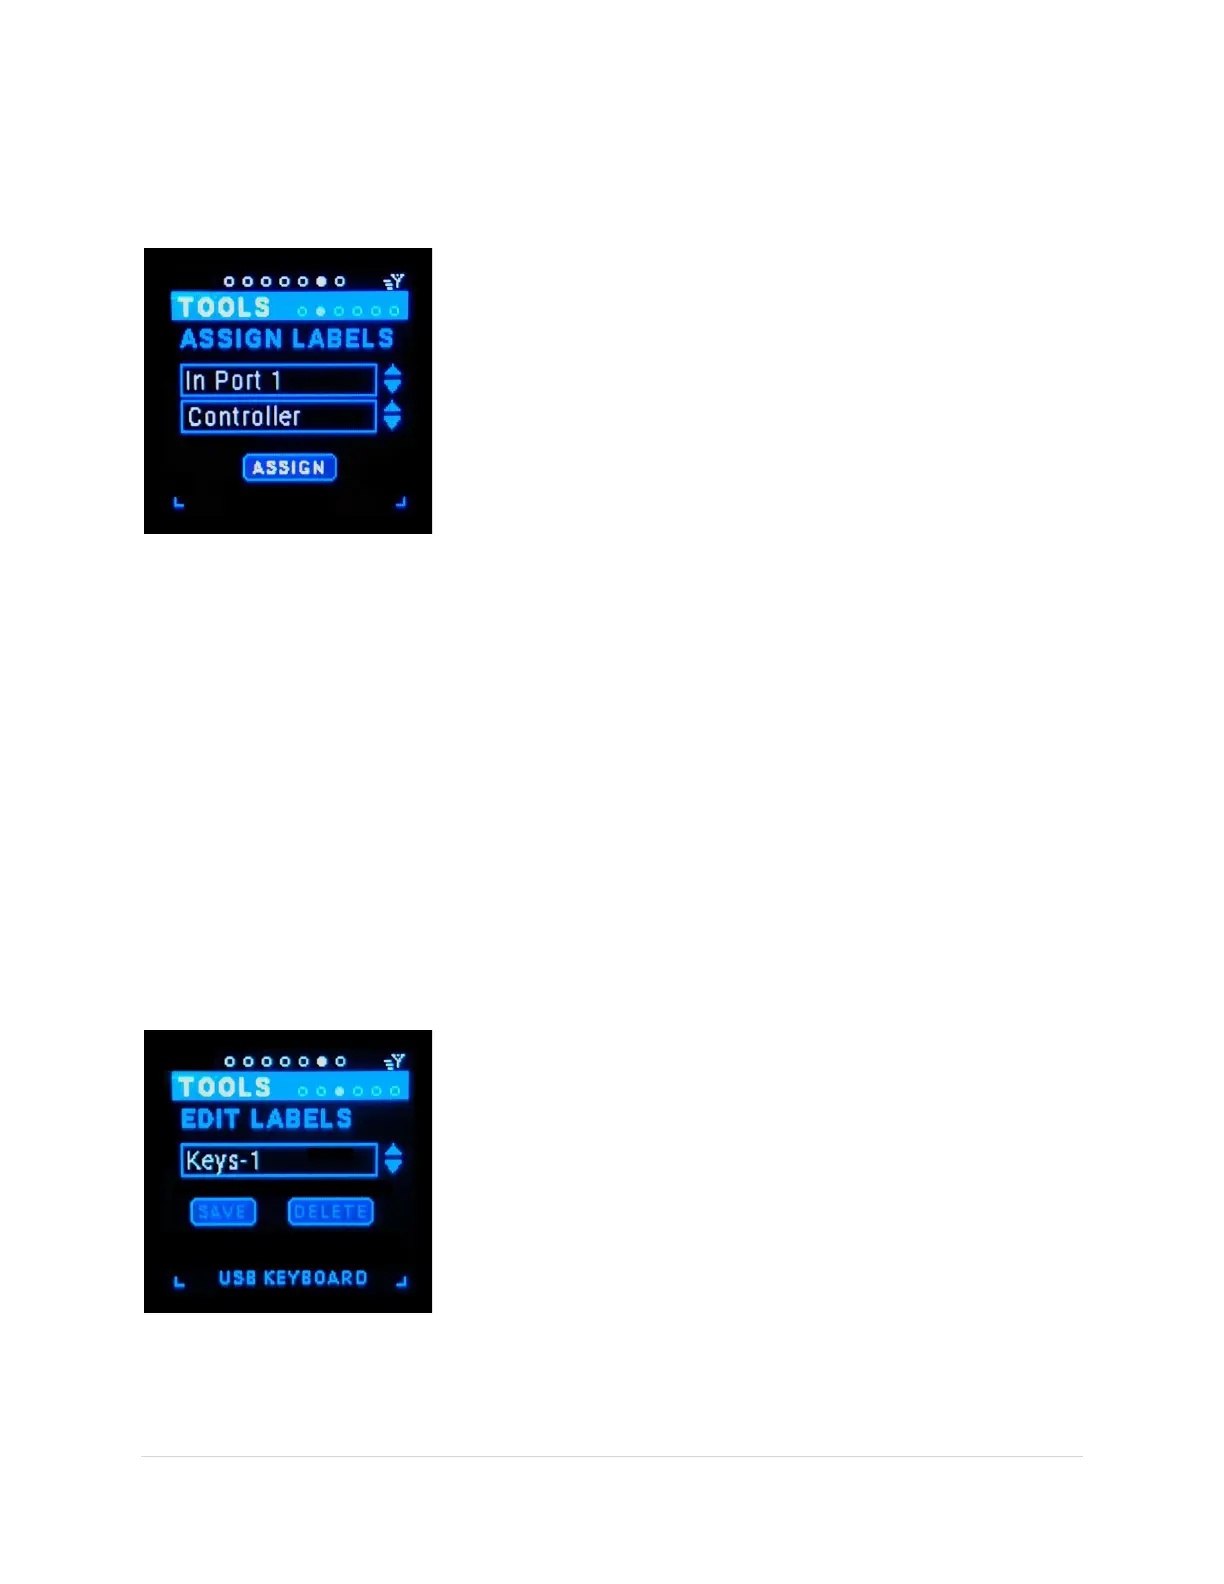
Edit Labels Sub-Page
This is the place to add and remove the user labels from the label list. As a quick start there are 20 or so
built-in labels (these can’t be removed). You can add labels by plugging in a QWERTY USB keyboard and
typing in the text box. Also USB “device” names are automatically added to the label list when plugging
in a USB device. Sometimes the manufacturer name is also in the device name, the MRCC will remove
this to keep the label readable on the small screen.
NOTE: A great time saver is to plug in a QWERTY keyboard and type in ALL the device names of the gear
in your studio. Then later when convenient or “in the moment” you can assign them to the ports.
The labels list is a combination of three lists: the MRCC built-in labels, the User defined labels, and the
USB labels, all alphabetically sorted.
NOTE: this is screen is for editing only, there is a separate screen for assigning the port labels.
Port (tab-stop list box)
Choose the label to edit. Use the QWERTY keyboard to edit the label.
The Back-Space key will remove the last letter of the label.
The Delete key will delete all the text in the edit box.
The Tab key or Arrow up/dn keys will move thru the tab stops.
The Return key will press the highlighted button.
SAVE +shift (tab-stop button)
Saves the label to user labels list on the SD Card.
DELETE +shift (tab-stop button)
Deletes the label from the user labels list on the SD Card.