98 Operator’s manual A 222
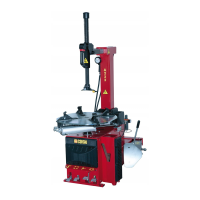
- Press the pedal to turn the table top
clockwise. The upper bead will automati-
cally be guided up and over the rim (fig.18).
Repeat the last three points to detach the
lower bead.
- Tilt the tower backwards .
NOTE: If the tyre has an inner tube, after de-
taching the upper bead, tilt the tower back
and remove the inner tube before
proceeding to demount the lower bead.
The rotation of the table top can be stopped
at any time by releasing the pedal .
To rotate in the opposite direction, simply
raise up the pedal .
6.6. TYRE MOUNTING
Always check that the size of the tyre is compatible with the size of the wheel
before proceeding with mounting.
WARNING
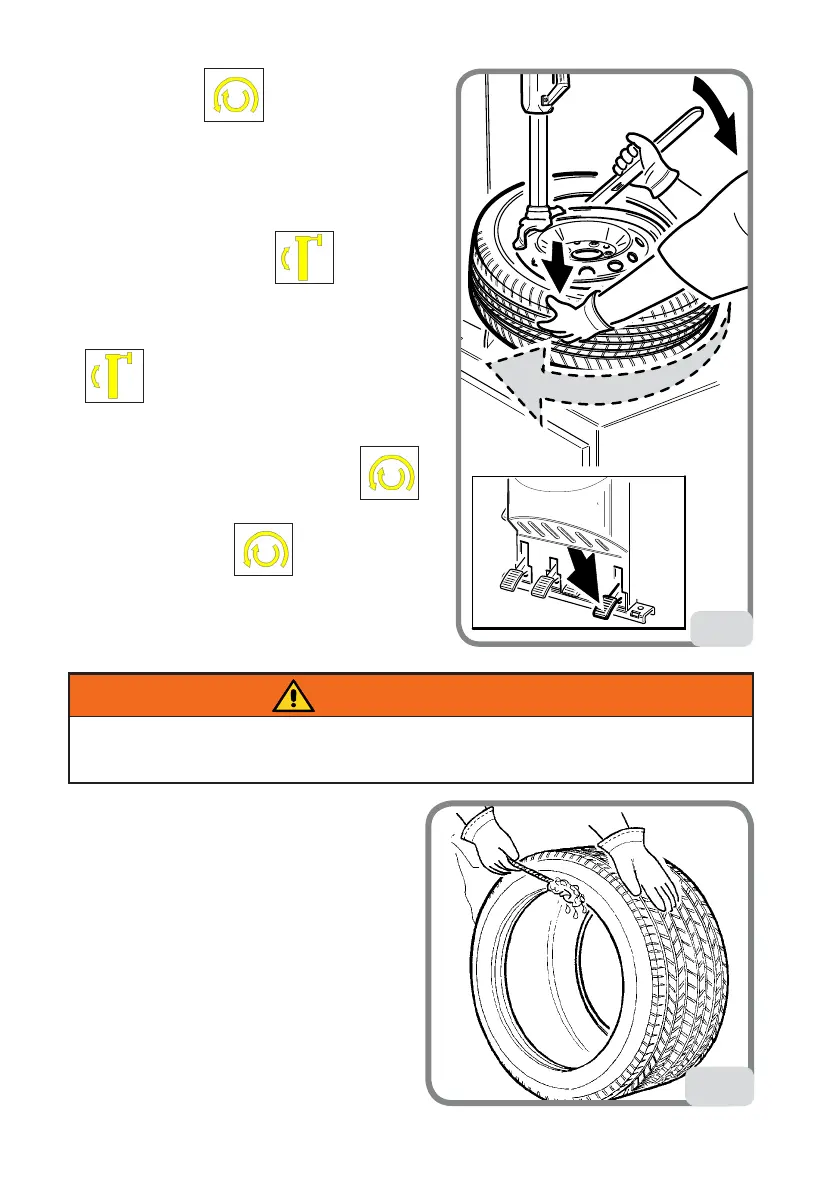
- Before you start with tyre mounting
operations, apply a liberal amount of tyre
manufacturer approved rubber lubricant to
both beads (fig.19).
Lubricated beads require less force to
mount/seat and are protected against tor-
sional damage.
Make sure that the tyre is in good condition
without any signs of undue wear or damage.
- Place the tyre over the wheel and tilt the
19
Assicurarsi che la copertura sia in buono
stato e non presenti danneggiamenti.
-Sistemare il pneumatico sul cerchio e
ribaltare il palo in avanti. Posizionare il
tallone inferiore (fig.20) sotto la parte
destra della torretta.
20
il pedale d’azionamento.
Per la rotazione in senso opposto sarà
sufficiente sollevare il pedale.
18
moNTAGGIo
AVVERTENZA
Verificare sempre la compatibilità fra le
dimensioni del pneumatico e quelle del
cerchio prima del loro assemblaggio.
- Prima d’iniziare le operazioni di montag-
gio, lubrificare i talloni (fig.19).
Un tallone lubrificato è più agevole da
montare e rimane protetto da possibili
danneggiamenti.
20 A 224 - A 224 TI
19
Assicurarsi che la copertura sia in buono
stato e non presenti danneggiamenti.
-Sistemare il pneumatico sul cerchio e
ribaltare il palo in avanti. Posizionare il
tallone inferiore (fig.20) sotto la parte
destra della torretta.
20
il pedale d’azionamento.
Per la rotazione in senso opposto sarà
sufficiente sollevare il pedale.
18
moNTAGGIo
AVVERTENZA
Verificare sempre la compatibilità fra le
dimensioni del pneumatico e quelle del
cerchio prima del loro assemblaggio.
- Prima d’iniziare le operazioni di montag-
gio, lubrificare i talloni (fig.19).
Un tallone lubrificato è più agevole da
montare e rimane protetto da possibili
danneggiamenti.