xStack® DES-3200 Series Layer 2 Managed Fast Ethernet Switch
239
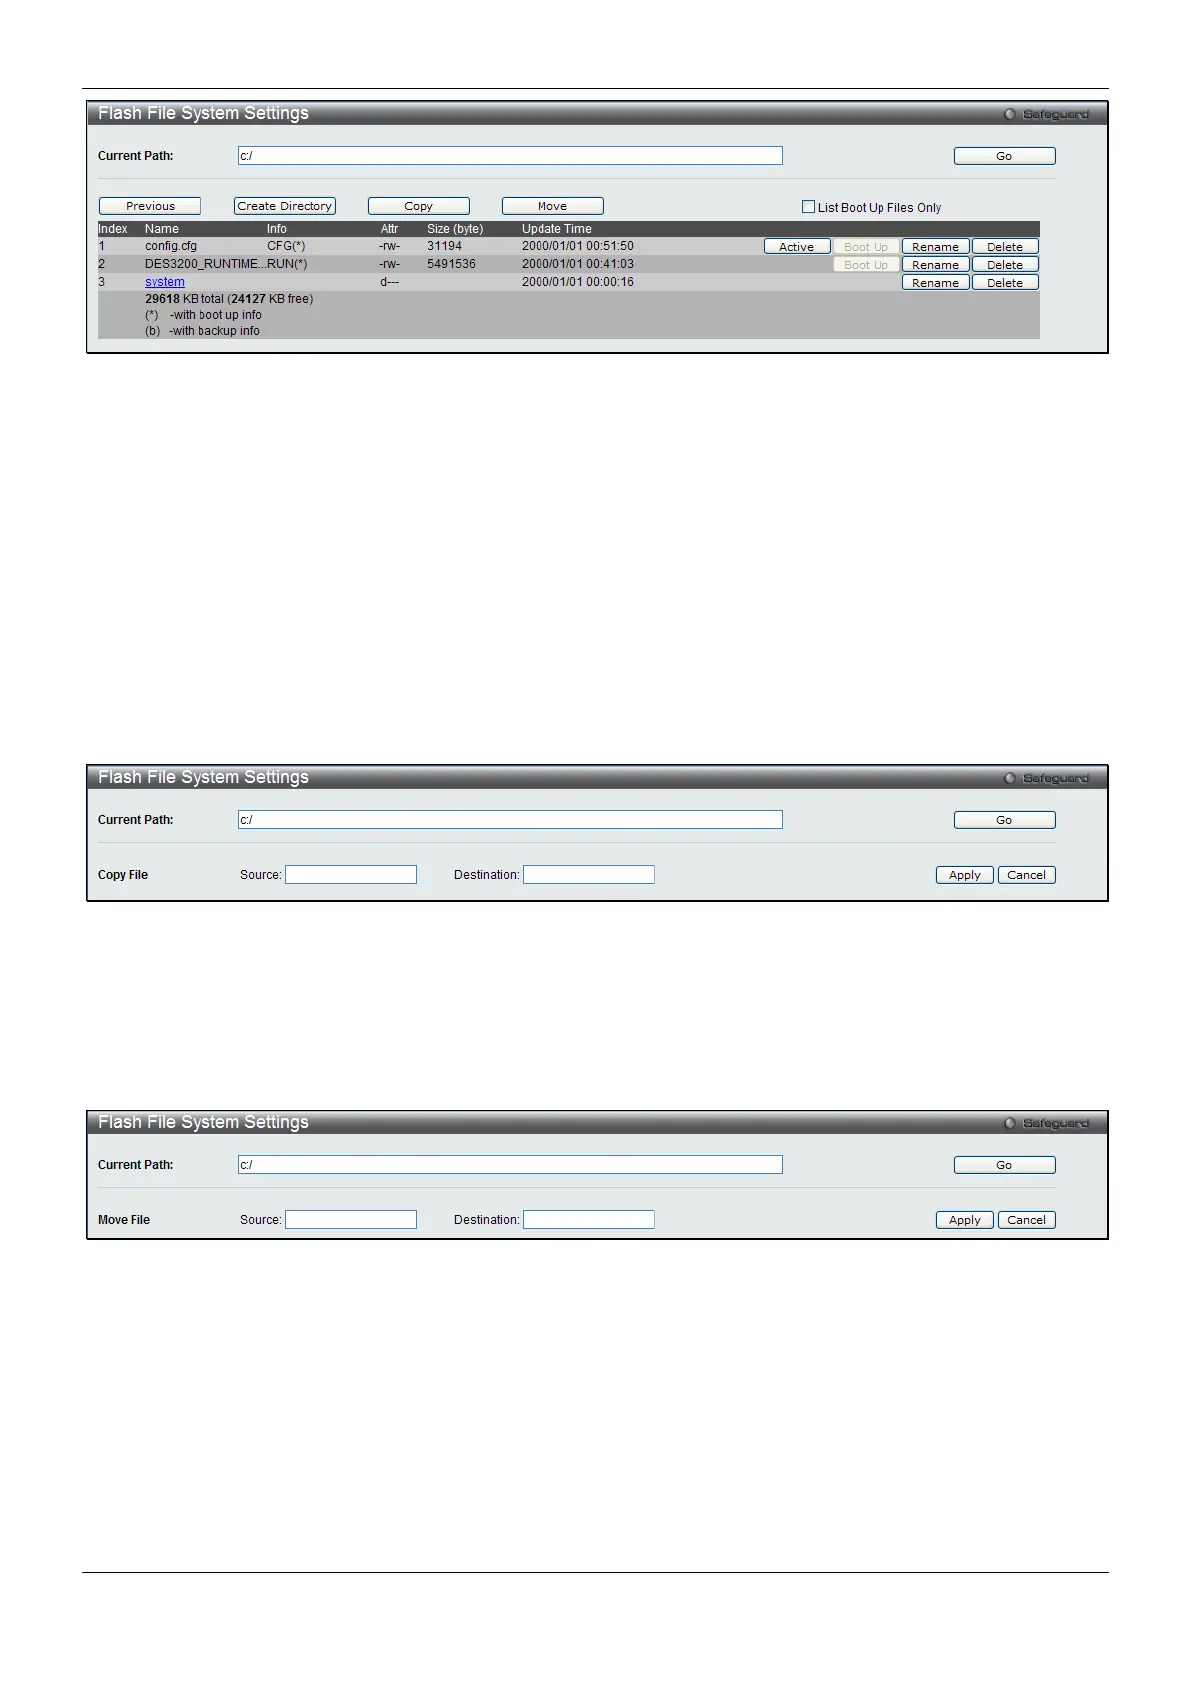
Figure 9-15 Flash File System Setting – Search for Drive window
Click the Previous button to return to the previous page.
Click the Create Directory to create a new directory within the file system of the switch.
Click the Copy button to copy a specific file to the switch.
Click the Move button to move a specific file within the switch.
Tick the List Boot Up Files Only option to display only the boot up files.
Click the Active button to set a specific config file as the active runtime configuration.
Click the Boot Up button to set a specific runtime image as the boot up image.
Click the Rename button to rename a specific file’s name.
Click the Delete button to remove a specific file from the file system.
After clicking the Copy button, the following page will appear:
Figure 9-16 Flash File System Settings – Copy window
When copying a file to the file system of this switch, the user must enter the Source and Destination path.
Click the Apply button to initiate the copy.
Click the Cancel button the discard the process.
After clicking the Move button, the following page will appear:
Figure 9-17 Flash File System Settings – Move window
When moving a file to another place, the user must enter the Source and Destination path.
Click the Apply button to initiate the copy.
Click the Cancel button the discard the process.
 Loading...