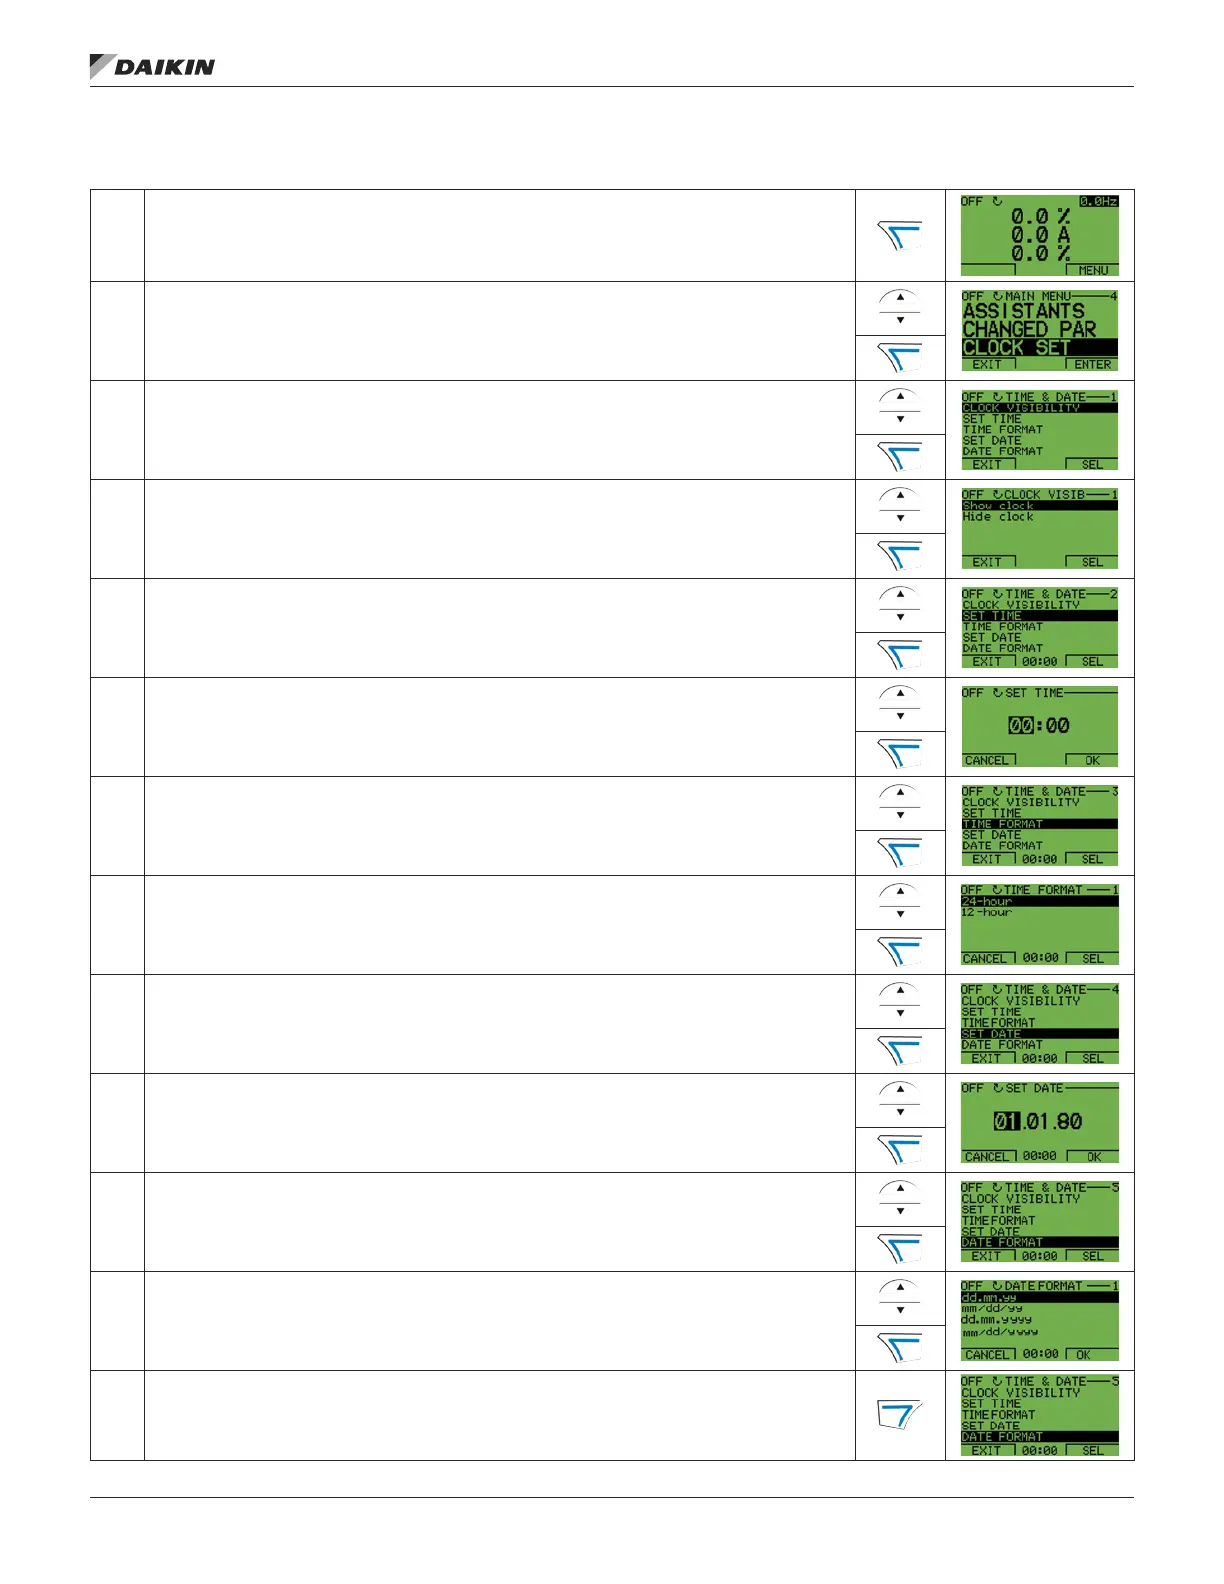
Figure 16: Changing the Clock Set
To set the clock, follow these steps:
1
Select MENU to enter the main menu.
2
Scroll to Clock Set with the UP/ DOWN buttons and
select ENTER to enter the Clock Set mode.
3
Scroll to Clock Visibility with the UP/DOWN buttons and
select SEL to change the visibility of the clock.
4
Scroll to Show Clock with the UP/DOWN buttons and
select SEL to make the clock visible.
5
Scroll to Set Time with the UP/DOWN buttons and select SEL.
6
Change the hours and minutes with the UP/DOWN buttons and
select OK to save the values.
The active value is displayed in inverted color.
7
Scroll to Time Format with the UP/DOWN buttons and select SEL.
8
The different formats are displayed. Select a format with the UP/DOWN buttons and
select SEL to conrm the selection.
9
Scroll to Set Date with the UP/DOWN buttons and select SEL.
10
Change the days, months and year with the UP/DOWN buttons and
select OK to save the values.
The active value is displayed in inverted color.
11
Scroll to Date Format with the UP/DOWN buttons and select SEL.
12
The Date formats are displayed. Select a date format with the UP/DOWN buttons and
select OK to conrm the selection.
13
Select EXIT twice to return to the main menu.
OM 1190-1 • MD4 VFD 22 www.DaikinApplied.com
sTarT up
 Loading...