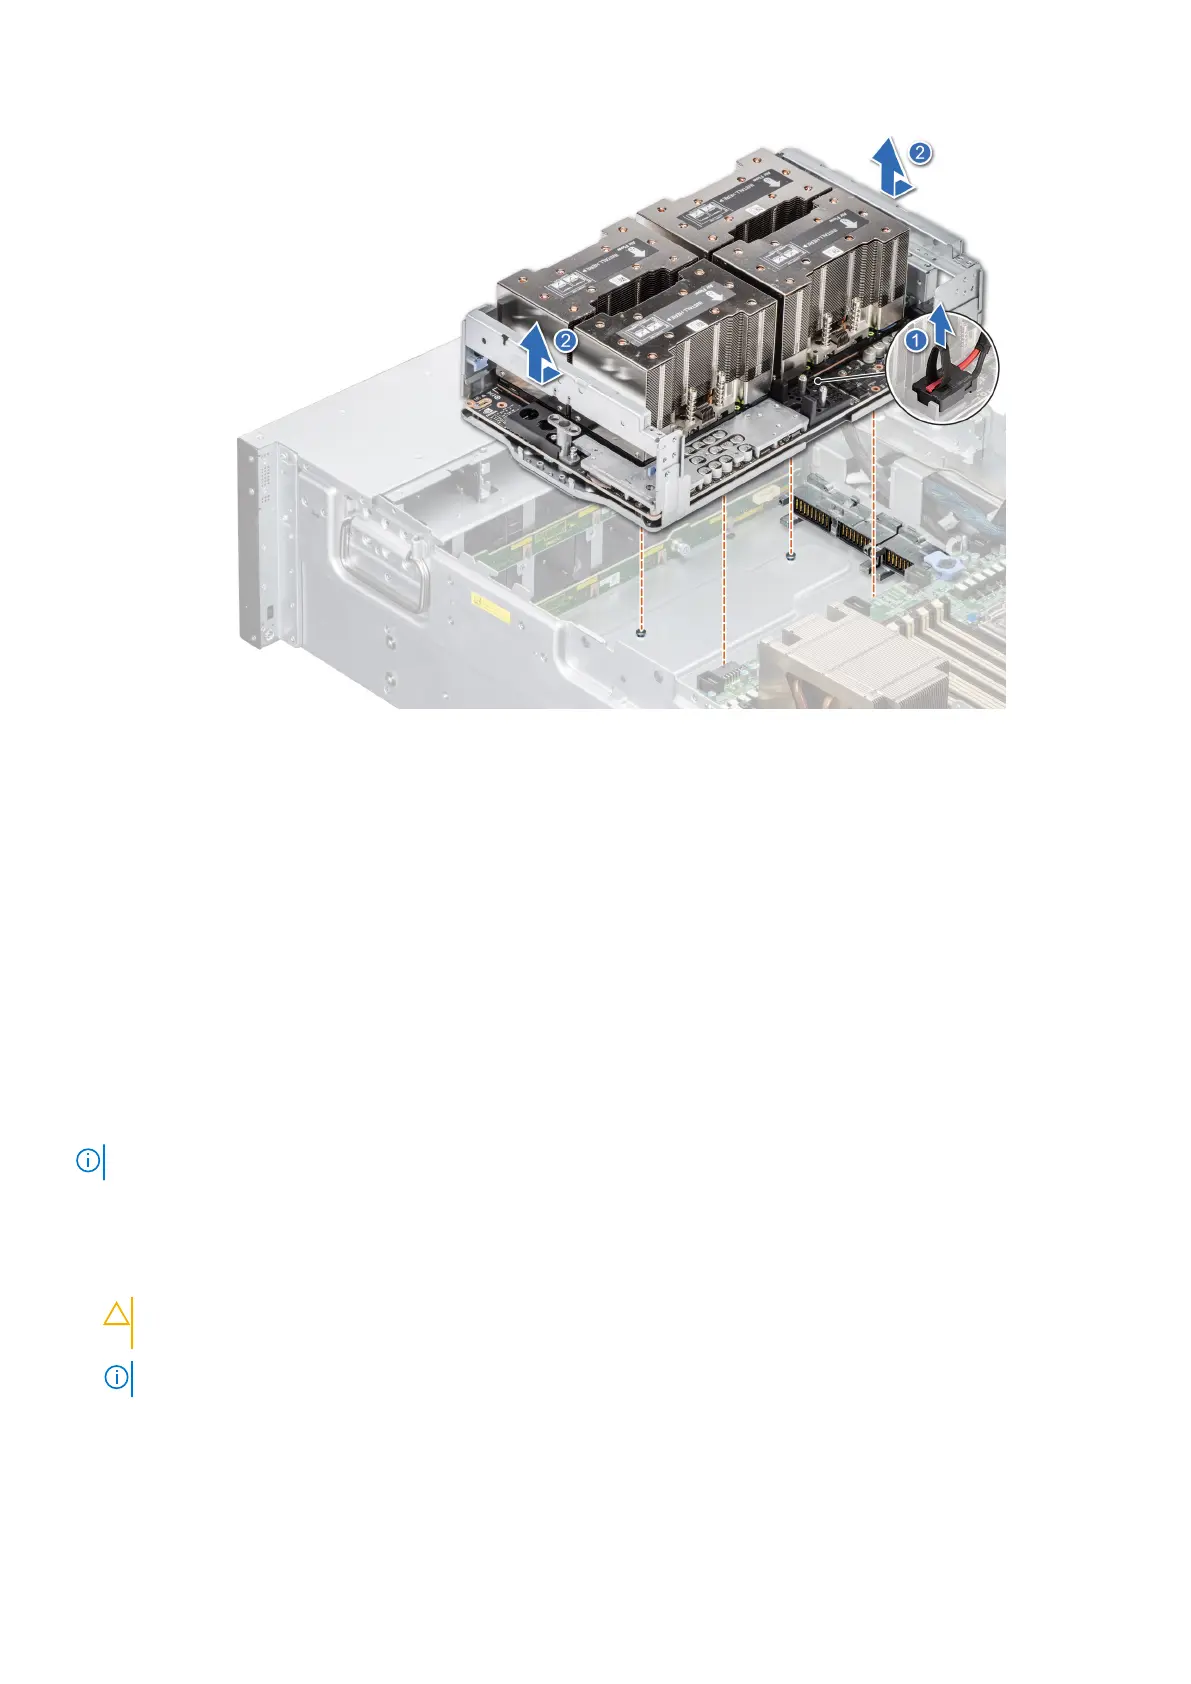
Figure 48. Removing the GPU assembly
Next steps
Replace the Nvidia A100 GPU assembly.
Installing the Nvidia A100 GPU assembly
Prerequisites
1. Follow the safety guidelines listed in the Safety instructions on page 23.
2. Follow the procedure listed in the Before working inside your system on page 24.
3. Remove the middle top cover.
4. Disconnect the drive backplane cables from the connector on the backplane.
5. Remove the GPU air shroud.
6. Remove the cooling fan cage.
NOTE: Route the cables properly when you replace the component to prevent the cables from being pinched or crimped.
Steps
1. Hold the GPU tray handles and lower the GPU assembly into the system by aligning with the guide pins.
2. Slide the GPU assembly holding the GPU tray handles to engage the GPU assembly to the connectors in the system.
CAUTION:
While installing the GPU assembly from the system, ensure that the GPU connectors do not
collide with anything, to avoid damage.
NOTE: Ensure that the GPU connectors are connected to the connectors in the system properly.
54 Installing and removing system components

 Loading...


