User Manual DEV 2194
24 Copyright DEV Systemtechnik GmbH 2013-2017
An acknowledged and not pending error can be deleted from the list by highlighting
the corresponding line, followed by clicking on the button.
If a deleted error occurs again, a line added at the beginning of the table.
Note:
It is possible to acknowledge (and to delete) more than one entry at a time by
highlighting more errors using the <Ctrl> or the <Shift> key of the keyboard in
combination with mouse click(s).
Users with "read" permission only have no rights to acknowledge or to delete
error entries (chapter 5.4.7.1.2).
The table content can be stored using the data backup functionality
(chapter 5.4.7.4.2).
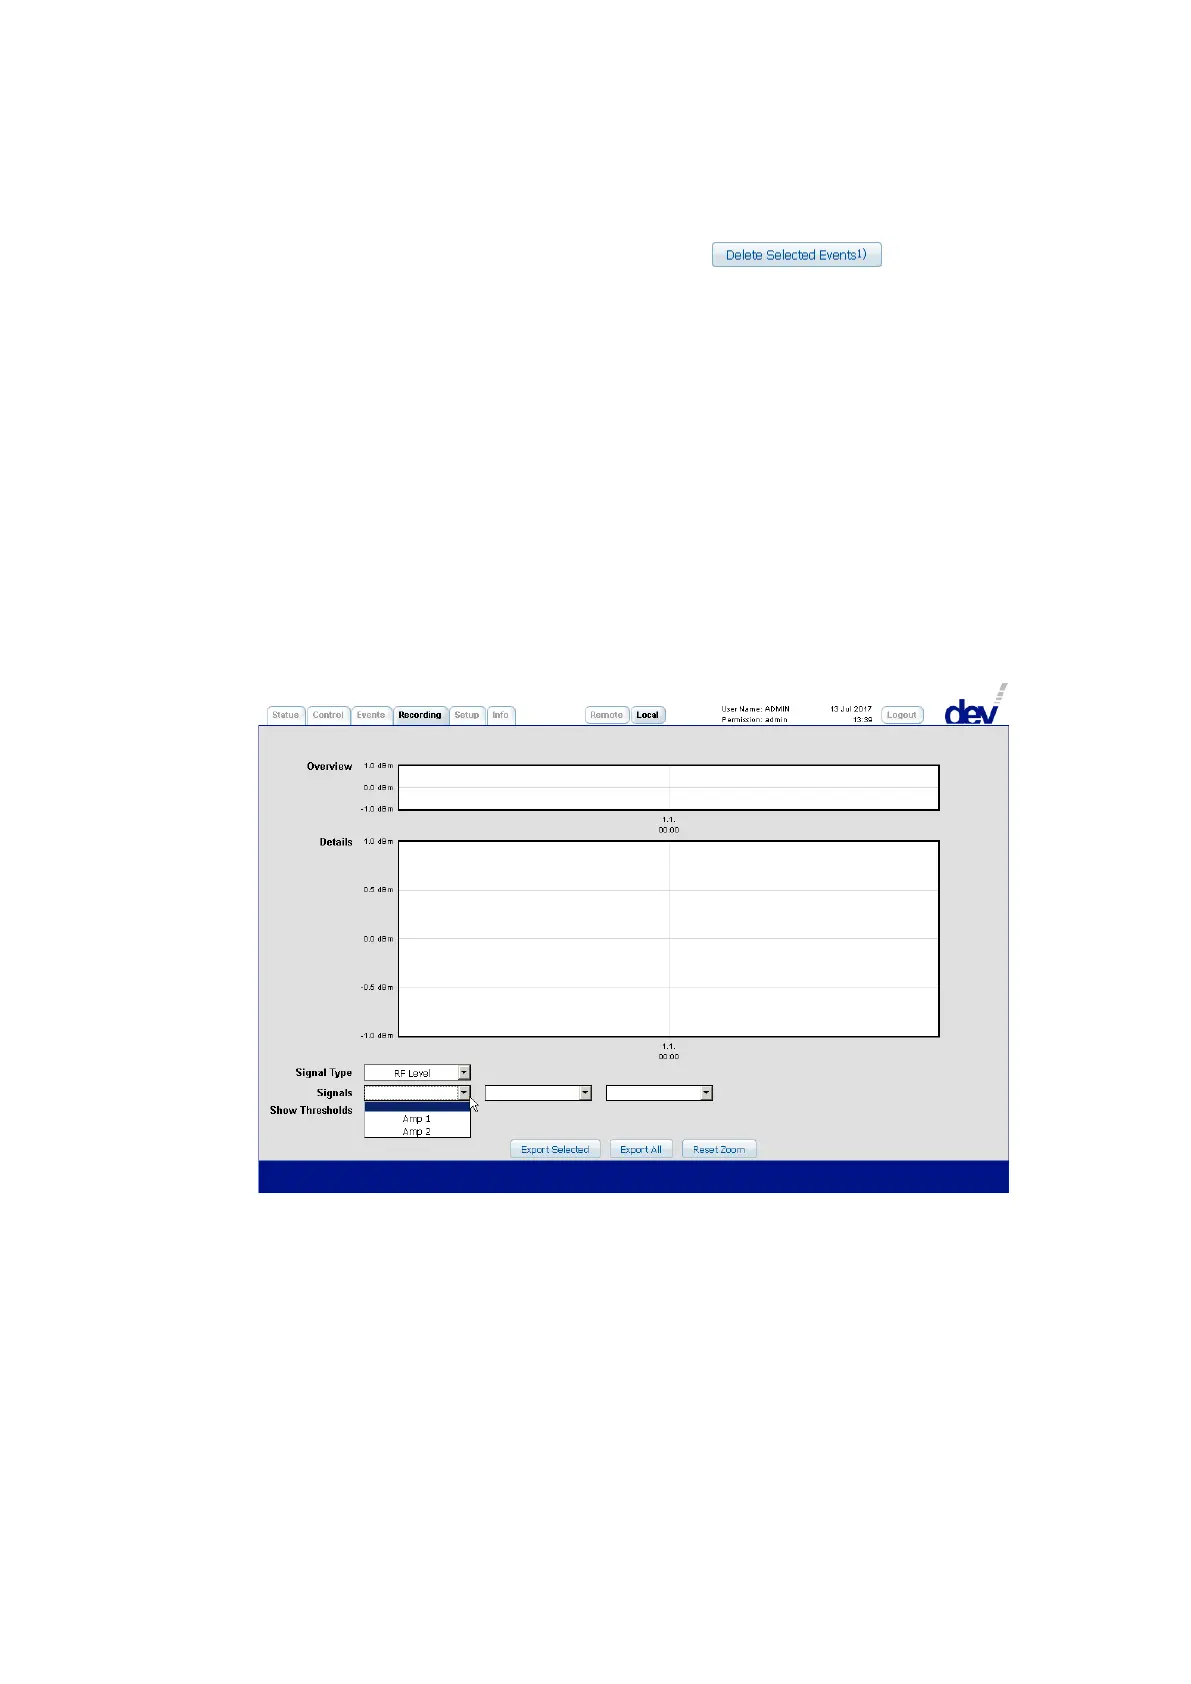
5.4.6 Recording Tab
Some data of each amplifier is continuously captured in discrete intervals. The
Recording Tab permits the visualization and the external storage of this data. After
opening the Recording Tab for the first time in a Web Interface session, two empty
diagrams labeled "Overview" and "Details" are shown as in the next screenshot.
After selecting "RF Level" or "LNB Power" (for LNB power current monitoring data)
from the drop down list "Signal Type" and after selecting one to three "Signals" via
the three drop down lists, the recorded data shows up in both diagrams: