LAN Control Utility
The LAN IP Address of the projector can be set by using the Network submenu, which can
be found in the Advanced Setting submenu in the Installation menu.
Once the LAN IP Address has been set, it is possible to control some basic functions by
using the emedding LAN Control Utility:
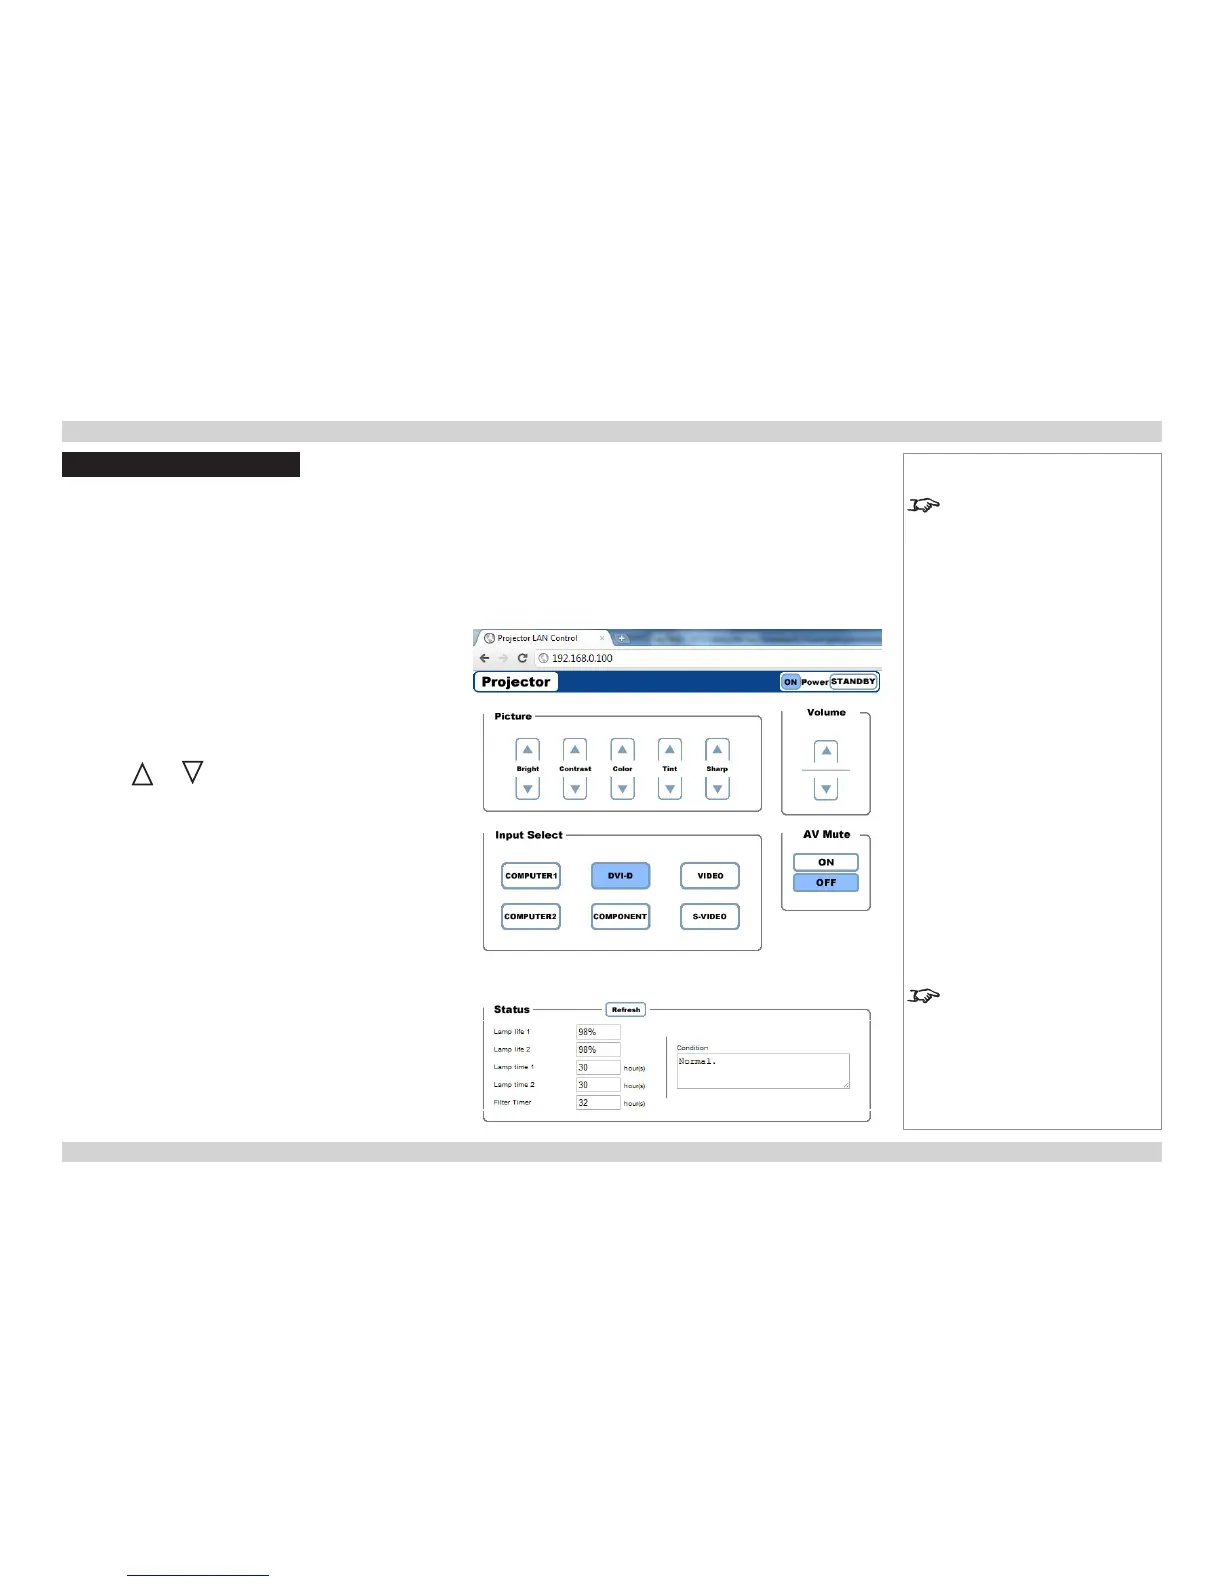
• Point your browser at the projector by typing the url
http://<LAN IP Address>/index.html into the address bar, then press the Enter key.
• The embedded webpage shown here should appear.
Power ON/STANDBY
Click on the buttons to turn the projector On or into Standby mode.
Picture and Volume controls
Click on the and controls to adjust the settings as required.
Input Select
Click on the Input buttons to switch to the required input.
AV Mute
Click to switch both video and sound On or Off.
Status
The panel shows the status of the lamps and lters. Click on the
Refresh button to update the readings.
Notes
For full details of how to use the
menu system, see the Operating
Guide.
The lamp life percentage shown
here is based on expected lamp life
in controlled laboratory conditions.
Actual life may vary depending on
installation environment, orientation
and lamp mode (Normal or Eco).”

 Loading...