6 XR150/XR350/XR550 User Guide Introduction
7/0
Panic Function
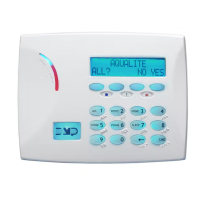
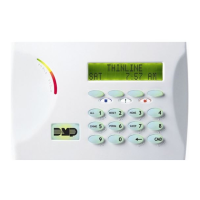
Thinline™ and Aqualite™ Keypads:
Thinline™ and Aqualite™ Keypads may also be programmed at
installation to allow the user to initiate an optional Panic alarm by
simultaneously pressing and holding the 7 and 0 (zero) keys. When
the 7 and 0 keys are pressed for a short time, the keypad sends a
Panic alarm report to the central station.
Note: The 7/0 Panic Function is not available on Clear Touch™,
Thinline™ Icon, Wireless, or Graphic Touchscreen keypads.
Common Keys on All Keypads
Data Entry Digit keys
These keys allow you to enter your user code when arming or
disarming or enter other information into the system.
COMMAND (CMD) key
The COMMAND key allows you to advance through the keypad
displays, User Menu, or complete a data entry function.
Back Arrow
(<—) key
The Back Arrow (<—) key is used to go back through the keypad
displays while operating your system. You can press the Back Arrow
key to back up through the list of functions in the User Menu or to
erase the last character you entered.
Using the Keypad
Multi-lingual Display Option
Your system may be programmed to display the User Menu and
Status Display text in multiple languages. When the COMMAND
key is pressed, the option to choose the language displays. Select
the language you want to use. The language chosen continues to
display at this keypad until another language is chosen.
Keypad Displays Current Programming
Most User Menu options displayed at the keypad show the currently
selected option in the panel memory. These options are either
shown as a number, a blank, or a NO or YES. To change a number
press any top row Select key. The current option is replaced with a
dash. Press the number(s) on the keypad you want to enter as the
new number for that option.
It is not necessary to enter numbers with leading zeros. The panel
automaticallyrightjustieswhenyoupresstheCOMMAND key. To
change an option that requires a NO or YES response, press the top
row Select key for the response not selected. For example, if the
current option is YES and you want to change it to NO, press the
third Select key. The display changes to NO. Press the COMMAND
key to go to the next option.
Multiple Displays (XR350 and XR550 System
Only)
For some User Menu options, such as Access Areas under User
Proles there are several displays containing lists. For example,
when using Access Areas, areas 1 through 32 display on four
separate displays. First, areas 1 through 8 display. Press the
COMMAND key to display areas 9 through 16. Press the COMMAND
key again to display areas 17 through 25. Press the COMMAND key
one more time to display areas 26 through 32.
 Loading...

