XR150/XR350/XR550 User Guide 45User Menu
Setting Schedules
1. Access the User Menu and press COMMAND until SCHEDULES?
displays. Press any Select key.
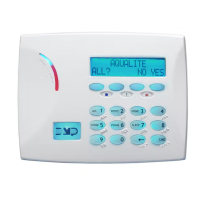
2. The keypad displays TIMES AREAS DOOR. Press COMMAND
to display OUTPUT HOLIDAYS. Press COMMAND to display
FAVORITES. Select the function you want to program.
TIMES
The keypad displays ADD DEL CHG.
Adding a Schedule
Select ADD to enter a new schedule number.
1. Enter the Schedule number 01-99 that you want to add. Press
the COMMAND key to accept your Selection. You are then
given the option to enter a Schedule name. Press COMMAND
to proceed.
2. The keypad displays SUN MON TUE WED. Press the COMMAND
key to display THU FRI SAT HOL. Select the day you want
the schedule to begin. If you select HOL, go to Setting
Holiday ABC Schedules for additional instructions.
Note: After Selecting the day of the week or holiday for the
schedule to begin, the keypad displays any currently
programmed Begin and End times previously set for that day.
This feature allows you to review programmed schedules at
any time.
3. If Begin and End times already exist, the keypad then
displays DELETE KEEP. Select DELETE to enter new times.
4. The keypad then displays BEGIN TIME? followed by the
display MON – : AM PM. Enter the new opening time and
select AM or PM.
Enter all schedule times using a 12 hour clock. For example,
to enter 6 AM you would enter a 0 + 6 + 0 + 0 and select AM.
For 11 PM you would enter a 1 + 1 + 0 + 0 and select PM.
The keypad then displays END TIME? followed by the display
MON – : AM PM. Enter the new closing time and select
AM or PM. Select whichever day displays, for example, MON,
allows you to scroll through the days of the week and create
a schedule window that spans multiple days.
Note: You must enter a Begin and End time or the system will not
recognize the schedule.
The new schedule is now programmed into your system.
5. The keypad goes back to the SUN MON TUE WED display.
Press the Back Arrow key to enter another schedule.
6. To clear a schedule press DELETE and then AM when the
opening time is requested.
Press the Back Arrow key to exit the User Menu.
Delete a Schedule
Select DEL to delete a schedule number.
1. Enter the Schedule number 01-99 that you want to delete.
2. The keypad displays DELETE SCHEDULE SURE? YES NO.
Select YES to delete the schedule.
3. The keypad displays SCHEDULE NO: - DELETED and the
keypad prompts you for the next schedule number to be
deleted.
Press the Back Arrow key to exit the User Menu.
Change a Schedule
Select CHG to edit an existing schedule.
1. Enter the schedule number 01-99 that you want to change.
2. The keypad displays ENTER SCHEDULE and the schedule
name. To edit the name press any Select key to make
changes. Press COMMAND to proceed.
 Loading...

