Changing the sewing motor
100 Service Instructions 755 A/756 A - 00.0 - 02/2019
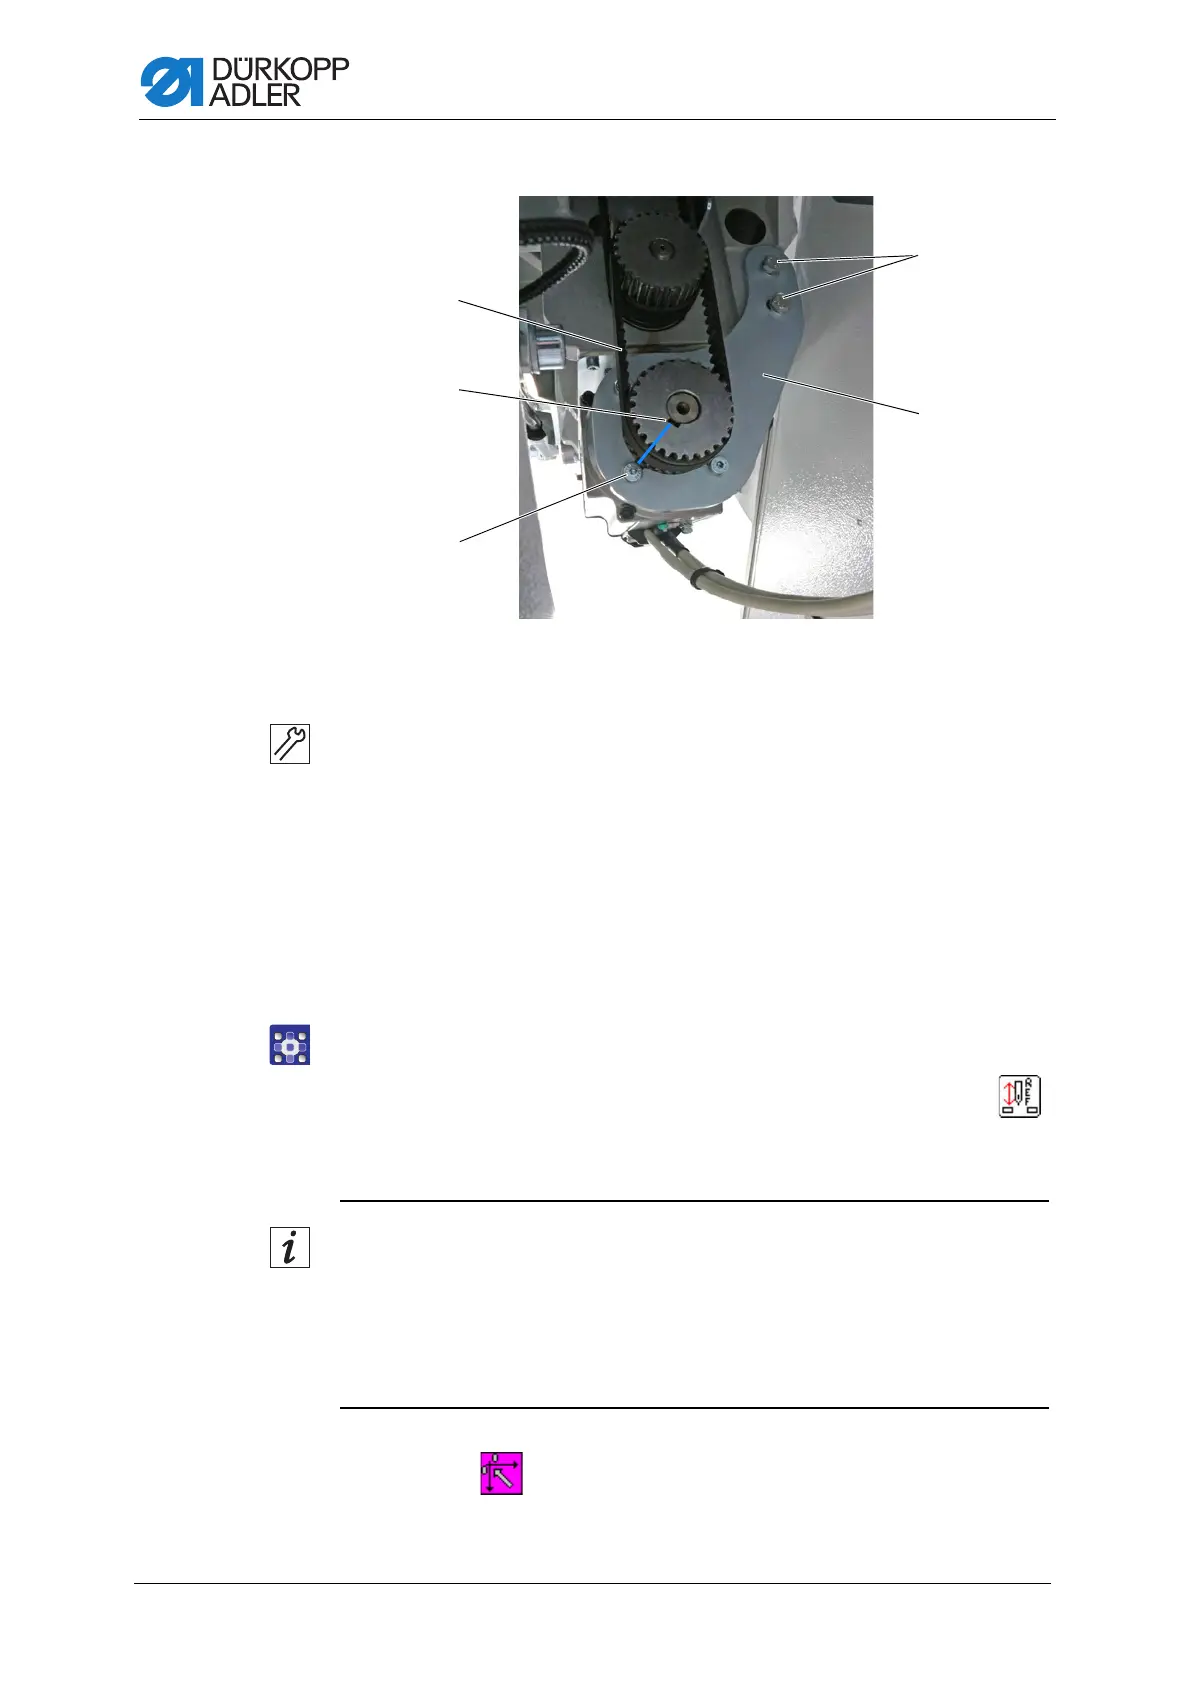
Fig. 105: Changing the sewing motor (3)
16. Place the toothed belt (3) such that the spring groove (7) points to
the screw (8).
17. Tension the toothed belt (3).
To do so, turn the sewing motor holder (5) down until the toothed belt (3)
is tensioned.
18. Tighten the screws (4).
19. Switch on the machine.
The sewing motor moves to its internal reference position.
The handwheel automatically adjusts to the value that corresponds
to the sewing motor position.
20. Correct the sewing motor position.
To do so, open the menu Service > Machine test > Test
sewing motor > Adjust sewing motor and press the button .
21. Adjust the value such that the handwheel will subsequently be set
to the 40° position.
Correction example
The handwheel will be set to the 45° when the machine is switched on.
Consequently, the sewing motor must be corrected by a value of 5°
to reach a position of 40°.
The value that must be entered is +5 as the drive shaft rotates in
the opposite direction of the handwheel marking.
22. Press the button.
The machine performs a reference run.
23. Check the handwheel position and readjust it if necessary.
(3) - Toothed belt
(4) - Screws
(5) - Sewing motor holder
(7) - Spring groove
(8) - Screw
 Loading...


