Needle bar
38 Service Instructions 755 A/756 A - 00.0 - 02/2019
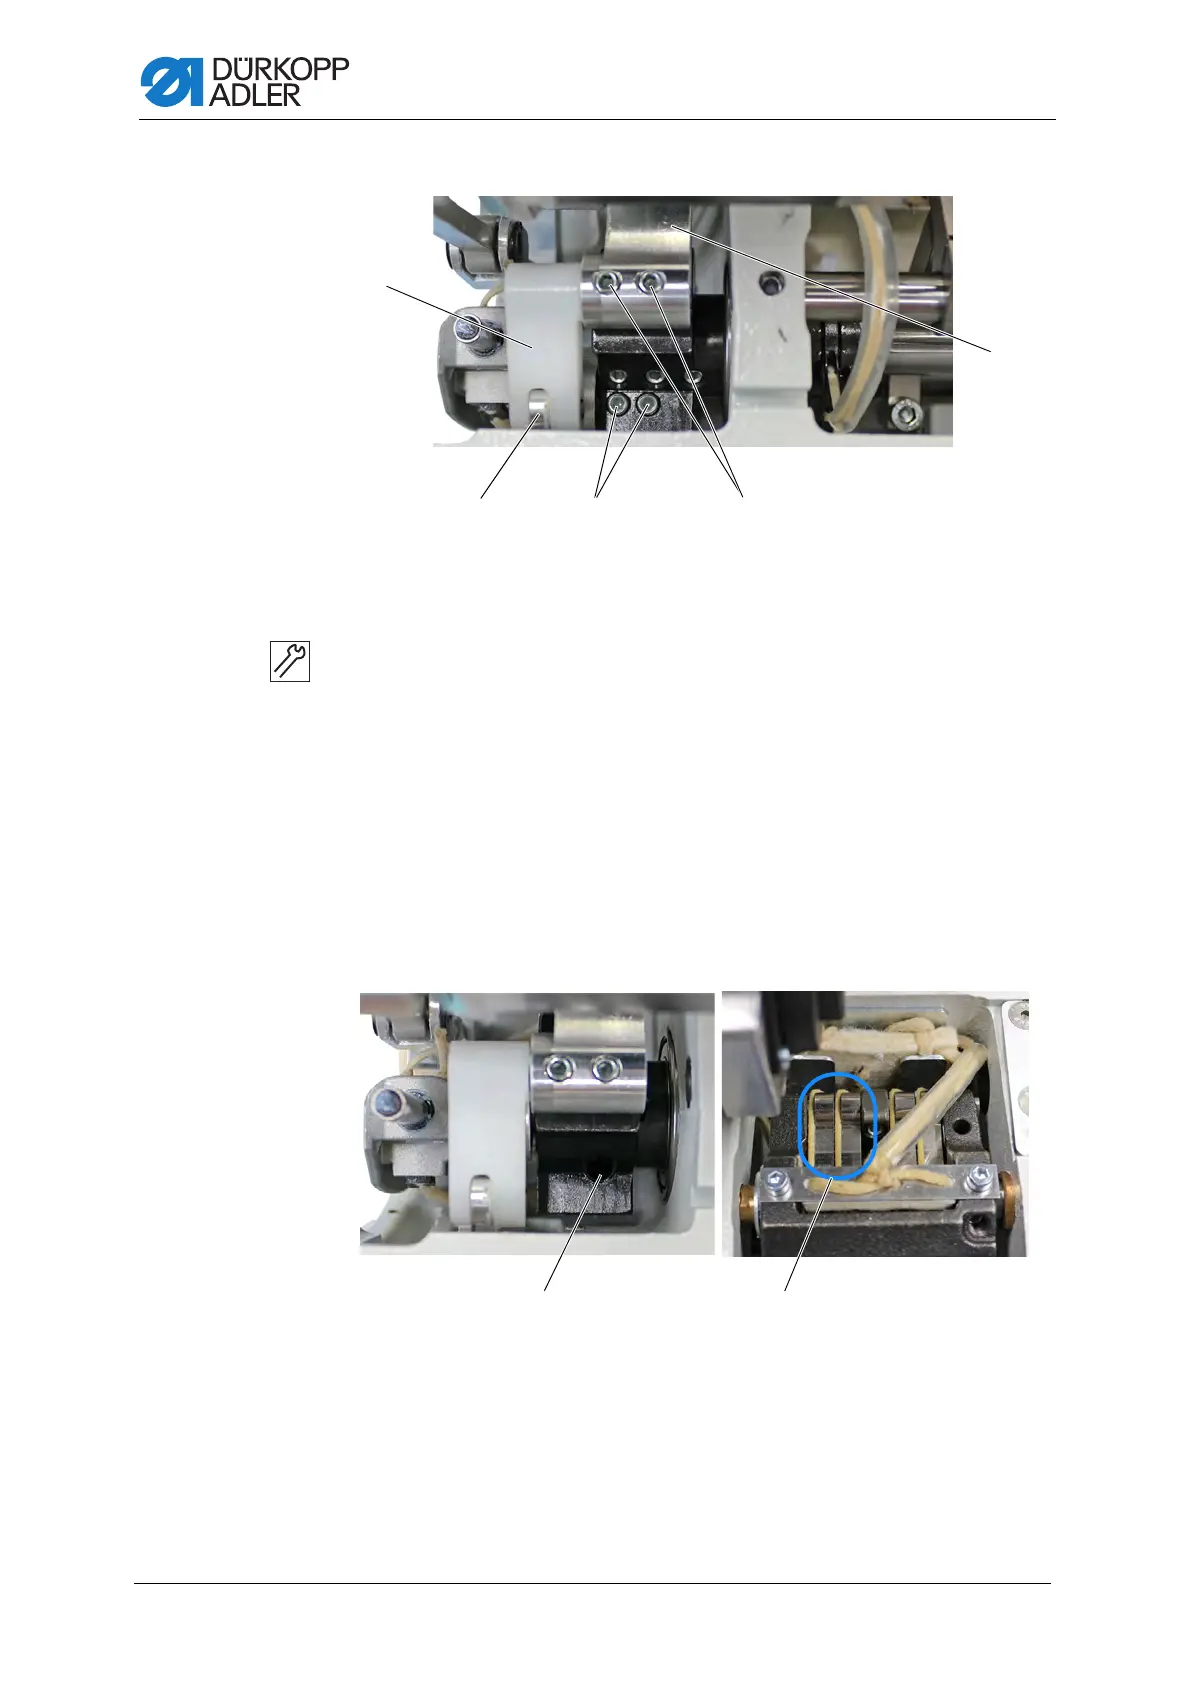
Fig. 27: Assembling the needle bar linkage (3)
7. Push the pin completely into lever (7) and then further into lever (11).
8. Tighten the screws (10).
The thread lever (8) must be able to move freely.
The thread lever (8) is automatically positioned correctly when the
screws (9) on the face of the pin have been tightened.
9. Slightly loosen the screws (9) and slowly complete 2-3 turns at the
handwheel.
The components are released from tension mechanically.
10. Tighten the screws (9).
11. Tie the oil wick (3) to the felt (2).
Fig. 28: Assembling the needle bar linkage (4)
(7) - Lever
(8) - Thread lever
(9) - Screws
(10) - Screws
(11) - Lever
(12) - Screw (13) - Gear tongues
 Loading...


