Needle bar
Service Instructions 755 A/756 A - 00.0 - 02/2019 61
10. Slide the clamping rings (11) downwards over the crosshead (7).
11. Applying a small amount of grease, place the retaining rings (9) into
the slots of the needle bars (2).
12. Slide the clamping rings (11) upwards over the retaining rings (9).
The retaining rings (9) fit exactly into the slots found on the upper
side of the clamping rings (11).
13. Pull the pull rod (6) up.
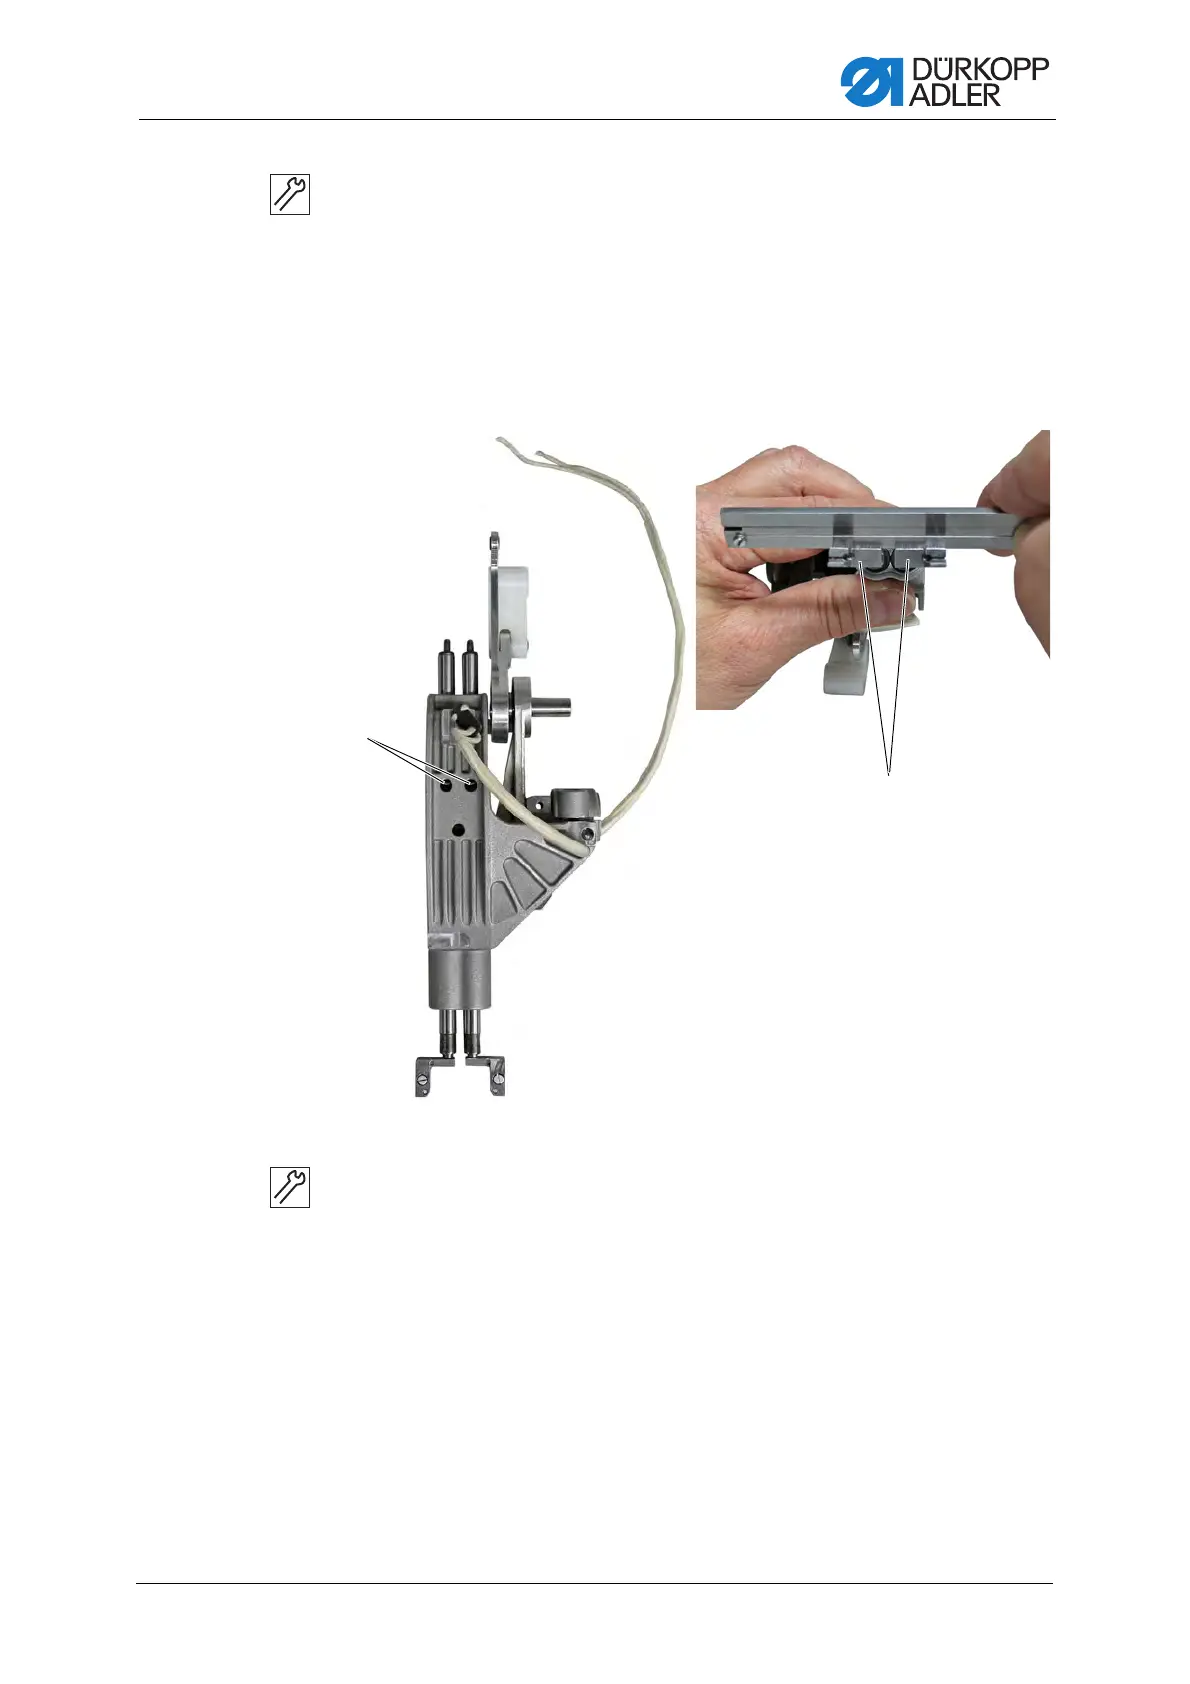
Fig. 59: Assembling the needle bar linkage (6)
14. Screw in the needle holder (12) until the lateral screws are centered
in the slotted holes of the needle bar.
15. Align the needle holder (12) straight.
To check the setting, place a suitable tool - such as a gage - onto
the needle holder (12).
16. Tighten the screws (10).
The first pair of screws (10) secures the needle bars against twisting.
The second pair of screws (10) locks the first pair of screws (10) in
place.
(10) - Screws (12) - Needle holder
 Loading...


