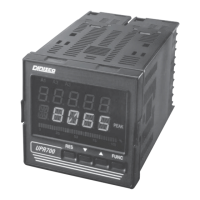
UPR700 Microprocessor-Based Pressure/Process Indicator 41
When the instrument is re-inserted into its case, the upper display will show
CodE
and the lower
display will show
UPR
.
8.8.1 SETTING THE SECURITY CODES FOR LEVEL A
To view or change the security code, press the FUNC key and the lower display changes to
CODE.A
. The upper display shows
0
, which indicates no security, and 1 means all parameters
related to levels A, B, and C are always locked). Press the ▼ or ▲ keys until the desired security
code number (from 2 to 250) appears in the upper display. Press the FUNC key to lock in the value.
The upper display changes to
1
, and the lower display changes to
CODE.B
. This means that ONLY
Levels B and C are locked, NOT Level A. If finished remove the instrument from its case and place
both dip switch SW1 and SW2 into the OFF position to return to the operating mode; otherwise,
continue with the next step.
8.8.2 SETTING THE SECURITY CODES FOR LEVEL B
If you first set
CODE.A
, the lower display will read
CODE.B
; if not, press the FUNC key to move to
CODE.B
. The upper display shows
0
, which indicates no security; or it may show
1
, which means all
parameters related to levels A, B, and C are always locked). Press the ▼ or ▲ keys until the desired
security code number (from 251 to 500) appears in the upper display. Press the FUNC key to lock in
the value. The lower display changes to
CODE.C
, and the Upper display shows
1
. This means that all
levels are locked and cannot be changed. If finished, remove the instrument from its case and place
both dip switch SW1 and SW2 into the OFF position to return to the operating mode.
8.8.3 SETTING THE SECURITY CODES FOR LEVEL C
If you first set
CODE.A
and
CODE.B
, the lower display will read
CODE.C
. If not, press the FUNC
key to move to
CODE.C
. The upper display shows
0
, which indicates no security; a 1 means all
parameters related to levels A, B, and C are always locked). Press the ▼ or ▲ keys until the desired
security code number (from 501 to 1000) appears in the upper display. Press the FUNC key to lock
in the value. The upper display changes to CodE and the lower display changes to
UPR
. If finished,
remove the instrument from its case and place both dip switch SW1 and SW2 into the OFF position
to return to the operating mode.
Once the security codes are selected, they CANNOT be displayed. If the codes are forgotten, new
values must be entered using the above procedure. It is recommended that a code be set for each
security level. Note that unlocking the Level C code unlocks Levels A, B, and C. To, relock a code,
simply enter any incorrect number and all the locked levels will relock. Unlocking the Level B code,
unlocks Levels A and B. Unlocking Level A unlocks only Level A. When the
SECUR
functions are
accessed in Group 1, the levels that are locked will be followed by a decimal point.

 Loading...