Eaton Static Transfer Switch 2000A 3-Pole Installation and Operation Manual 164001127—Rev 01 61
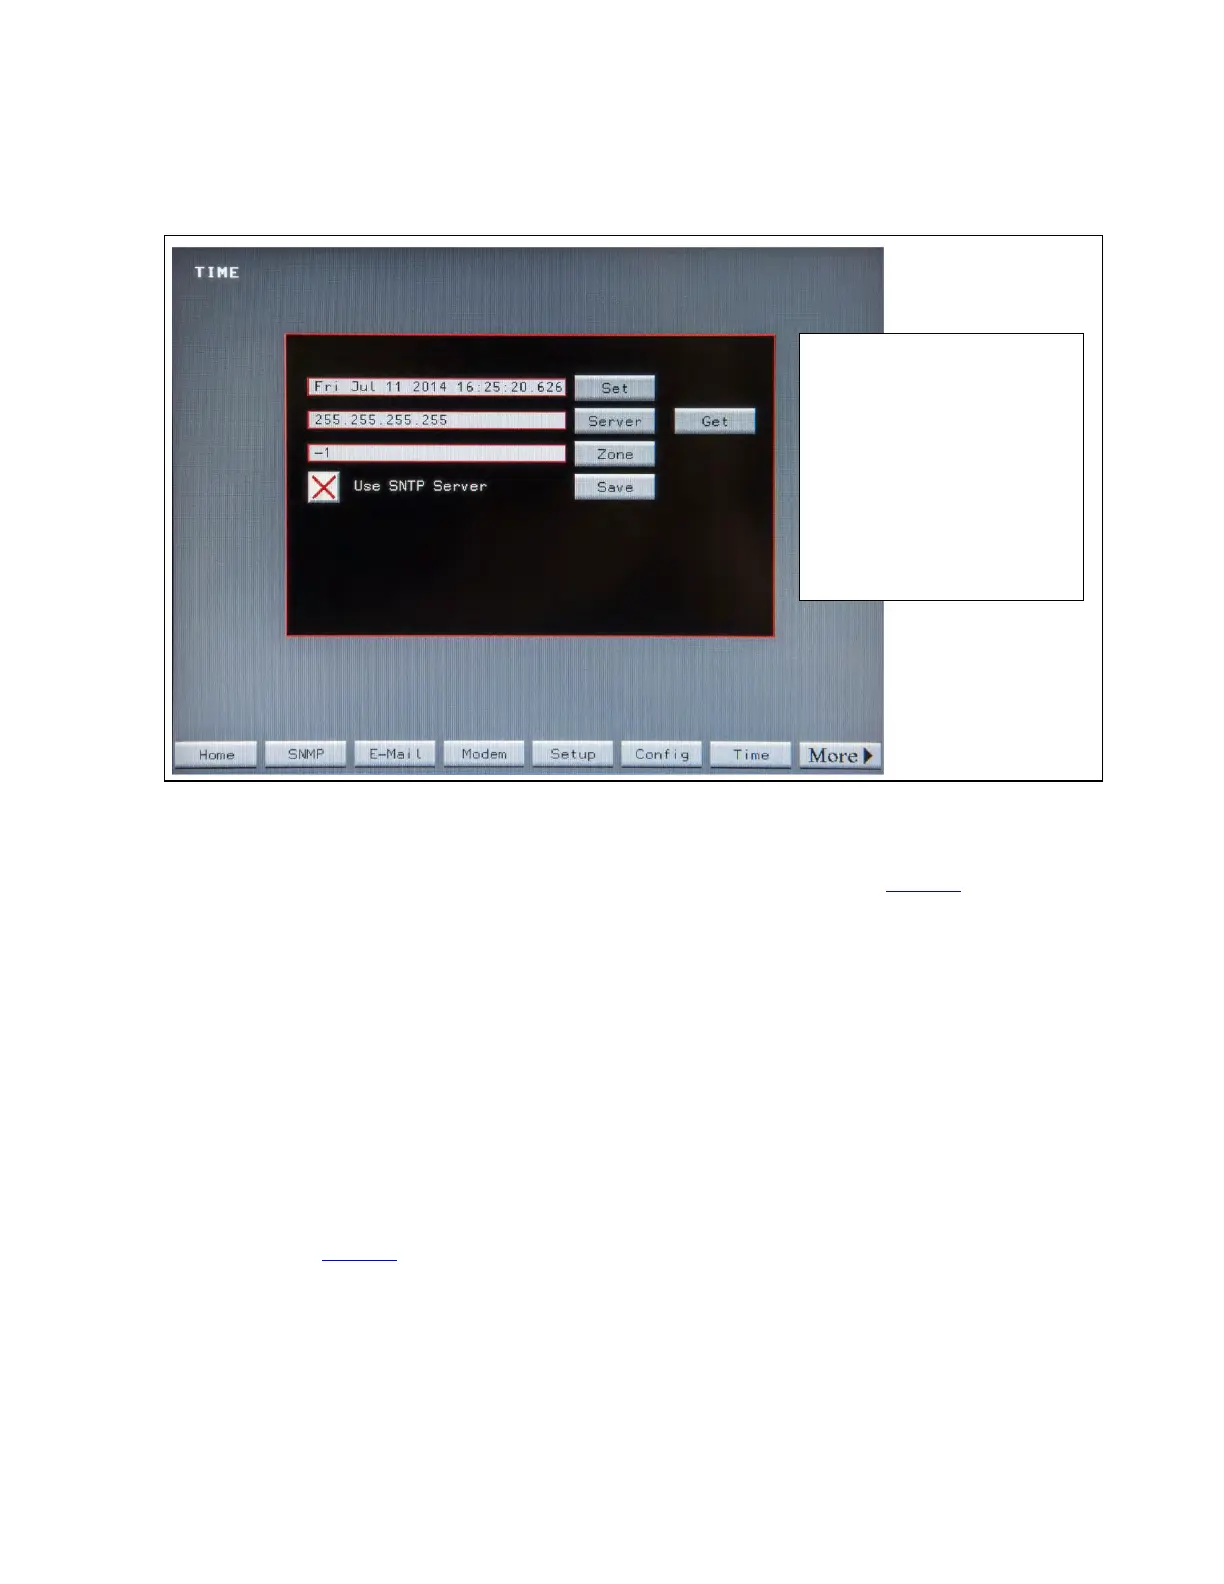
Figure 24. TIME Screen
Toggle Use SNTP Server to
the green check mark.
Server: set IP address of time
server.
Zone: time zone displaced from
UCT.
Get: initialize time.
Set: confirm date/time.
Save save settings
To have the STS use Simple Network Time Protocol (SNTP), follow these steps:
1. Press Time button at the bottom of the screen. The TIME screen displays (Figure 24).
2. Press the Server button. Enter the time server’s IP address.
3. Press the Zone button. Enter the time zone offset from Coordinated Universal Time (UCT) (-4 is Eastern
Daylight time).
4. Make sure the Use SNTP Server checkbox has a green check. Touch Use SNTP Server to toggle
between the green check (use SNTP Server) and red X (do not use SNTP Server).
5. Press Get to initialize time and verify that Time Synchronization is working.
6. Touch Set to confirm date/time.
7. Touch Save to save settings.
1111..44 SSNNMMPP
The STS supports SNMP over its Ethernet connection. The STS sends a single trap, a summary alarm, if any
alarm condition is raised on the STS. Touch the SNMP button on the Home Screen to display the SNMP
Screen (Figure 25). Touch MORE to display additional buttons if SNMP button doesn’t show.
System Setup: Networking