List of figures
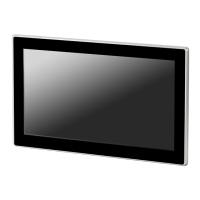
Figure 1: Front with plastic frame 18
Figure 2: Service side with optional interfaces 18
Figure 3: Front with plastic frame 18
Figure 4: Service side with optional interfaces 18
Figure 5: Front side with aluminum frame 18
Figure 6: Service side with optional interfaces 18
Figure 7: Front side with aluminum mounting
frame 19
Figure 8: Service side with optional interfaces 19
Figure 9: Front side with aluminum mounting
frame 19
Figure 10: Service side with optional interfaces 19
Figure 11: Interfaces 21
Figure 12: Example for a nameplate 24
Figure 13: Space required to remove the SD
card 35
Figure 14: Cooling air circulation 37
Figure 15: Mounting distance 37
Figure 16: Mounting position 38
Figure 17: Engineering example for integration
of radio interference suppression filters 40
Figure 18: Peripheral gasket along the entire
edge 43
Figure 19: Pre-installing the holding brack-
etsScrew the set screwsInternal hexagon
M4x25 DIN 914 galvanized into the holding
brackets 44
Figure 20: Installing the holding brackets 44
Figure 21: M4 x 12 weld studs on sheet 46
Figure 22: Dimensional drawing for mounting
XV-313-70-.. 46
Figure 23: Dimensional drawing for mount-
ingXV-313-10-.. 47
Figure 24: Mounting XV-313 47
Figure 25: Screwing the functional earth con-
ductor onto the enclosure 51
Figure 26: Connecting the screw terminals on
52
the Plug connector MSTB 2.5/3-ST-5.08
Figure 27: Power supplied through Plug con-
nector MSTB 2.5/3-ST-5.08 52
Figure 28: Interfaces included on all HMI panels 57
Figure 29: XV300 multi touch display with all
optional features 57
Figure 30: USB 2.0, not galvanically isolated,
plug type A, Full power (500 mA) 59
Figure 31: USB 2.0, not galvanically isolated,
plug type B 59
Figure 32: RJ-45 socket, 8-pole, 2 LEDs
(CAT5e/6), LAN1, 10/100 Mbps 60
Figure 33: Bus segment with four nodes 63
Figure 34: CAN bus segment with four nodes 65
Figure 35: Profibus bus segment with four
nodes 67
Figure 36: SmartWire-DT power connector 68
Figure 37: WAGO plug connector (view from wir-
ing side) 69
Figure 38: Commissioning SmartWire-DT
sequence 71
Figure 39: Dimensions 7.0" front mounting
devices in mm (inches) 80
Figure 40: Dimensions 10.1" front mounting
devices in mm (inches) 81
Figure 41: Dimensions 15.6" front mounting
devices in mm (inches) 82
Figure 42: Dimensions 7.0" rear (panel) mount-
ing devices in mm (inches) XV-313-..-...-A00-.. 83
Figure 43: Dimensions 7.0" rear (panel) mount-
ing devices in mm (inches) XV-313-..-...-A11-.. 84
Figure 44: Dimensions 10.1" rear (panel) mount-
ing devices in mm (inches) XV-313-..-...-A00-.. 85
Figure 45: Dimensions 10.1" rear (panel) mount-
ing devices in mm (inches) XV-313-..-...-A11-.. 86
Figure 46: Installation panel for XV-313-70-.. 87
Figure 47: Installation panel for XV-313-10-.. 87
XV30004/19 MN048017ENwww.eaton.eu
111

 Loading...
