F9 Fetal & maternal Monitor Service Manual Disassembling the Monitor
- 50 -
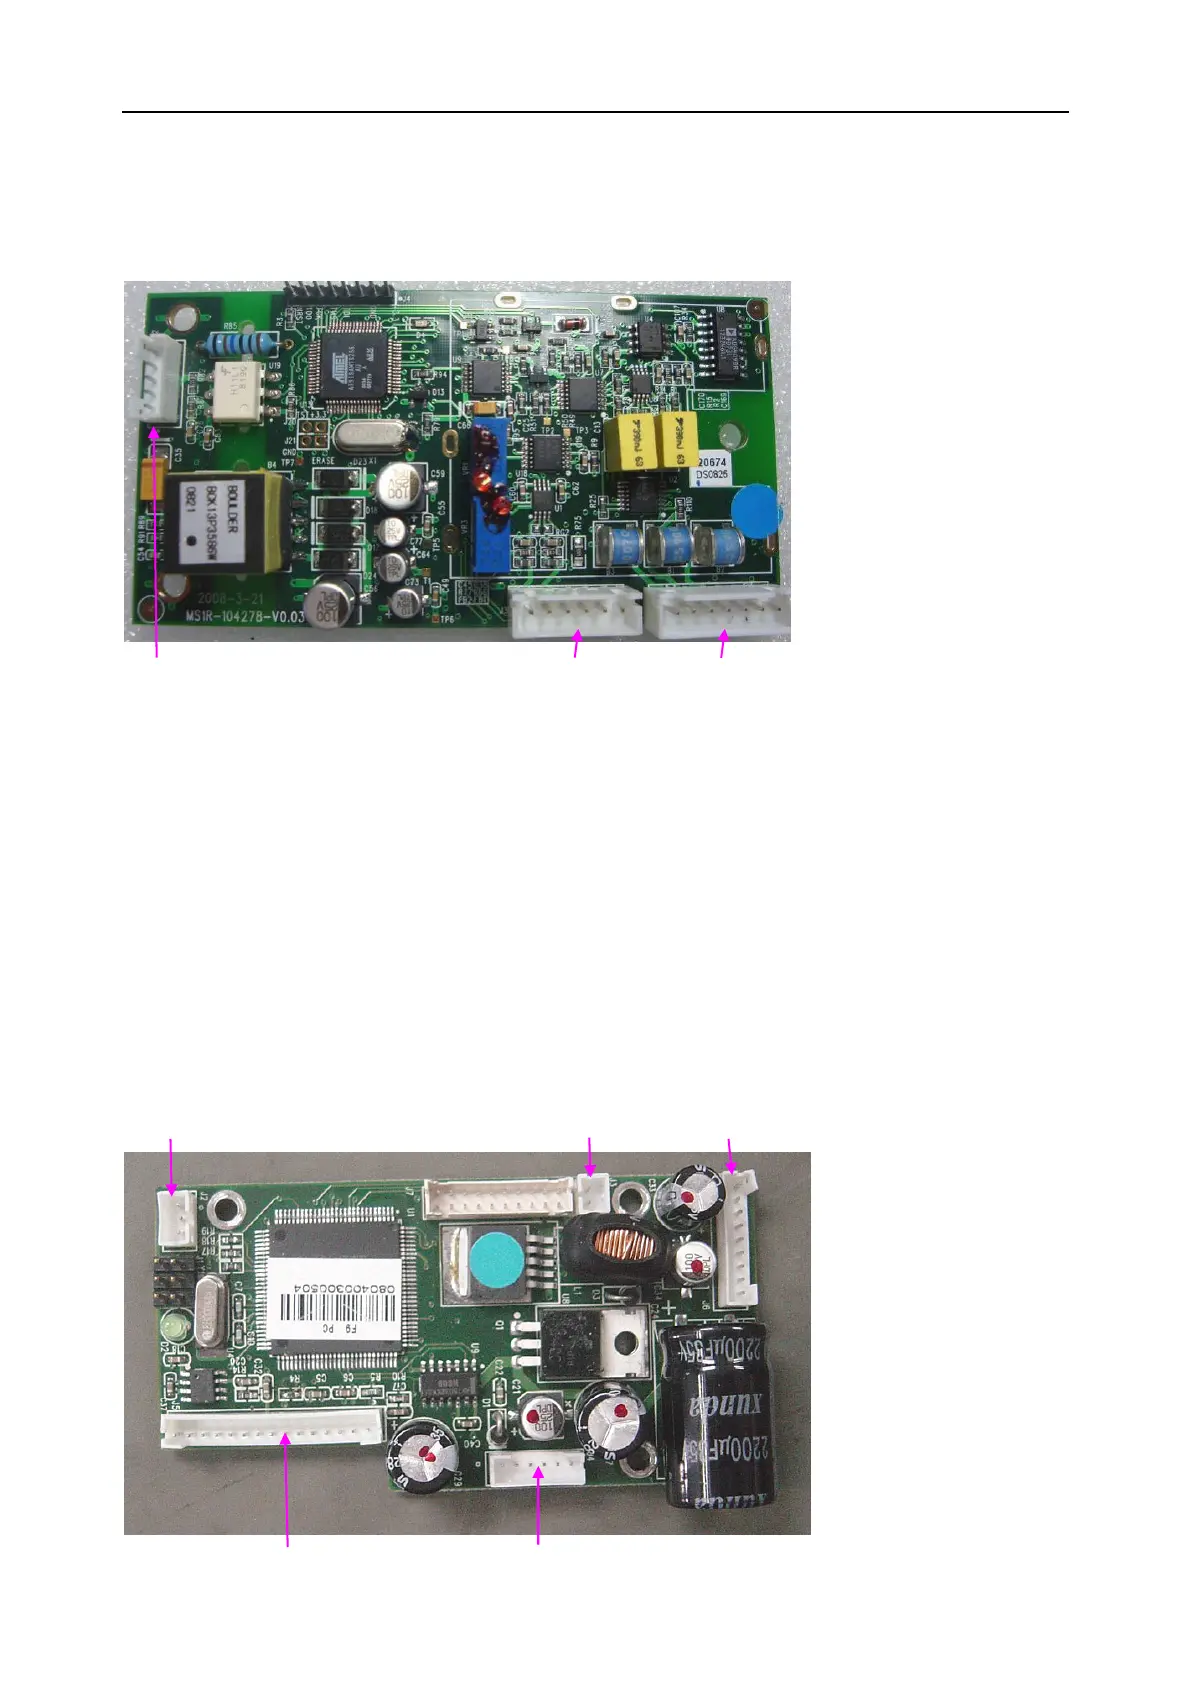
To replace the DECG module,
Replace the DECG module in a reverse procedure. Refer to the following illustration when
connecting wires. Ensure they are all correctly connected.
10.4.3 Replacing the Print Controlling Board
To remove the print controlling board,
1)
Separate the upper assembly and the lower assembly.
2)
Disconnect all the wires on the PCBA.
3)
Remove the three screws securing the PCBA.
To replace the print controlling board,
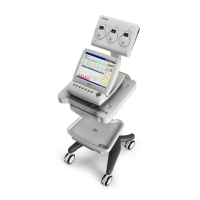
Replace the print controlling board in a reverse procedure. Refer to the following illustration
when connecting wires. Ensure they are all correctly connected.
v
v
No. Connect to
i Paper Sensor
ii Paper Drawer
Detector
iii Bottom Interfaces
Board
iv Print head
(2 Sockets)
v Gear Assembly
No. Connect to
i Bottom Interfaces Board
ii IUP Socket
iii DECG Socket
i
ii
iii