REPLACING PARTS 67
If you remove the CPU from the motherboard in order to install it on a new motherboard,
unpack the new motherboard and remove the protective plastic cover on the CPU socket.
Transfer the protective cover to the CPU socket of the old motherboard to protect the
circuitry. Follow standard ESD precautions while handling the motherboard and all
components.
TO REMOVE THE COOLING ASSEMBLY
1 Shut down, and then open the E-42B (see pages 40 and 43).
To access the CPU, you must remove the left panel.
2 Remove the CPU fan cable from motherboard connector FAN 1.
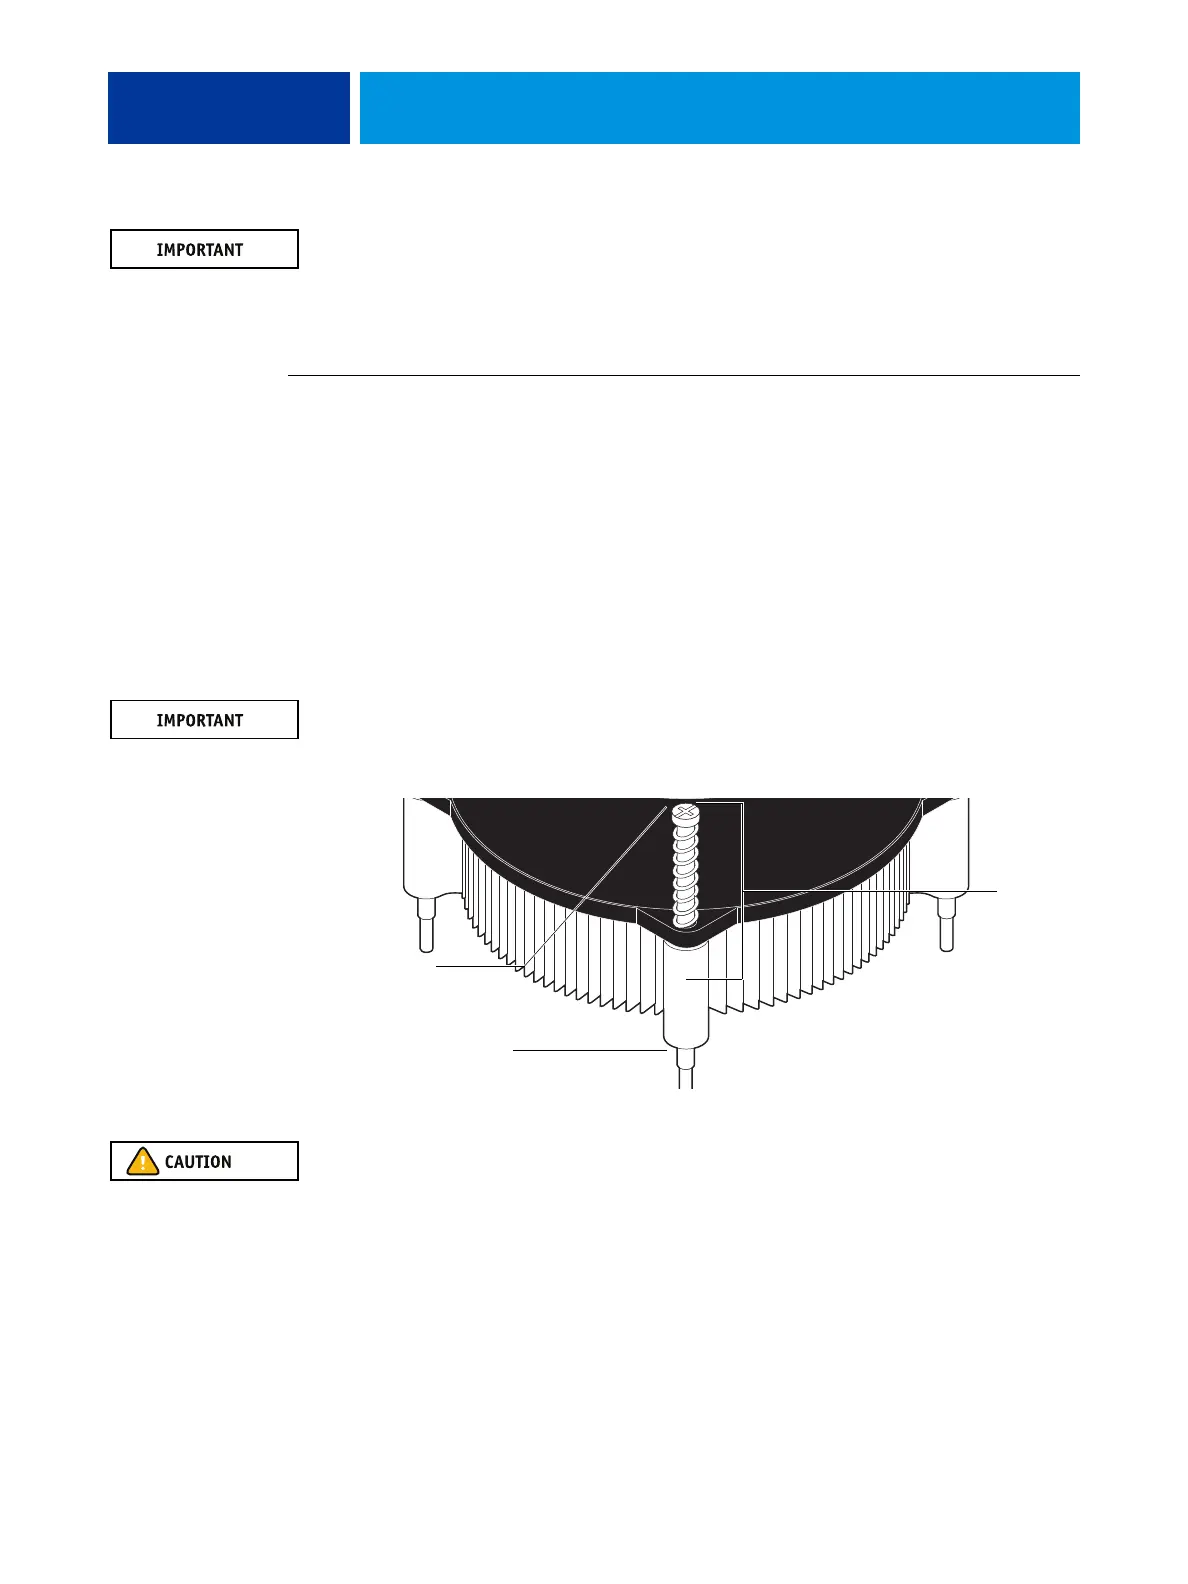
3 Remove the CPU cooling assembly.
• Insert a flathead screwdriver into the groove on the top of a fastener cap and rotate the
fastener counterclockwise (that is, in the direction of the arrow) to the position shown
below.
• Pull straight up on the fastener cap until the peg is out of the motherboard.
You may need to use moderate force to pull the pegs out of the motherboard. Be careful
not to damage the components on the motherboard or the CPU cooling assembly when
pulling up on the fasteners.
4 Lift the cooling assembly off the CPU socket and set it aside.
Be aware that the cooling assembly and the CPU may be very hot. You may need to let the
components cool before attempting to remove them.
Rotate each
fastener
to this
position.
Groove
Peg