Page 35 / 53
remaining teeth in the arch.
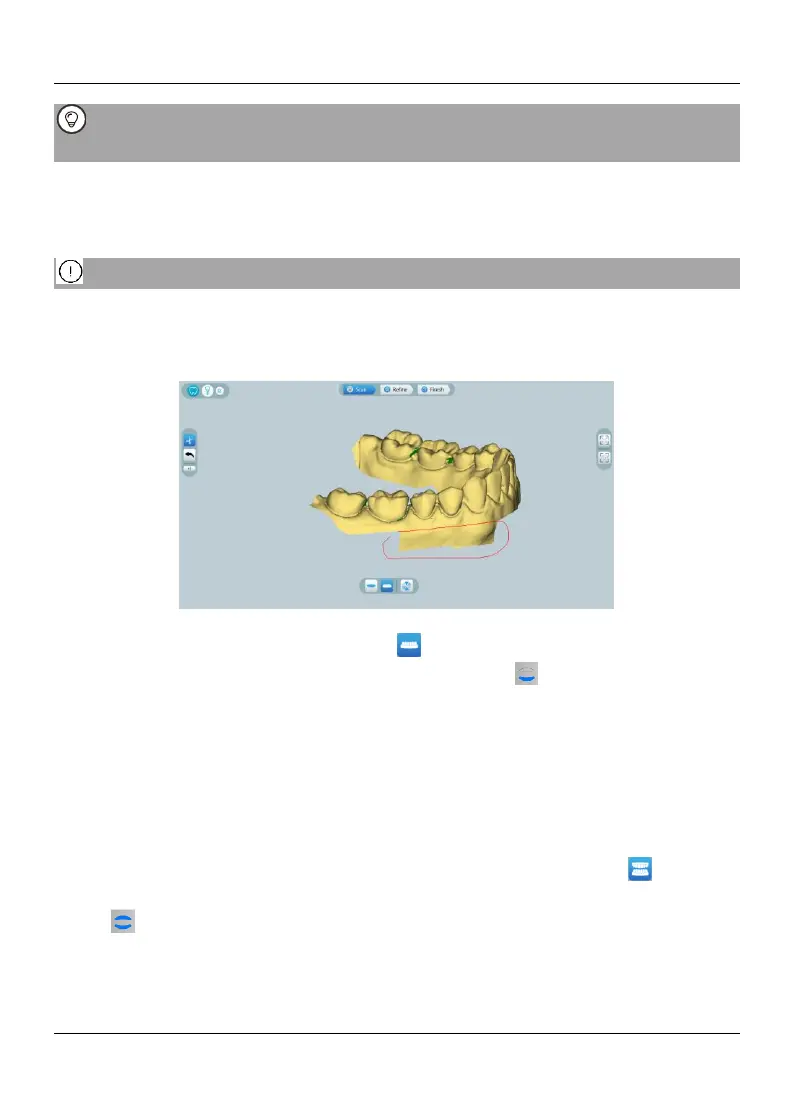
If Fill tooth holes with color is enabled, the holes will be displayed in the specified
color. It is recommended to scan these areas until the holes disappear.
10.2.5. When the occlusal surface scan is complete, scan the lingual or buccal surface
of the teeth in the arch.
10.2.6. When the lingual or buccal scan is completed, scan the opposite side of the
arch.
Re-dry the teeth as appropriate throughout the acquisition process.
If you need to remove soft-tissue artifacts, mismatches, or unwanted views during
the acquisition, click the Cut tool, then draw a curve that covers the region to be
removed on the 3D model. If necessary, rescan the area to fill the holes.
10.2.7. After scanning the upper jaw, you can continue scanning the lower jaw. On the
HELIOS interface, select the Lower Jaw acquisition mode OR Press the mode
button on the scanner to select the lower jaw scan mode 。
10.2.8. Repeat steps 3 to 6 until the lower jaw scan is completed.
10.2.9. Check whether there are obvious holes in the 3D model and rescan if necessary.
10.2.10. When you confirm that the 3D model of the upper and lower jaw is complete,
continue with the buccal bite registration acquisition.
10.3 Scanning the Buccal Bite Registration
To acquire a buccal bite registration, follow these steps:
10.3.1. On the HELIOS interface, select the Buccal Bite Registration acquisition
mode OR Press the mode button on the scanner to select the buccal bite registration
mode .
10.3.2. Place the tip of the scanner into the buccal side in the patient’s mouth, then
rotate the tip to align with the teeth, close the patient’s mouth and confirm that the bite
position is correct.