Section
2
Installation
INSTALLATION
No special installation intructions are required. The counter is
a
self-contained bench or rack mounted unit,
and only requires connection to
a
standard, 100/120/220/240V 50-60
Hz
power line for operation.
CAUTION
Check current rating of counter fuse and setting
of rear panel VAC selector switch before
applying power to counter.
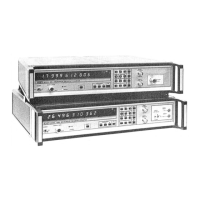
COUNTER IDENTIFICATION
This counter
is
identified by two sets of numbers. The model number 545A or 548A, and
a
serial number
that
is
located on
a
label affixed to the rear panel. Both must be mentioned in any correspondence regard-
ing your counter.
SHIPPING AND STORAGE
Wrap the counter in heavy plastic or kraft paper, and repack in original container if available. If the original
container can not
be
used, use
a
heavy (275 Ib test) double-walled carton with approximately four inches of
packing material between the counter and the inner carton. Seal carton with strong filament tape or strap-
ping. Mark the carton to indicate that
it
contains
a
fragile electronic instrument. Ship to the EIP address on
the title page of this manual.
PERFORMANCE CHECKOUT PROCEDURE
The following procedure can be done without special tools or equipment.
1.
Turn counter POWER switch off. Check fuse rating and setting of AC POWER switch on the rear panel.
2. Connect the power cord to 1001120 or 2201240 V, 50-60
Hz
single-phase power source. The ground
terminal on the power cord plug should be grounded.
3.
Turn POWER switch on.
Dashes will be displayed for about one second, followed by all
0's. This in-
dicates that the automatic self-check has been completed.
TEST
4. PRESS:
n
[
l1
Display should read 200 000 000.
TEST
5.
PRESS:
PI
Display should read all 8's and all annunciators should be lit.
TEST
6. PRESS
[I
[I
Each display segment should light in turn.
TEST
7. PRESS:
0
Each digit should light in turn.
8.
This completes the performance checkout procedure.
Scans by ArtekMedia © 2007