88
Maintenance
Maintenance details
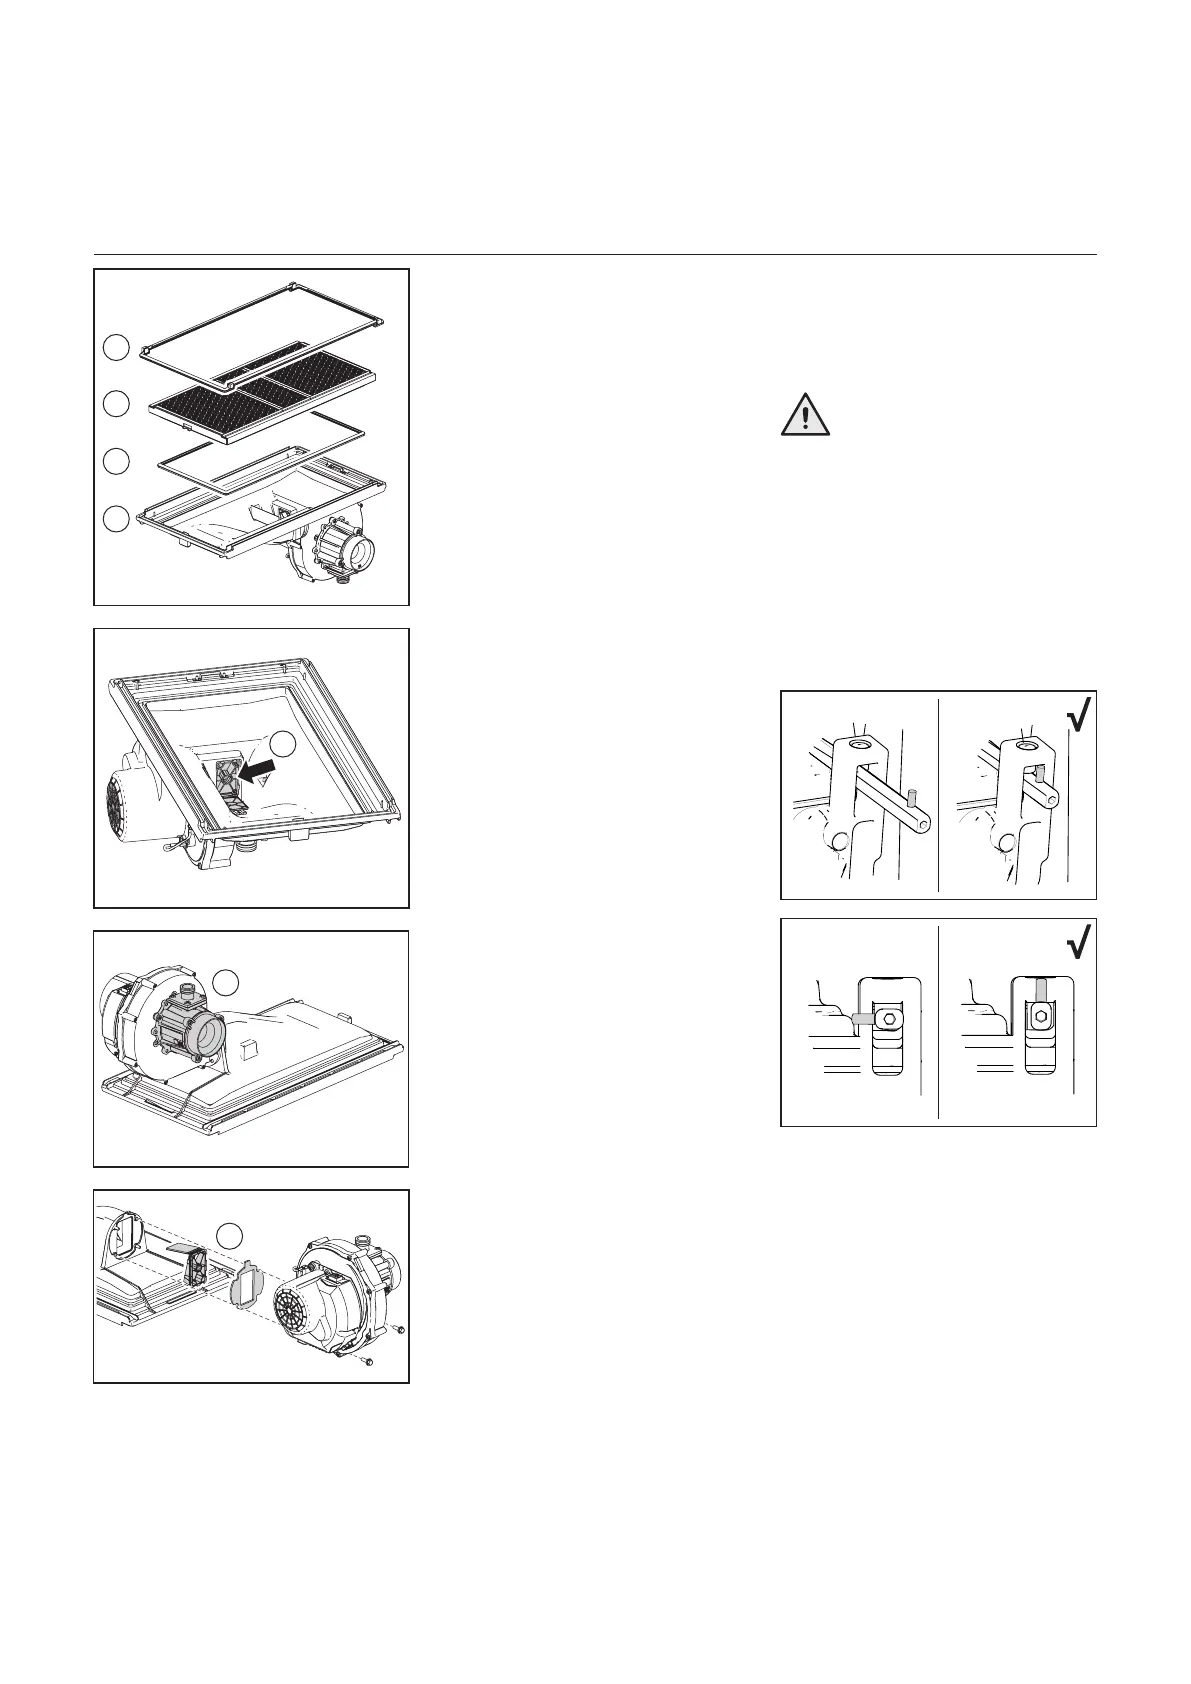
- Turn the unit up side down and
removetheburnercassette(8)from
theventilatorunit;
- Checktheburnercassettefor
wear and tear, pollution and any
breakages.Cleantheburner
cassettewithasoftbrushand
vacuum cleaner. In the case of
breakages,alwaysreplacethe
completeburnercassette(8);
Thefollowingoperationsmustbe
performed carefully in relation to the
vulnerabilityofthenonreturnvalve.
- Afterremovingtheburner
cassette (8) the non return valve
(12)becomesvisible.Check
that the non return valve entire
circumference closes / seals
completely. The valve (12) should
beabletomovefreelyfromfully
open to fully closed.
Replace the non return valve if the
valve does not seal properly. Follow
the instructions supplied with the
new part.
- Replacethegasket(9)betweenthe
burner(8)anduppercasing(10);
- Replacethegasket(11)between
the upper casing (10) and
exchanger.
- Check the venturi (13) for pollution
andcleanthemwithasoftbrushin
combinationwithavacuumcleaner,
if necessary.
Iftheinsideoftheboilercasingis
heavily polluted with dust, it is likely
that the fan impeller is also polluted.
Tocleanthefan,ithastoberemoved
from the upper tray and the venturi.
Cleantheimpellerwithasoftbrushand
a vacuum cleaner. Replace the gasket
and take care that the new gasket is
installedproperlywhenreassembling
the fan parts.
Reassemblytakesplaceinreverse
order.
Heat exchanger
- Check the heat exchanger for
pollution. Clean it, if necessary, with
asoftbrushandavacuumcleaner.
Avoid any pollution falling down.
NOTE: TOP-FLUSHING THE
EXCHANGER WITH WATER IS NOT
ALLOWED.
Reassemblytakesplaceinreverse
order.
During installation pay attention to
thecorrectpositionoftheclampbars.
Thesehavetobeinaverticalposition.
11
8
9
10
12
13
12
x
x