53
A Z
PROG. Classic BH
14 15 16 17 18
19
20 21
22
23
24
R
Adjust
Pull Button Holder firmly.
Auto
3
13
PROG.
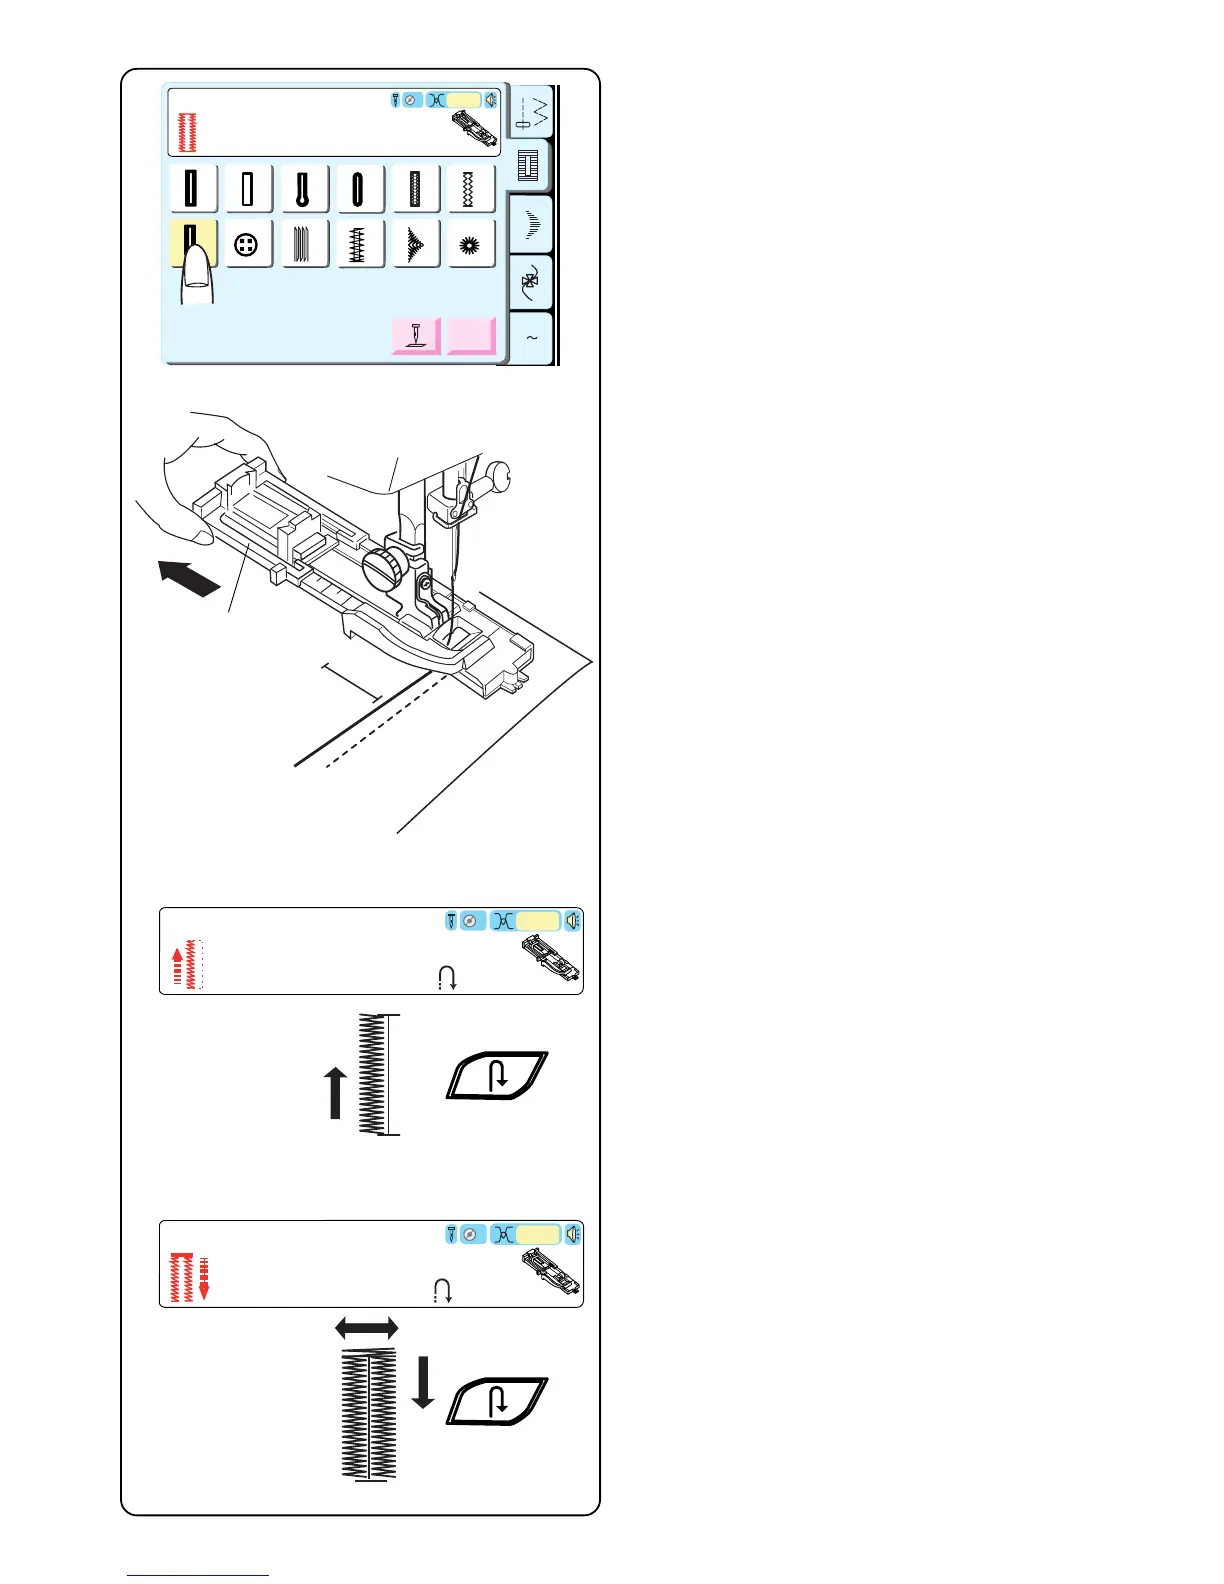
19 Classic Buttonhole (4 Step Programmable)
The classic buttonhole is especially suited for oversized
novelty buttons or larger decorative openings for
weaving curtain rods and scarves, for example. All
buttonholes should use interfacing suitable for the fabric
weight.
Test sew the buttonhole on sample swatch.
Select 19.
Use either the “R” or optional “B” buttonhole foot. If you
use the R foot, fully extend open the buttonholder q
(maximum buttonhole size with this foot is 3.2 cm or
1 1/4˝).
DO NOT pull down the buttonhole lever.
Alter the buttonhole width to match the fabric and thread.
See page 52.
Mark the buttonhole area on the fabric. Place both
threads to the left under the foot. Insert the garment
under the foot and hand turn the flywheel to lower the
needle at the starting point. Lower the buttonhole foot.
q
Auto
3
Step1
R
Sew to length
required, then press " ".
Step2
Sew up to start
position, then press " ".
Auto
3
R
Start sewing - zigzag backwards on left side. Stop
sewing when you reach the desired buttonhole length.
Press “Reverse” key.
Start sewing – back bartack and zigzag forward on right
side. Stop sewing when you are opposite the starting
point.
Press “Reverse” key.
 Loading...