60
4-Step Buttonhole (Model 320)
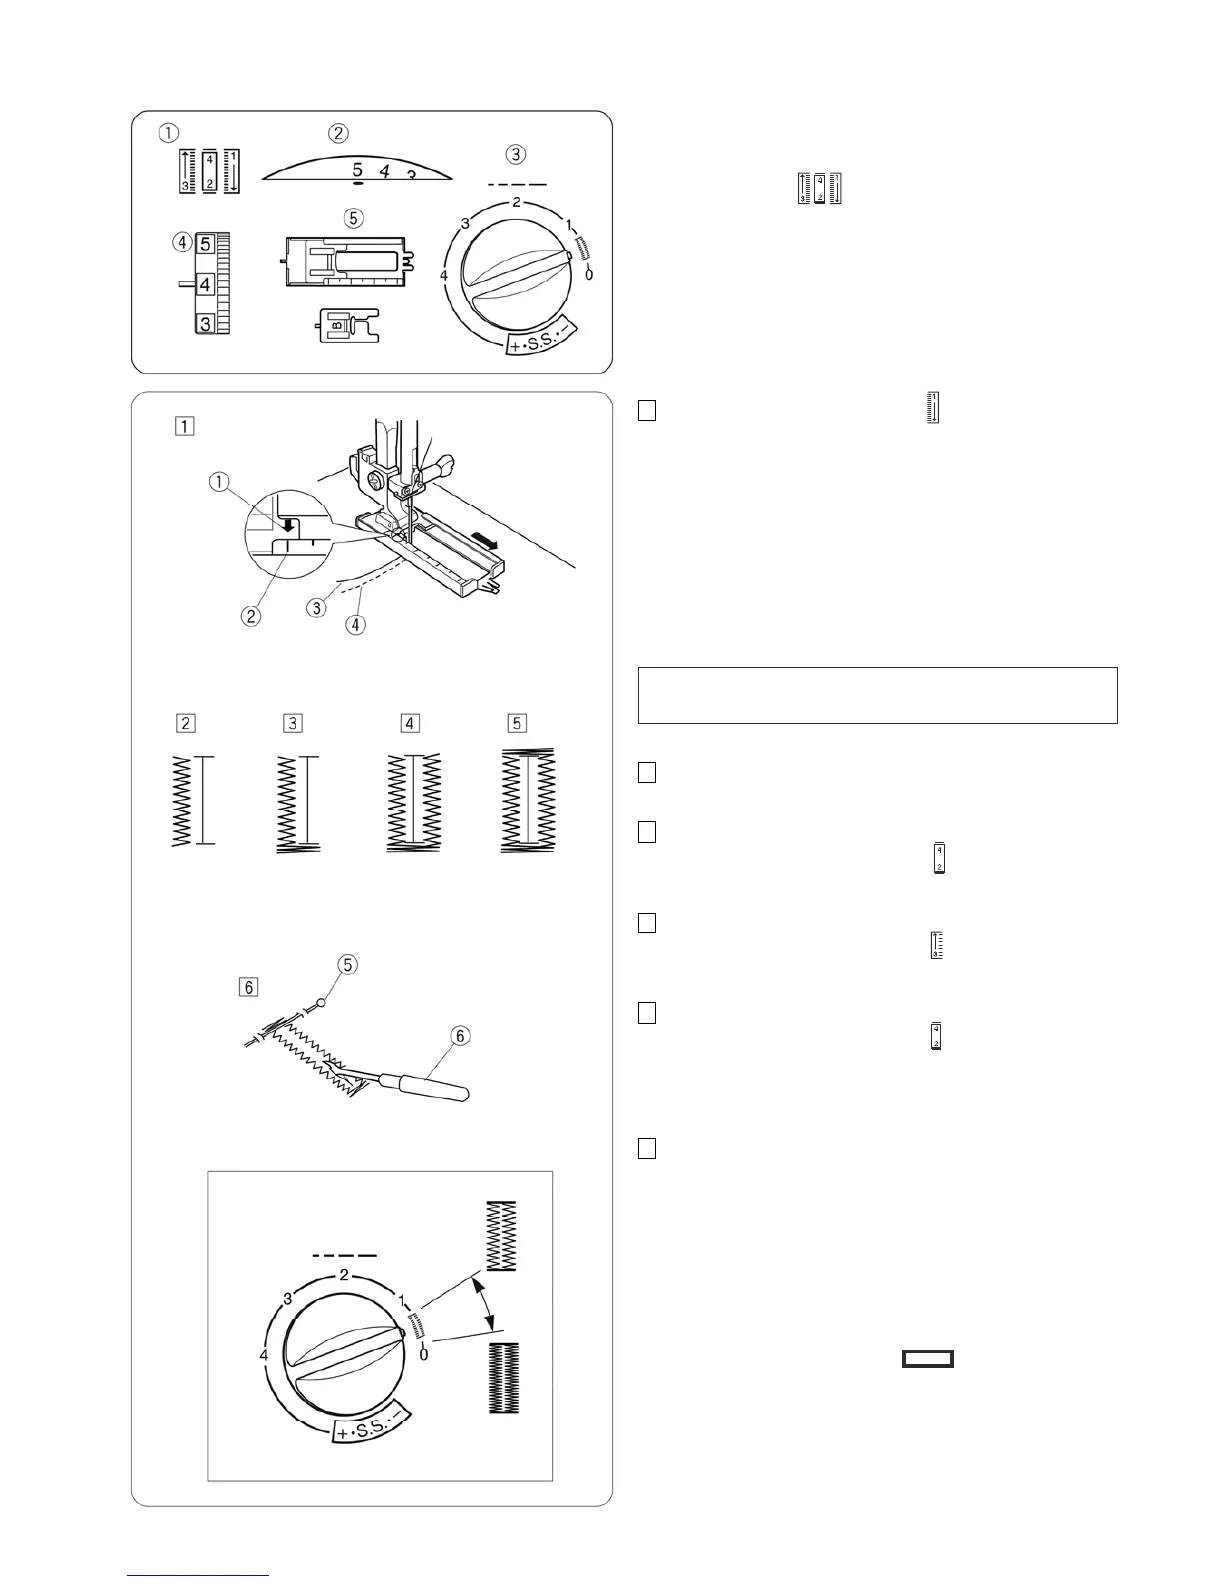
Machine setting
Stitch:
Stitch width: 4 – 5
Stitch length: 0.5 – 1
Thread tension: 1 – 5
Presser foot: Sliding buttonhole J or
Buttonhole foot B (optional)
1 Set the pattern selector dial at “ ”.
Carefully mark buttonhole length on fabric.
Place the fabric under the foot with the buttonhole
marking running toward you.
Draw both of needle and bobbin thread to the left
.
Move the slider toward you so that the top mark 2
on the slider meets the start mark 1.
Start mark
Top mark
Needle thread
Bobbin thread
NOTE:
The scale on the slider is engraved in centimeters.
2 Sew forward until you reach the front marking of your
buttonhole. Stop sewing at a left stitch.
3
Raise the needle to its highest position.
Set the pattern selector dial at “ ”. Sew 5 stitches,
then stop sewing at a right stitch.
4 Raise the needle to its highest position.
Set the pattern selector dial at “ ”. Sew until the
needle reach the back marking of the buttonhole.
5 Raise the needle to its highest position.
Set the pattern selector dial at “ ”. Sew 5 stitches,
then stop sewing. Set the stitch length dial to "0" and
the pattern selector dial at straight sewing.
Sew a few locking stitches.
6 Raise the needle and presser foot. Remove the fabric
from the machine and cut the sewing thread. Insert a
pin inside the bartack.
Then cut the opening with a seam ripper.
Take care not to cut the stitches.
Pin
Seam ripper
Adjusting the buttonhole stitch density:
Set the stitch length dial between “ ” to adjust the
buttonhole stitch density.
q
w
e
r
t
q
w
e
r
t
y