4 Perform a Test
4.2 Run a Test
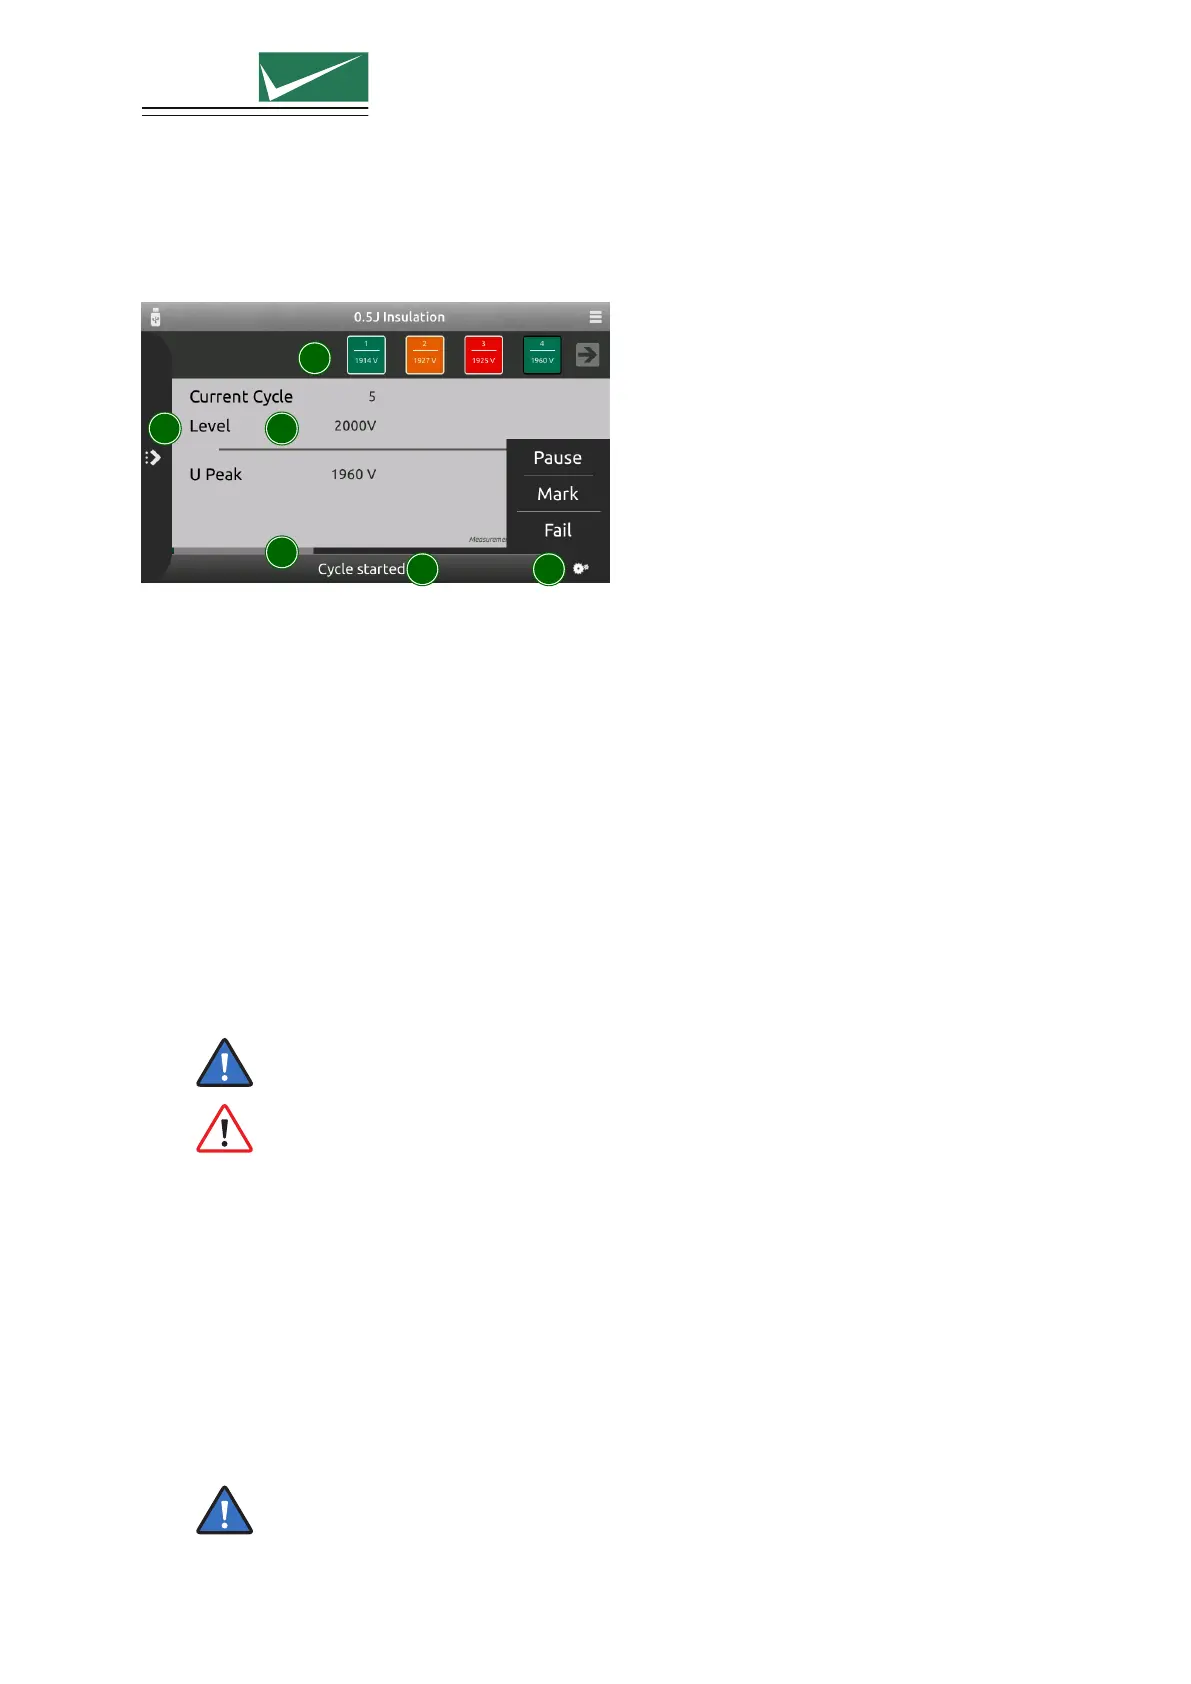
Starting a test by pressing the run button on the front panel, changes the display to the run view.
1
2
3 4
5
6
1 Information Area
Indicates the most important information about a running test.
2 Progress Bar
Indicates progress of the whole test and, if available, about the current cycle.
3 Status Bar
Provides information about the current event.
4 Running Options
Click to open a menu for additional options while a test is running.
• Mark or Fail add this information at the current test position. This information will be
included in the protocol.
• Pause will pause the running test. With Resume, the test will continue at the current position.
• Trigger will release an impulse. This option is only available in the manual trigger mode.
Pressing the Run button during a running test activates the pause. Another press on the
run button will resume the test at the current position.
During the pause, only the disturbance source is interrupted. A possible EUT voltage will
not be switched off. Only a stopped test and an open safety circuit (pressed emergency
button) guarantees a safe operation on the connected device.
5 Parameter Change
Click to open a shutter menu containing all parameters that can be edited while a test is running.
Depending on the test type, parameter change will take place with the next cycle or after a few
seconds. Changed values are highlighted for a few seconds in the information area.
6 Pulse History
Surge tests with internal measurement circuits show the results as scrolling blocks. Browse the
blocks while a test is running. Click on a block to view complete information.
Marked pulses have an orange background, failed ones a red and correct ones a green.
The pulse history is available for the 1.2/50 us insulation waveform only.
Page 19/55