MODEL 1000 SEP 2005
INSTALLATION AND SETUP
3-29
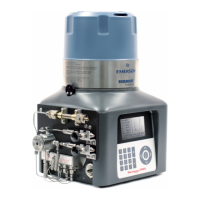
3.3.3 Sample and Gas Lines
4
Install Analyzer Wiring
5
Install Analyzer Sample & Gas Lines
»
6
Install GC Controller Wiring
7
Perform Leak Checks
To install GC sample and gas lines, follow these steps:
Use stainless steel tubing. Keep tubing clean and dry internally to avoid contamination.
Before connecting the sample and gas lines, flow clean air or gas through them. Blow out
internal moisture, dust, or other contaminants.
(1) Remove the plug from the Analyzer Sample Vent (SV) line (1/16-inch tubing marked "SV"(
located at the left side of the Analyzer).
At this stage in the installation, the Analyzer Measure Vent (MV) line (marked "MV") is left
plugged until Analyzer leak checks are completed. For regular Analyzer operation, however,
the MV line must be unplugged, or open.
HINT: Do not discard the vent line plugs. They are useful at any time when leak-
checking the Analyzer and its sample or gas line connections.
(a) If desired, connect "SV" vent line to an external (ambient pressure) vent. If the vent
line is terminated in an area exposed to wind, protect the exposed vent with a metal
shield.
(b) Use 1/4-inch or 3/8-inch tubing for vent lines longer than 10 feet.
 Loading...