Connecting High-Speed Stacking Cables
3-10 Hardware Installation
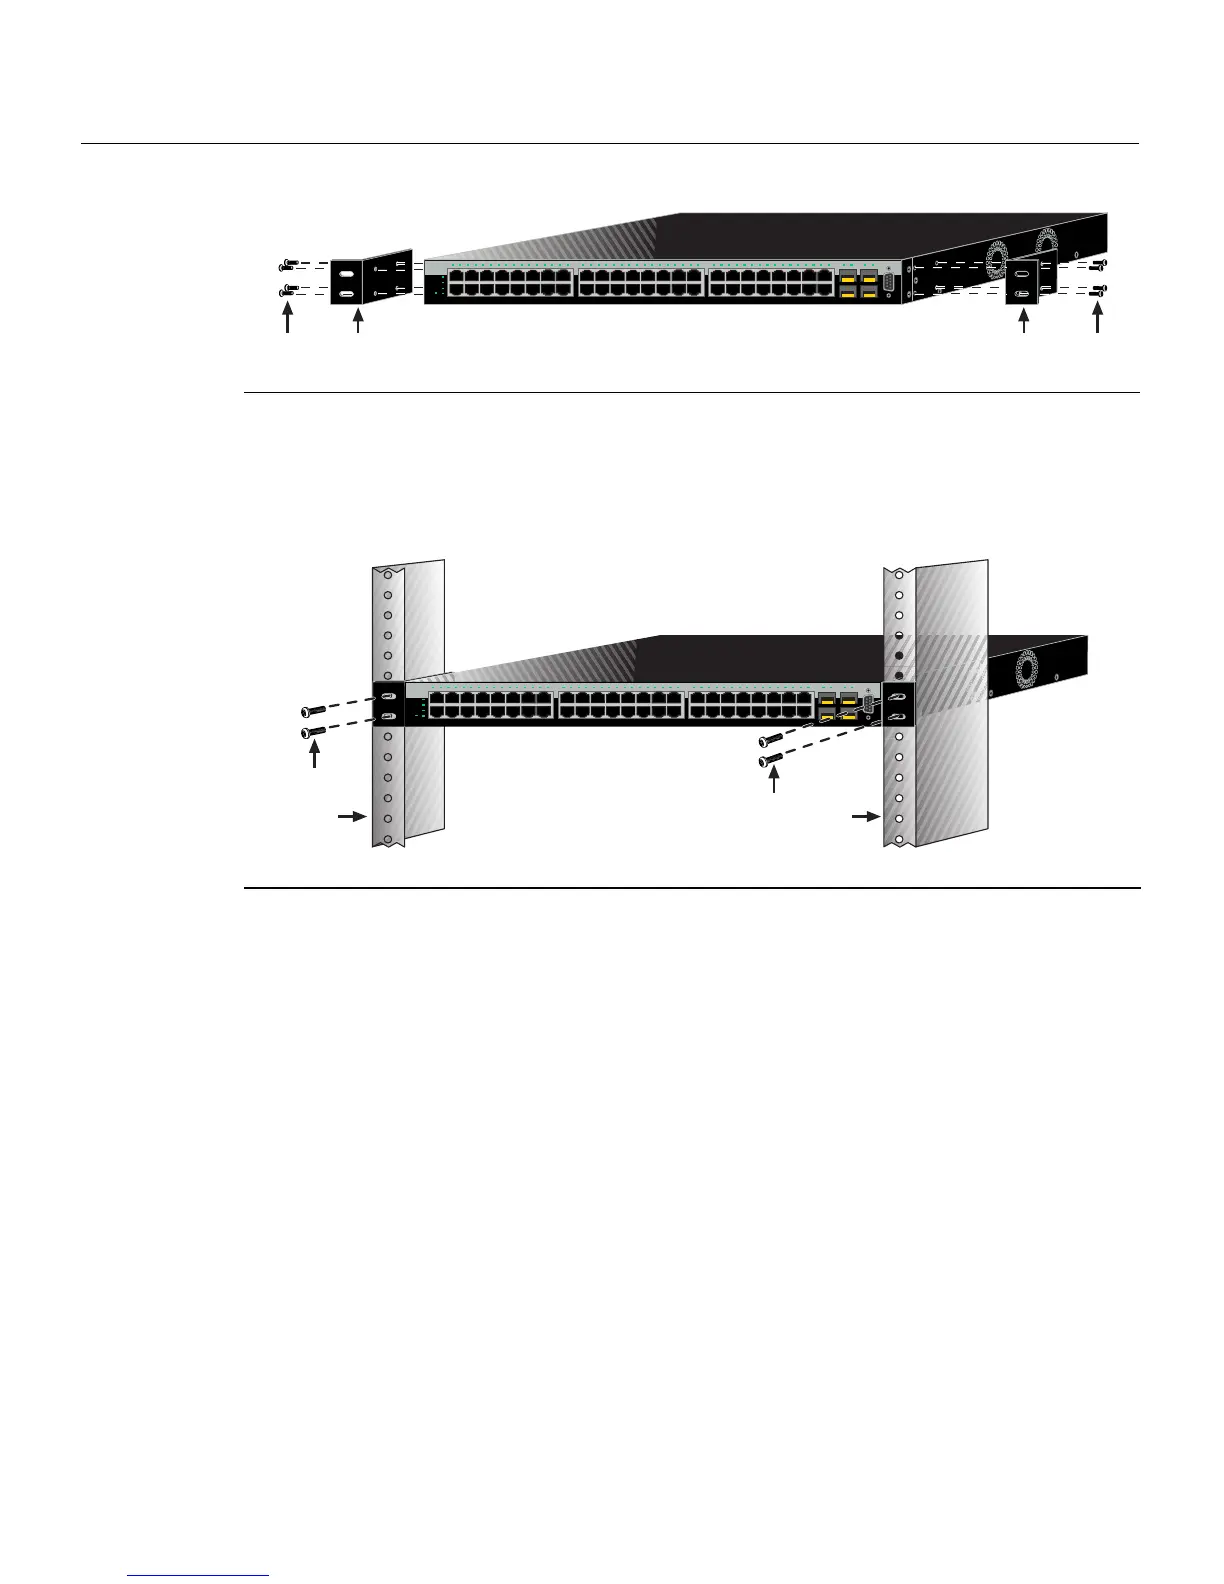
Figure 3-5 Attaching the Rackmount Brackets
2. Withthemountingbracketsattached,positiontheswitchbetweentheverticalframe
membersofthe19‐inchrackasshowninFigure 3‐6.Thenfastentheswitchsecurely
totheframeusingfourmountingscrews(usersupplied).
Figure 3-6 Fastening the Switch to the Rack
3. Ifyouareinstallingthisswitchinastackedconfiguration,repeatthisprocedure
for
eachswitchuntilallswitcheshavebeeninstalledinthestack,thenproceedto
“ConnectingHigh‐SpeedStackingCables”onpage 3‐10.Otherwise,proceedto
“ConnectingACandPoEPower”onpage 3‐15.
Connecting High-Speed Stacking Cables
Thestackofswitchescanbeconnectedinaringordaisychain topology.Inaring
topologyalltheswitchesareconnected.Theonlydifferenceinthecableconnectionsina
daisychaintopologyisthatonecableisnotinstalled.
Upto8switchescanbestackedtogetherusing
C2CAB‐SHORTandC2CAB‐LONG
high‐speedstackingcables.Youcanaddswitchesandreachuptoamaximumof384
Ethernetportsperstack.Thehigh‐speedstackingcablesallowtheentirestacktooperate
withasingleIPaddress.
1 Rackmount brackets 2 M3 x 6 mm flathead screws
1 Rails of 19-inch rack 2 Mounting screws (supplied by user)
Console
1
2
45
CPU
UP
RPS
MGR
DOWN
46
47
48
47
48
C2G124-48P
123456 78910111213141516
15
16
17
18
31
32
33
34
17 18 19 20 21 22 23 24 25 26 27 28 29 30 31 32 33 34 35 36 37 38 39 40 41 42 43 44 45 46 47 48 45 46 47 48
Á
À
Á
À
Console
1
2
45
CPU
UP
RPS
MGR
DOWN
46
47
48
47
48
C2G124-48P
123456 78910111213141516
15
16
17
18
31
32
33
34
17 18 19 20 21 22 23 24 25 26 27 28 29 30 31 32 33 34 35 36 37 38 39 40 41 42 43 44 45 46 47 48 45 46 47 48
À
Á
Á
À