62 Troubleshooting
Repair a Broken Ribbon
A ribbon can break if the power applied by the printhead is too high. Do the following to repair a
broken ribbon.
1. Open the printer and remove the print ribbon cartridge
or cassette.
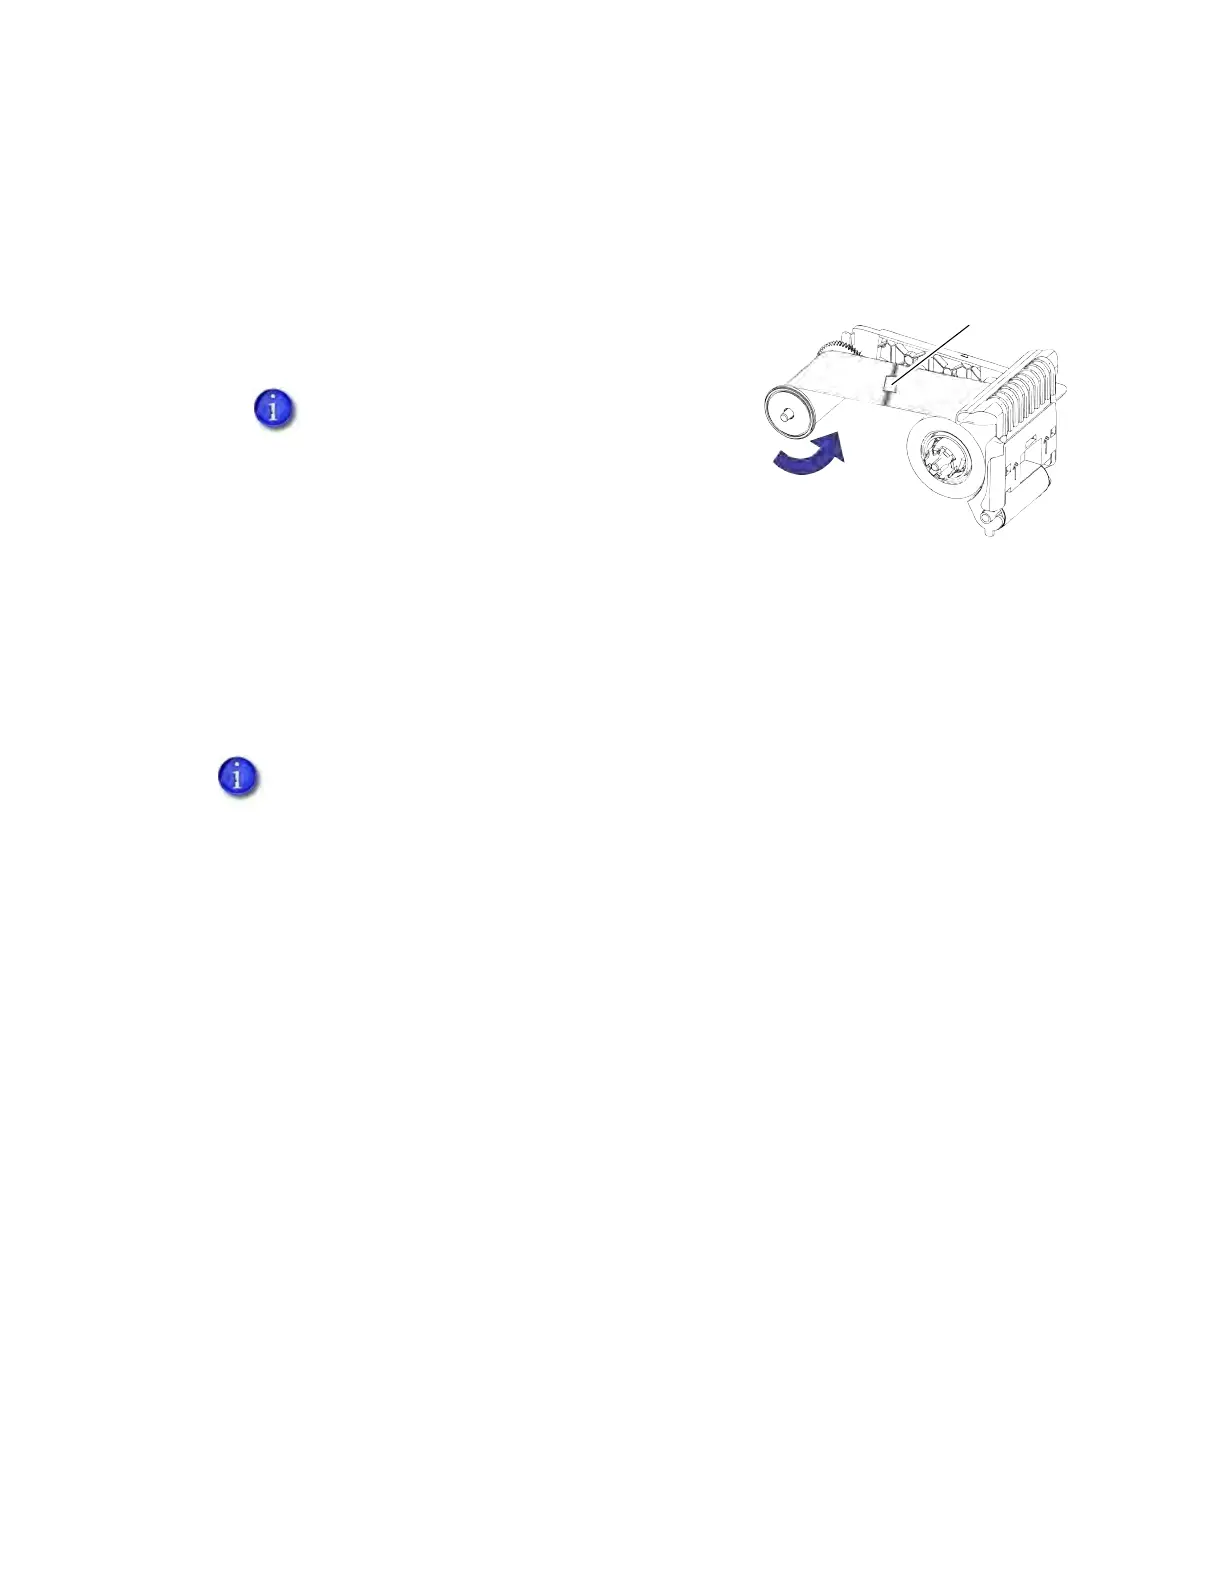
2. Trim the ends of the broken ribbon evenly.
3. Align the ends of the broken ribbon and apply adhesive
tape to secure them.
4. Turn the take-up spool counterclockwise until the mended portion is wound around the
spool two or three turns.
5. Reinstall the print ribbon cartridge in the printer.
6. Close the printer.
Messages and Conditions
When the printer cannot process a card, or a printer problem occurs, it issues a condition. The
LCD panel on the front panel displays the condition code and a brief message. The condition also
displays in the Printer Dashboard. When you use the XPS Card Printer Driver, the printer driver
displays the condition as a message on the PC that sent the print job. In a shared printer
environment, messages can differ slightly from the messages and conditions described in this
section.
Messages on the Printer LCD on page 63
Messages from the XPS Card Printer Driver on the PC on page 63
Messages in the Printer Dashboard on page 64
Other Messages on page 64
Do not remove the used ribbon from the
take-up spool.
A broken ribbon can become stuck in the printhead cover. Check the cover to make
sure that the ribbon is not stuck to the cover.
Tape