Envision One cDLM® User Manual
TS-MAM-EnvisionOneCDLMUserManual-V5.0-FN-EN , 2021-12-15
Step-by-step:
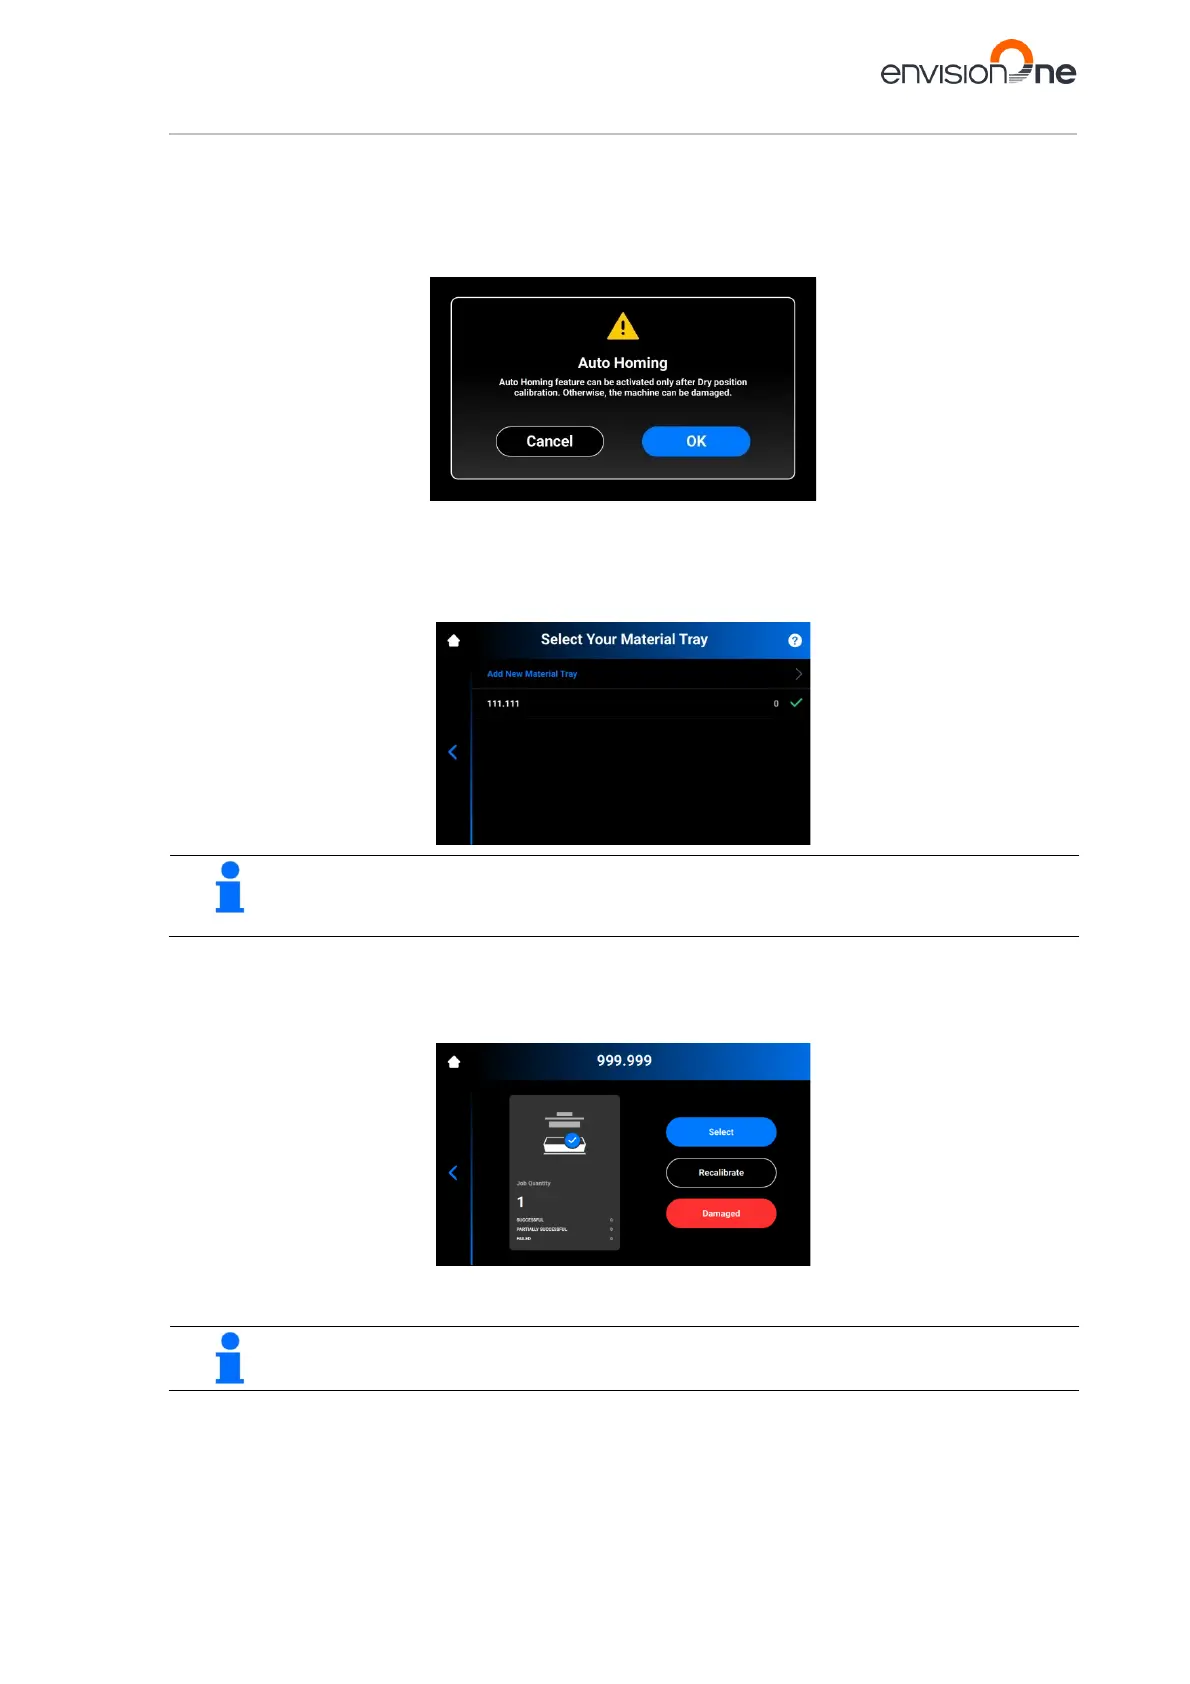
1. Tap Settings | Move & Calibration | Home Calibration | Auto Homing.
→ The following message appears.
2. Tap [OK].
→ The process of Dry position calibration starts.
→ The following screen appears with a list of material trays. The material trays included to the list have
been calibrated and the calibration data is saved. The numbers on the right of the material tray name show
the number of prints done for each material tray.
To learn more about the material tray maintenance, click on the ? icon in the upper-
right corner of
the screen. Scan the QR-code to visit the corresponding page in the online knowledge base.
If you have already calibrated the platform position with this material tray, proceed as follows:
Find the serial number or name of your material tray in the list and tap it.
→ The following screen appears.
• Tap [Select] if you want to select this material tray and proceed working with the printer.
• Tap [Damaged] to mark the material tray as damaged and remove the it from the list.
You can check the number of material trays marked as damaged on Printing Statistics screen.
If you want to recalibrate the existing material tray:
1. Tap [Recalibrate].
2. In the popup confirmation screen that appears, tap [OK].