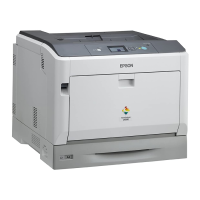
EPSON AcuLaser C9200N Revision D
OPERATING PRINCIPLES Operating Principle of Main Unit Mechanism 84
Confidential
Note * : Continuing on printing is available until the power is turned OFF. When the Power is turned ON again, the status will become Near-Empty.
Periodic
replacement
parts
Fusing Unit Near-
Empty
Condition becomes Near-Empty when any of the
following values reaches the given value.
• Number of prints (Paper more than 216 mm in
Sub Scan Direction is two counts)
• Value of the hours which the Fusing Motor has
turned is converted into the number of prints
Fusing Motor Fuser Needed
Soon
--- Prepare a new unit Available Warranty When Fuse for new
unit detection is
conducted, unit is
judged as new unit
and counter is reset
automatically.
Detection for
connector
connection
Near-
Empty 2
Condition becomes Empty 2 when any of the
following values reaches the given value.
• Number of prints (Paper more than 216 mm in
Sub Scan Direction is two counts)
• Value of the hours which the Fusing Motor has
turned converted into the number of prints
Replace Fuser --- Change to Empty
condition by receiving
job.
--- ---
Empty Condition becomes Empty when the print job is
received in the condition of Near-Empty 2
--- Replace Fuser Flash
• Continue on printing
by pushing down
[Start/Stop] to disable
the error
*.
• Replace with a new unit
Available Out of
warranty
Empty 2 Condition becomes Empty 2 when number of
prints reach the given numbers to print.
--- Replace Fuser Light Replace with a new unit Not
Available
---
Transfer Belt
Unit
Near-
Empty
Condition becomes Near-Empty when the hours
which the Transfer Belt has turned reached the
given time.
Main Motor Transfer Unit
Needed Soon
--- Prepare a new unit Available Warranty When Fuse for new
unit detection is
conducted, unit is
judged as new unit
and counter is reset
automatically.
1st Image
Transfer
Pressure
Retraction
Sensor
Near-
Empty 2
Condition becomes Near-Empty 2 when the
hours which the Transfer Belt has turned reached
the given time.
Replace Transfer
Unit
--- Change to Empty
condition by receiving
job.
--- ---
Empty Condition becomes Empty when the print job is
received in the condition of Near-Empty 2
--- Replace Transfer
Unit
Flash
• Continue on printing
by pushing down
[Start/Stop] to disable
the error.
• Replace with a new unit
Available Out of
warranty
Maintenance Unit/
Feed Roller/
Separation Roller
Near-
Empty
Condition becomes Near-Empty when number of
prints reach the given value (count is paper-size
independent).
Feed Roller/
Separation Roller
Replace
Maintenance
Unit/Replace
Feed Roller xx
--- Prepare a new unit Available Warranty Reset the counter
manually from
Maintenance Menu.
None
Empty Condition becomes Empty when number of prints
reach the given value (count is paper-size
independent).
Replace
Maintenance
Unit/Replace
Feed Roller xx
Flash
• Continue on printing
by pushing down
[Start/Stop] to disable
the error.
• Replace with a new unit
Available Out of
warranty
Type Unit Status Life detection
Parts attributed
life
Panel display
Solution
continued
on
printing
Image
quality
New unit detection
(Reset counter)
Dictate Unit
Message
Error
LED

 Loading...


