3.
If the standard tractor is installed in the pull tractor position,
remove it. If the optional pull tractor is installed, remove it. In
either case, make sure the paper tension unit is not installed.
Note:
Store the paper guide and optional pull tractor in a safe place; you
will need them if you remove the cut-sheetfeeder.
4.
Move the printer head to the ribbon installation position.
5.
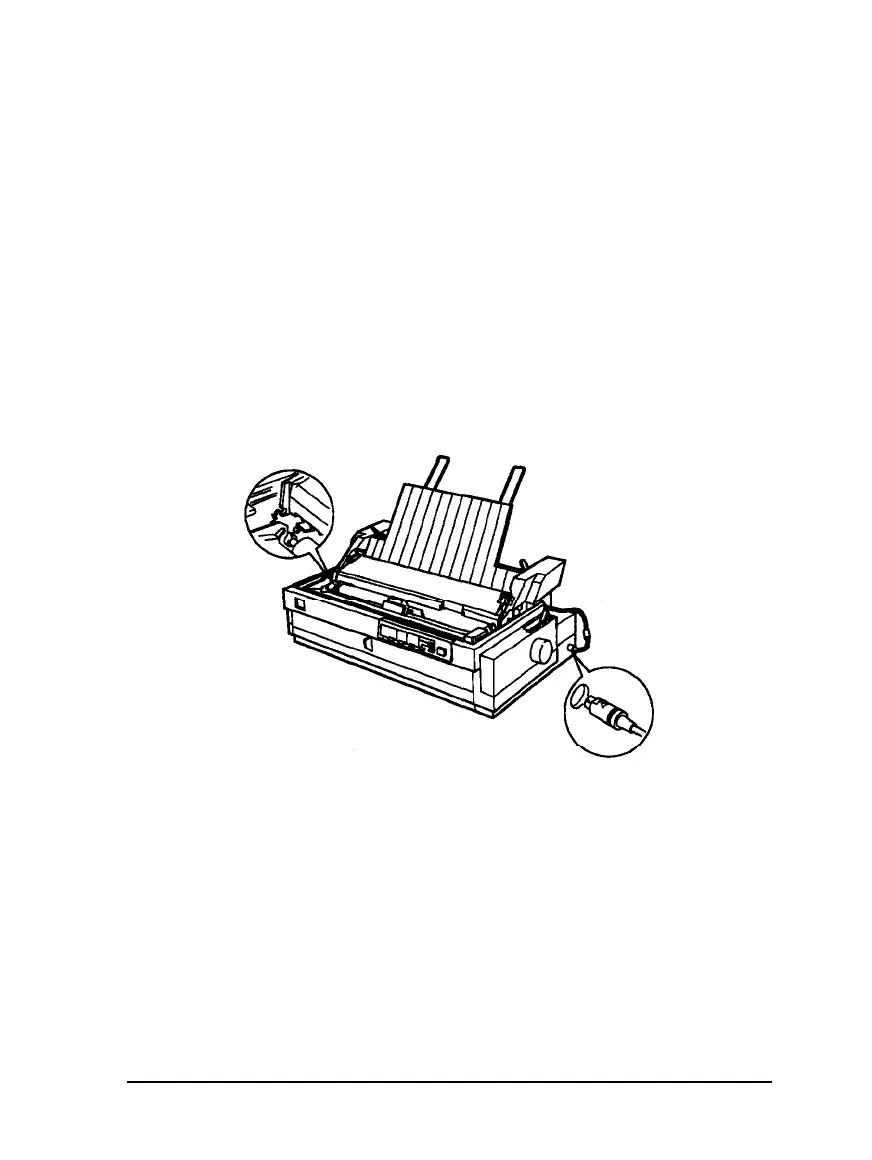
Hold the cut-sheet feeder in both hands and press back the latch
levers on each side. Fit the notches in the cut-sheet feeder over
the mounting posts on the printer. Release the latch levers and
lower the cut-sheet feeder until it rests on the printer.
6. Insert the cable into the connector as shown above.
7.
Replace the printer cover.
You are now ready to load paper with your cut-sheet feeder. To
remove the cut-sheet feeder, reverse the steps above.
Using Printer Options
4-3