EPSON Perfection V10/V100 Photo/V200 Photo/V350 Photo Revision B
DISASSEMBLY/ASSEMBLY Disassembly of Main Unit 40
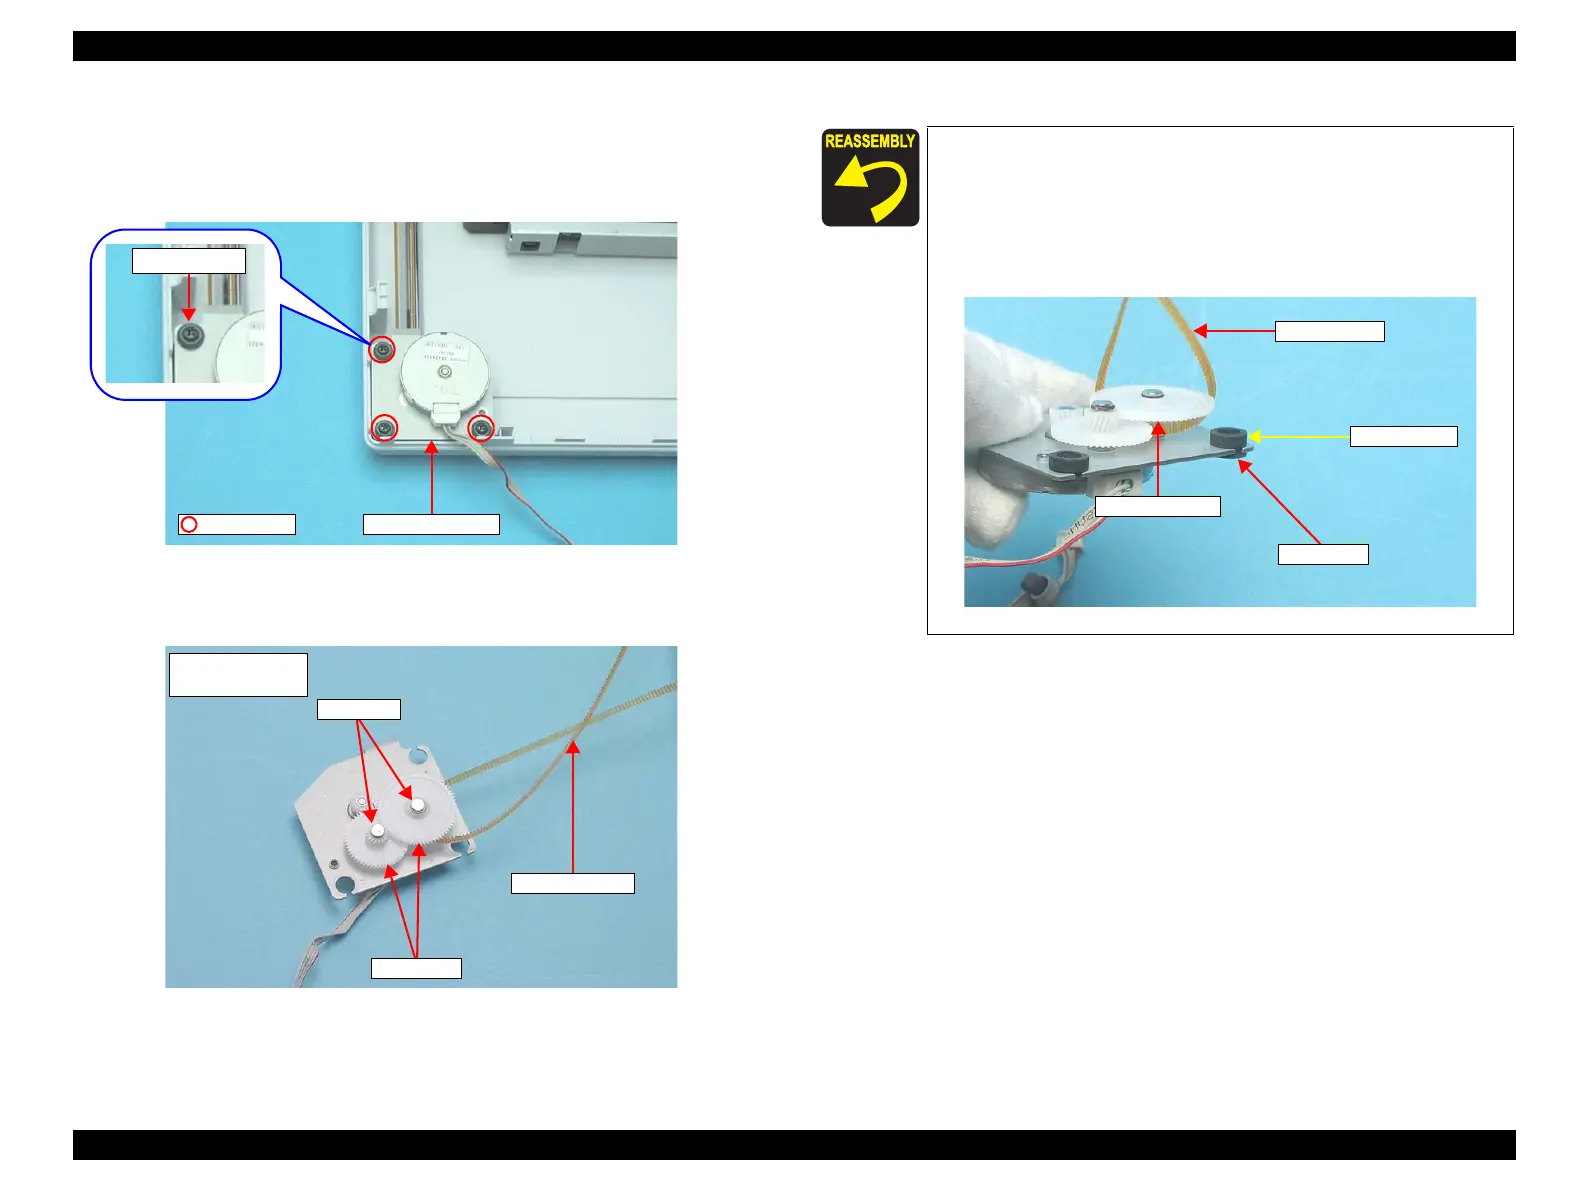
5. Remove the three screws (C.C.P. 3X8, 5-7 kgf.cm) that secure the CR Motor Assy.
6. Remove the CR Motor Assy from the Lower Housing.
7. Remove the Damper from the CR Motor Assy.
Figure 4-16. Removing the CR Motor (1)
8. Remove the two washers and the two Gears, and remove the Timing Belt from the
CR Motor Assy.
Figure 4-17. Removing the CR Motor (2)
C.C.P. 3x8
Damper
CR Motor Assy
CR Motor Assy
(Bottom side)
Timing Belt
Gears
Washers
After replacing the CR Motor, make sure to apply G-45 grease
to the specified area. (Chapter 6 "MAINTENANCE" P58)
Make sure to loop the Timing Belt over the shaft with the
larger Gear.
Attach the Dampers so that the thick side of them comes to the
side with the Gears, as shown below.
Figure 4-18. Reassembling the CR Motor Assy
Damper
Timing Belt
Thick side
The larger Gear
 Loading...