EPSON Perfection V10/V100 Photo/V200 Photo/V350 Photo Revision B
DISASSEMBLY/ASSEMBLY Disassembly of AFL 47
4.5.2 Harness AFL/AFL Main Board
1. Separate the AFL Upper Housing Assy/AFL Lower Housing Assy.
(4.5.1 Separation of AFL Upper Housing Assy/AFL Lower Housing Assy on page
46)
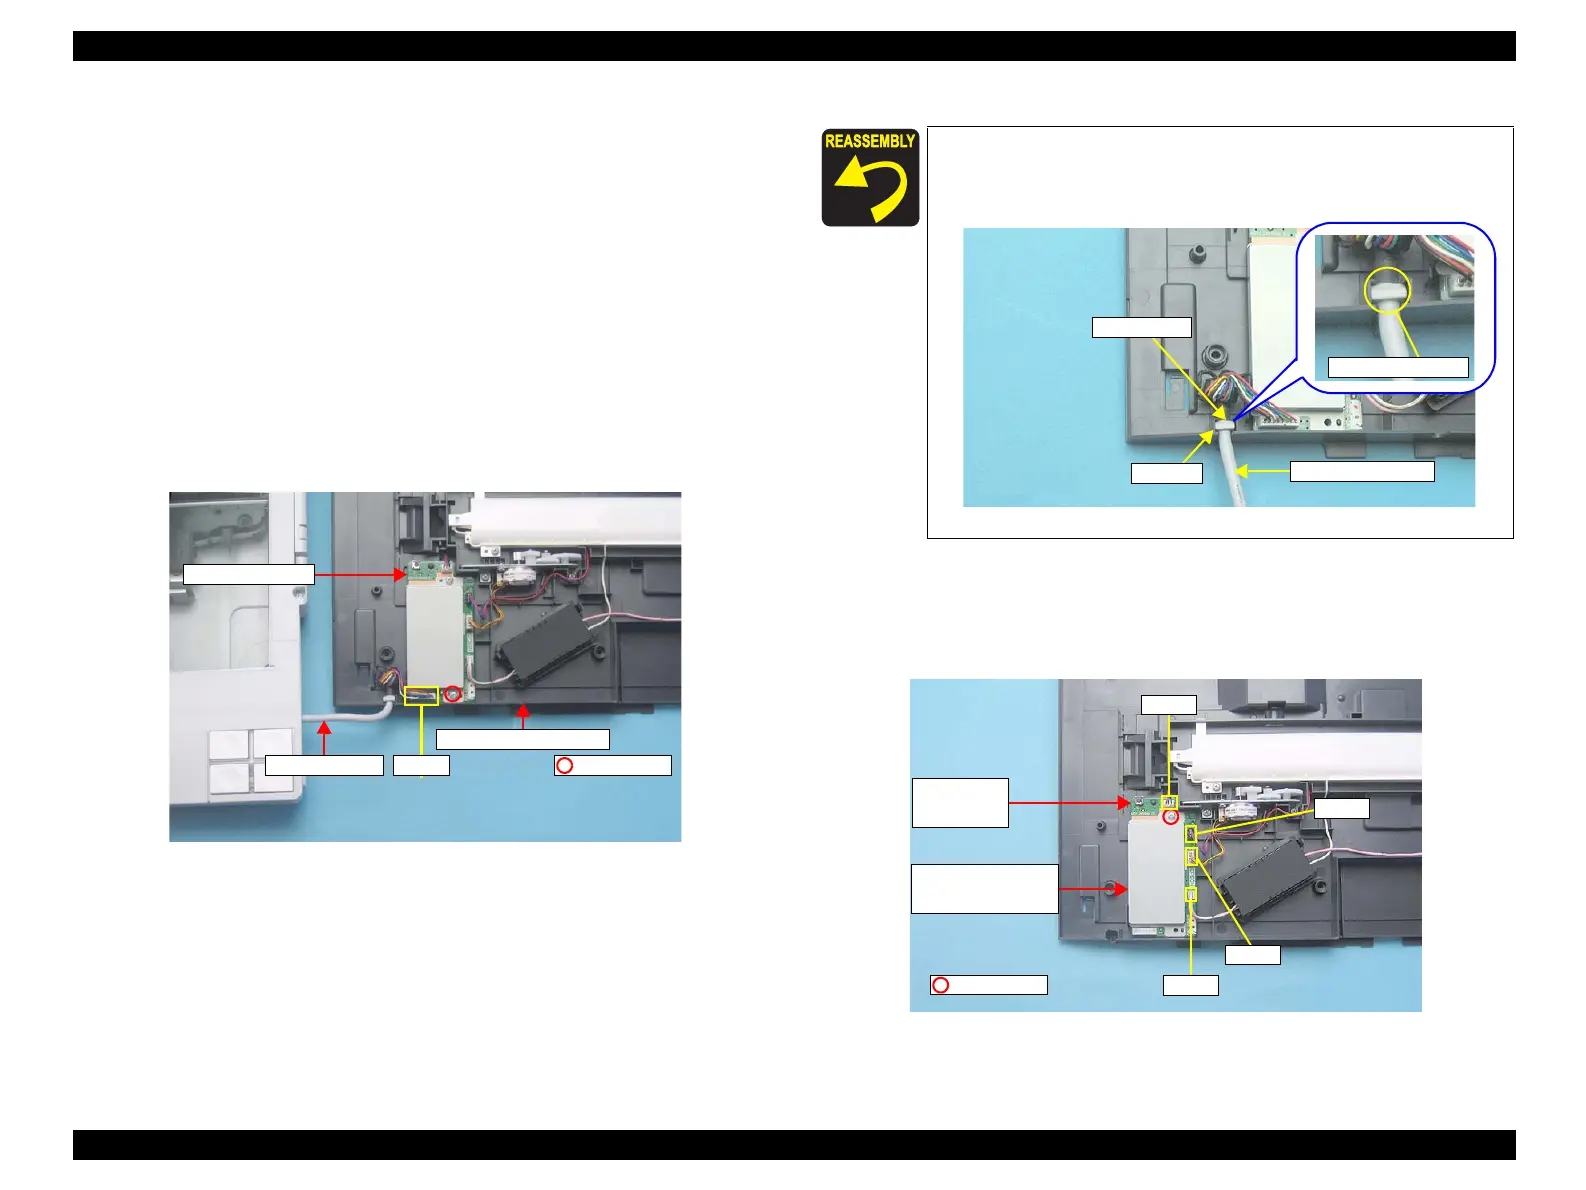
2. Remove the Harness AFL following the steps below.
1. Disengage the earth cable, that is a part of the Harness AFL from the Upper
Main Board Shield Plate.
(4.3.6 Main Board on page 37)
2. Disconnect CN5 connector from the Main Board of the scanner Main Unit.
(4.3.6 Main Board on page 37)
3. Disconnect CN1 connector from the AFL Main Board.
4. Remove the screw (C.B.P. 3x8, 5-7 kgf.cm.) that secures the earth cable, and
remove the Harness AFL from the AFL Lower Housing.
Figure 4-34. Removing the Harness AFL
3. Remove the screw (C.B.P.3x8, 5-7 kgf.cm) that secures the AFL Main Board and
the AFL Main Board Cover.
4. Disconnect CN2, CN3, CN4, CN6 connectors from the AFL Main Board, and
remove the AFL Main Board and the AFL Main Board Cover.
Figure 4-36. Removing the AFL Main Board
CN1
C.B.P. 3x8
AFL Lower Housing
AFL Main Board
Harness AFL
When installing the Harness AFL, insert the Stopper with the
stopper’s chipped side facing upwards into the socket of the AFL
Lower Housing.
Figure 4-35. Installing the Harness AFL
Chipped side
Harness AFL
Socket
Stopper
C.B.P. 3x8
AFL Main Board
Cover
AFL Main
Board
CN3
CN4
CN2
CN6
 Loading...