EPSON Perfection V10/V100 Photo/V200 Photo/V350 Photo Revision B
DISASSEMBLY/ASSEMBLY Disassembly of AFL 50
4.5.5 AFL Sensor B
1. Remove the Lamp Assy.
(4.4.3 Lamp Assy on page 45)
2. Disconnect CN4 connector from the AFL Main Board.
(Figure 4-36 on page 47 )
3. Remove the screw (C.B.P. 3x8, 5-7 kgf.cm.) that secures the AFL Sensor B, and
remove the AFL Sensor B.
Figure 4-42. Removing the AFL Sensor B
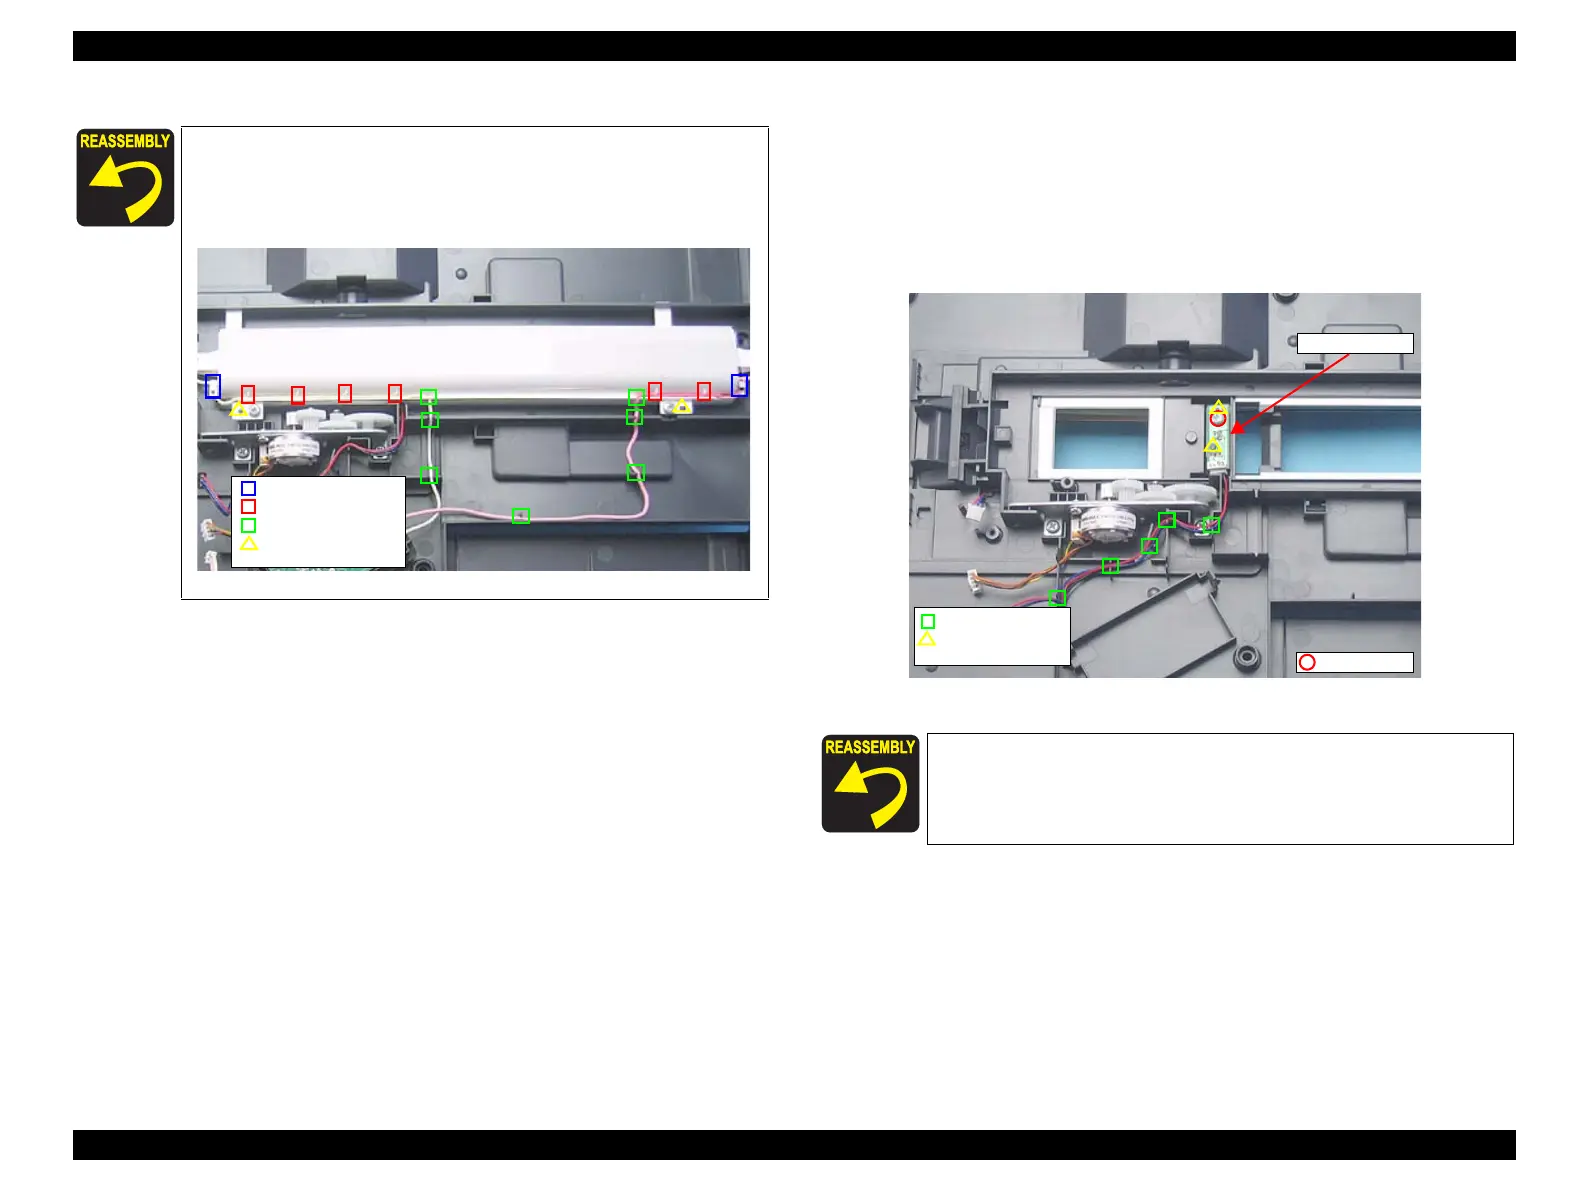
When installing the Lamp Assy, match the two guide pins and
the positioning holes.
Route the Lamp Assy cables through the two hooks, six ribs,
and seven notches as shown below.
Figure 4-41. Installing the Lamp Assy
Hook
Rib
Notch
Guide pin and
positioning hole
When installing the AFL Sensor B, match the two guide pins
and the positioning holes.
Route the AFL Sensor B cables through the five notches as
shown in Figure 4-42.
C.B.P. 3x8
Notch
Guide pin and
positioning hole
AFL Sensor B
 Loading...