EPSON Perfection V10/V100 Photo/V200 Photo/V350 Photo Revision B
DISASSEMBLY/ASSEMBLY Disassembly of TPU 45
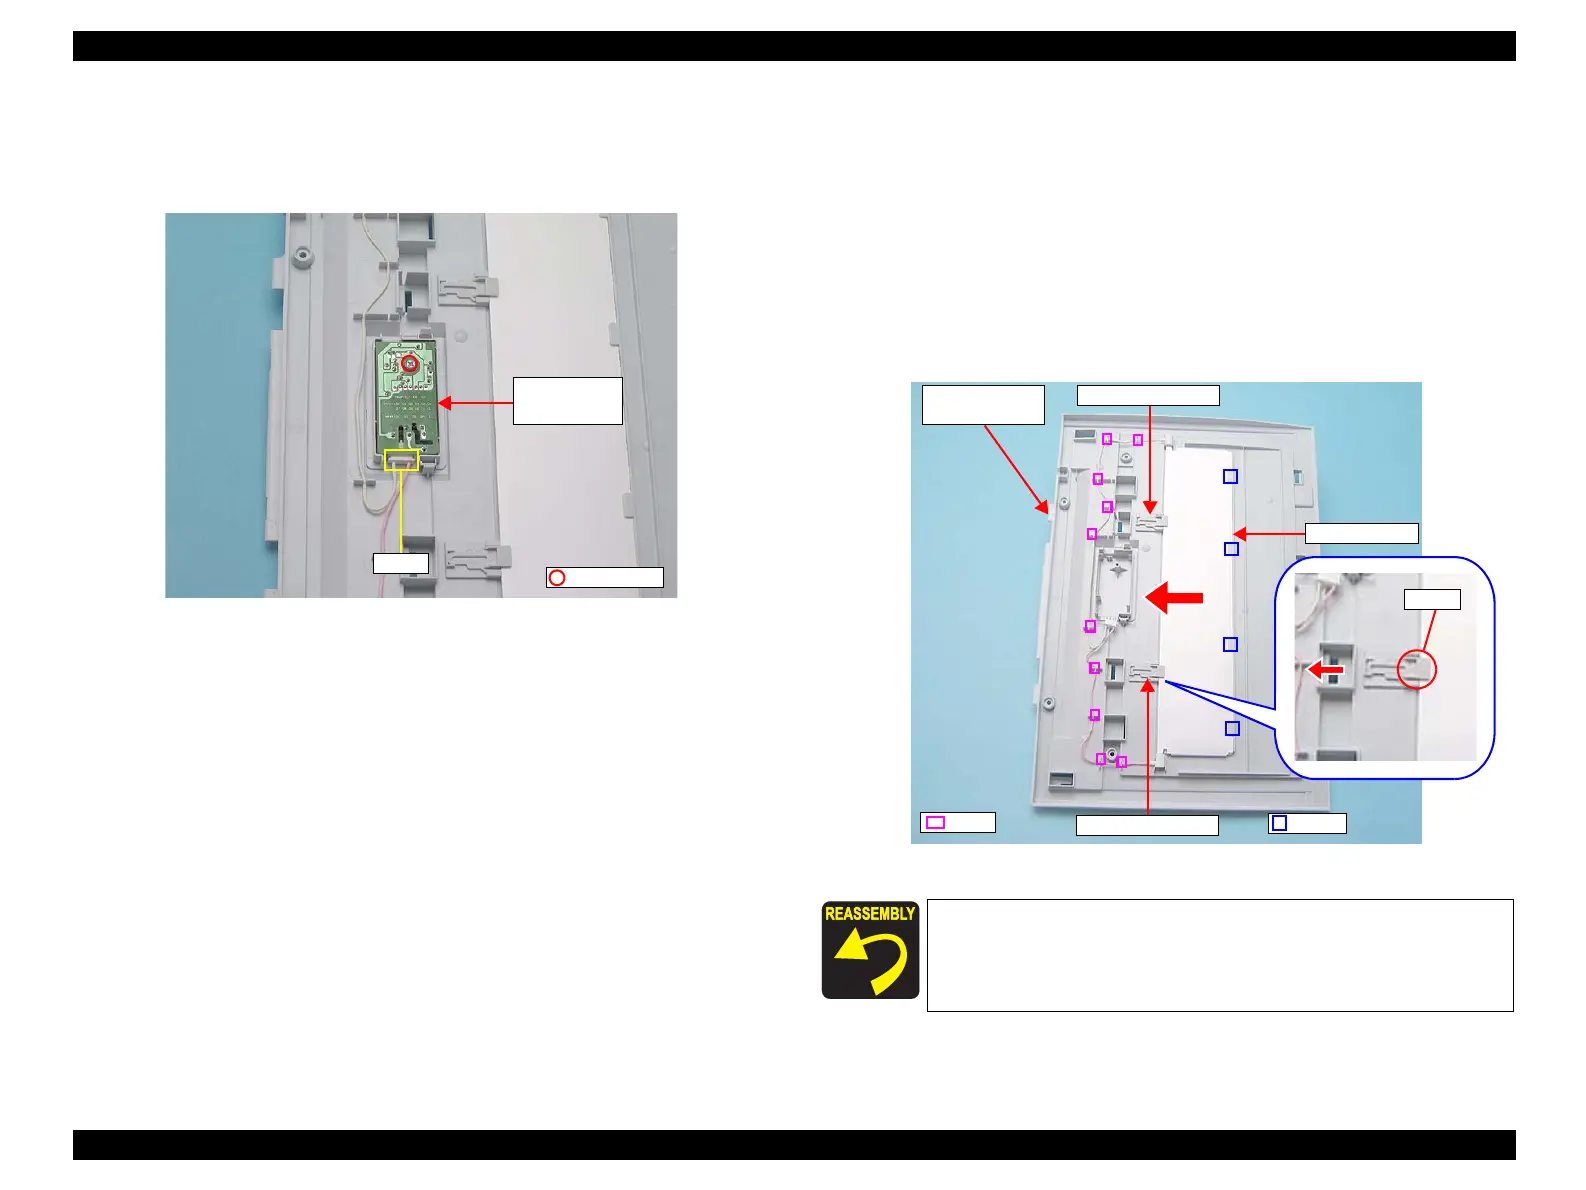
5. Disconnect CN1 connector from the TPU Inverter Board.
6. Remove the screw (C.B.P 3x8, 5-7 kgf.) that secures the TPU Inverter Board, and
remove the TPU Inverter Board.
Figure 4-29. Removing the TPU Inverter Board
4.4.3 Lamp Assy
1. Remove the TPU Upper Housing.
(4.4.1 TPU Upper Housing on page 43)
2. Disconnect CN1 connector from the TPU Inverter Board.
(Figure 4-29 on page 45 )
3. Press part A of the Glass Stopper, and remove the two Glass Stoppers.
4. Slide the Lamp Assy in the direction of the arrow to release it from the four hooks,
and remove the Lamp Assy.
Figure 4-30. Removing the Lamp Assy
C.B.P. 3x8
CN1
TPU Inverter
Board
Route the cables of the Lamp Assy through the ribs of the TPU
Lower Housing as shown in figure 4-30.
Hook
Lamp Assy
Glass Stopper
Rib
Glass Stopper
TPU Lower
Housing
Part A
 Loading...