EPSON Perfection V10/V100 Photo/V200 Photo/V350 Photo Revision B
DISASSEMBLY/ASSEMBLY Disassembly of Main Unit 37
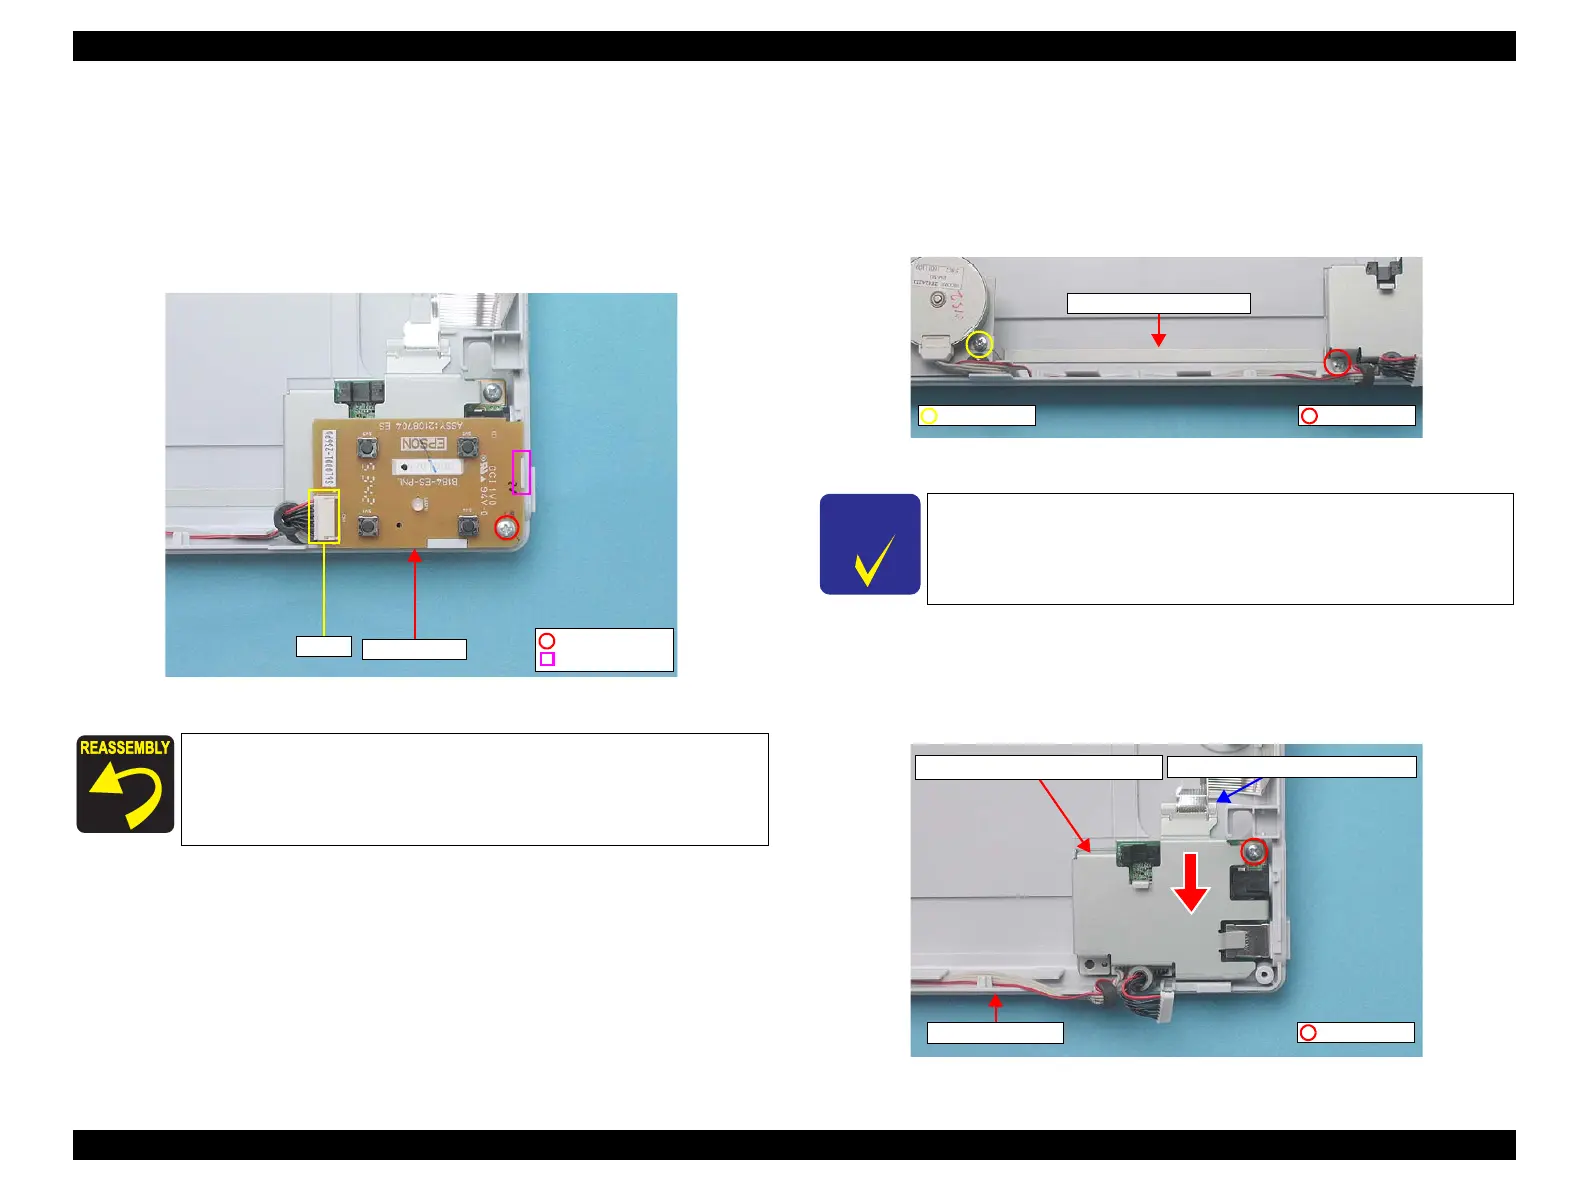
4.3.5 Panel Board
1. Remove the Upper Housing.
(4.3.3 Upper Housing on page 35)
2. Remove the screw (C.B.P. 3x8, 5-7 kgf.cm) that secure the Panel Board.
3. Disconnect CN1 connector from the Panel Board, and remove the Panel Board.
Figure 4-8. Removing the Panel Board
4.3.6 Main Board
1. Remove the Panel Board. (4.3.5 Panel Board on page 37)
2. Remove the two screws (C.B.P. 3x8, 5-7 kgf.cm/C.B.S 3x5, 6-8 kgf.cm) that
secure the Grounding Plate, and remove it.
Figure 4-9. Removing the Grounding Plate
3. Remove the screw (C.B.P. 3x8, 5-7 kgf.cm) that secures the Upper Main Board
Shield Plate.
4. Remove the Upper Main Board Shield Plate from the gap between the Lower
Housing and the Lower Main Board Shield Plate.
Figure 4-10. Removing the Upper Main Board Shield Plate
REASSEMBLY
When reassembling the Panel Board, match the notch to the rib of
the Lower Housing. (Figure 4-8 on page 37 )
C.B.P. 3x8
CN1
Panel Board
Notch and Rib
C H E C K
P O I N T
The screw described in the next step secures the Upper Main Board
Shield Plate together with the earth cable for the Perfection V100
Photo/V200 Photo/V350 Photo. (Figure 4-11 on page 38 )
Grounding Plate
C.B.P. 3x8C.B.S. 3x5
Upper Main Board Shield Plate
C.B.P. 3x8
Lower Main Board Shield Plate
Lower Housing
 Loading...