EPSON Perfection V10/V100 Photo/V200 Photo/V350 Photo Revision B
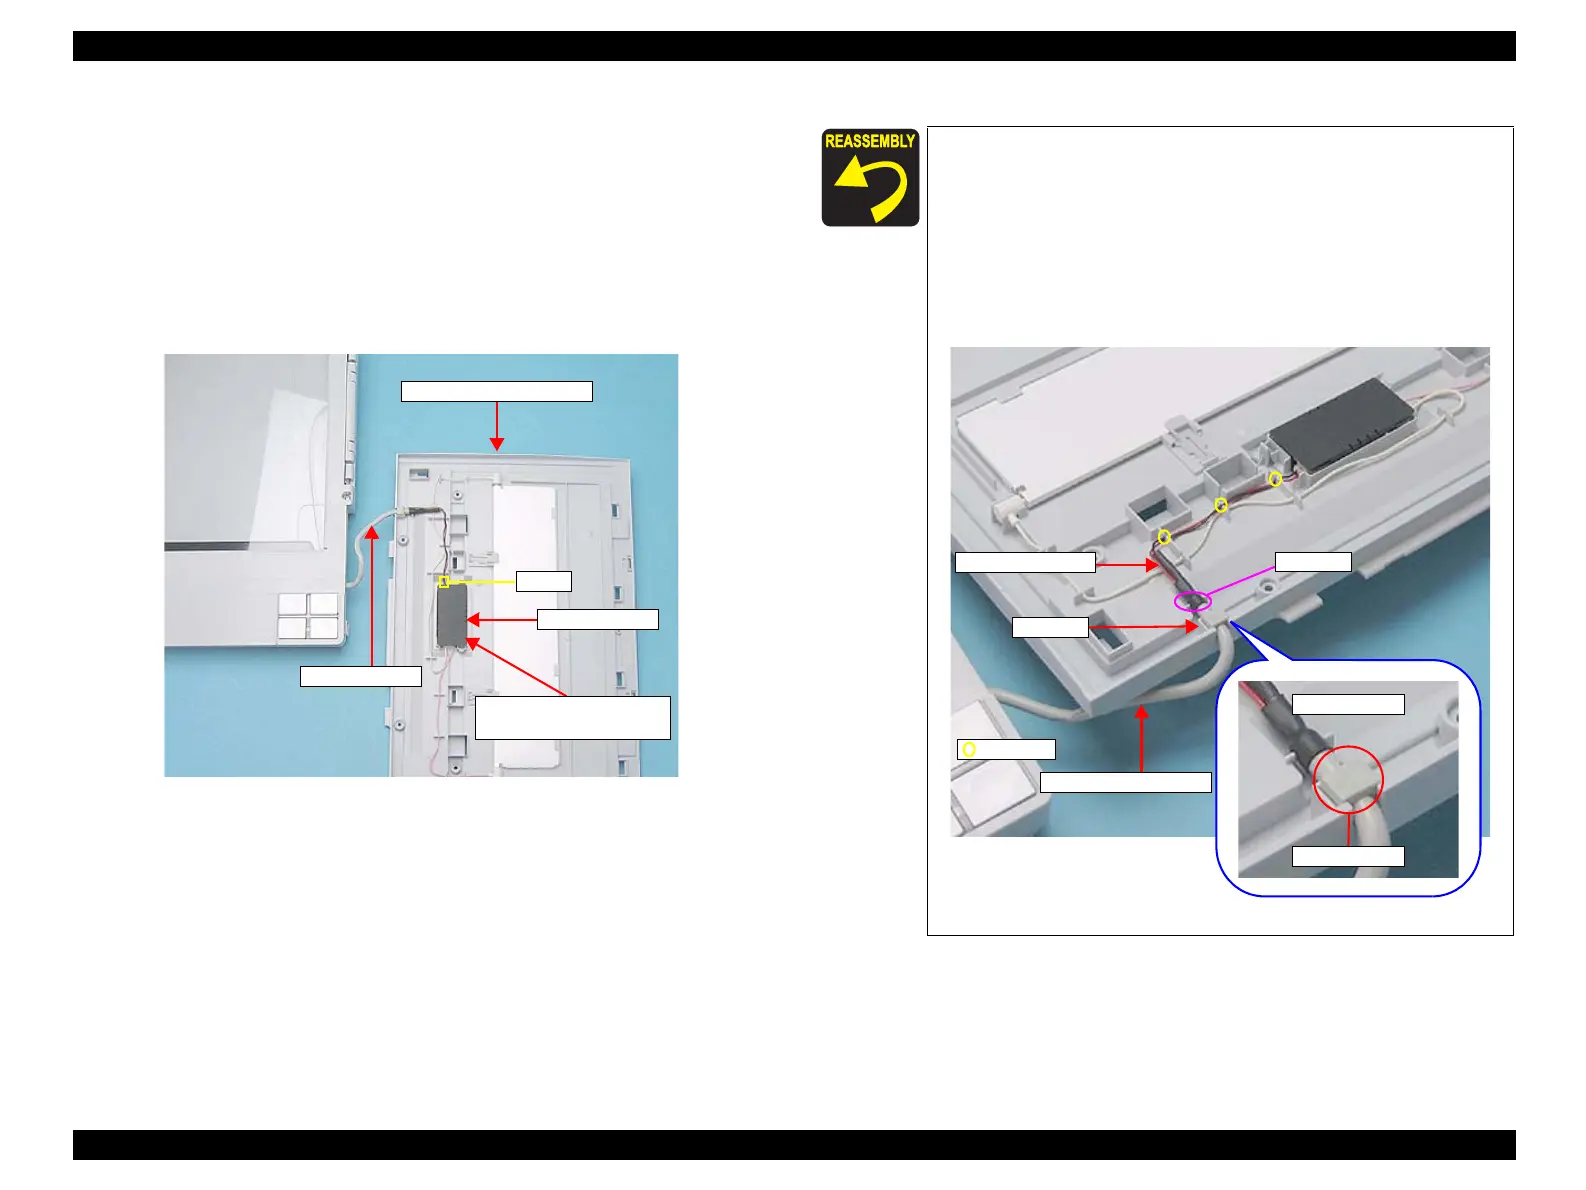
DISASSEMBLY/ASSEMBLY Disassembly of TPU 44
4.4.2 Harness TPU/TPU Inverter Board
1. Remove the TPU Upper Housing. (4.4.1 TPU Upper Housing on page 43)
2. Disconnect CN8 connector from the Main Board in the scanner Main Unit.
(4.3.6 Main Board on page 37)
3. Disconnect CN2 connector from the TPU Inverter Board, and remove the Harness
TPU from the TPU Lower Housing.
4. Remove the Cover Sheet.
Figure 4-27. Remove the Harness TPU
CN2
TPU Inverter Board
(under the Cover Sheet)
Harness TPU
TPU Lower Housing
Cover Sheet
Reassemble the Harness TPU following the steps below.
1. Insert the Stopper of the Harness TPU into the socket of the
TPU Lower Housing. Make sure that the “T” mark on the
stopper facing upwards.
2. Set the Expansion Tube of the Harness TPU into the holder of
the TPU Lower Housing.
3. Route the Harness TPU through the three notches of the TPU
Lower Housing.
Figure 4-28. Installing the Harness TPU
Stopper
“T” mark
Expansion Tube
Socket
Holder
Notch
Harness TPU
 Loading...