EPSON Perfection V10/V100 Photo/V200 Photo/V350 Photo Revision B
DISASSEMBLY/ASSEMBLY Disassembly of Main Unit 41
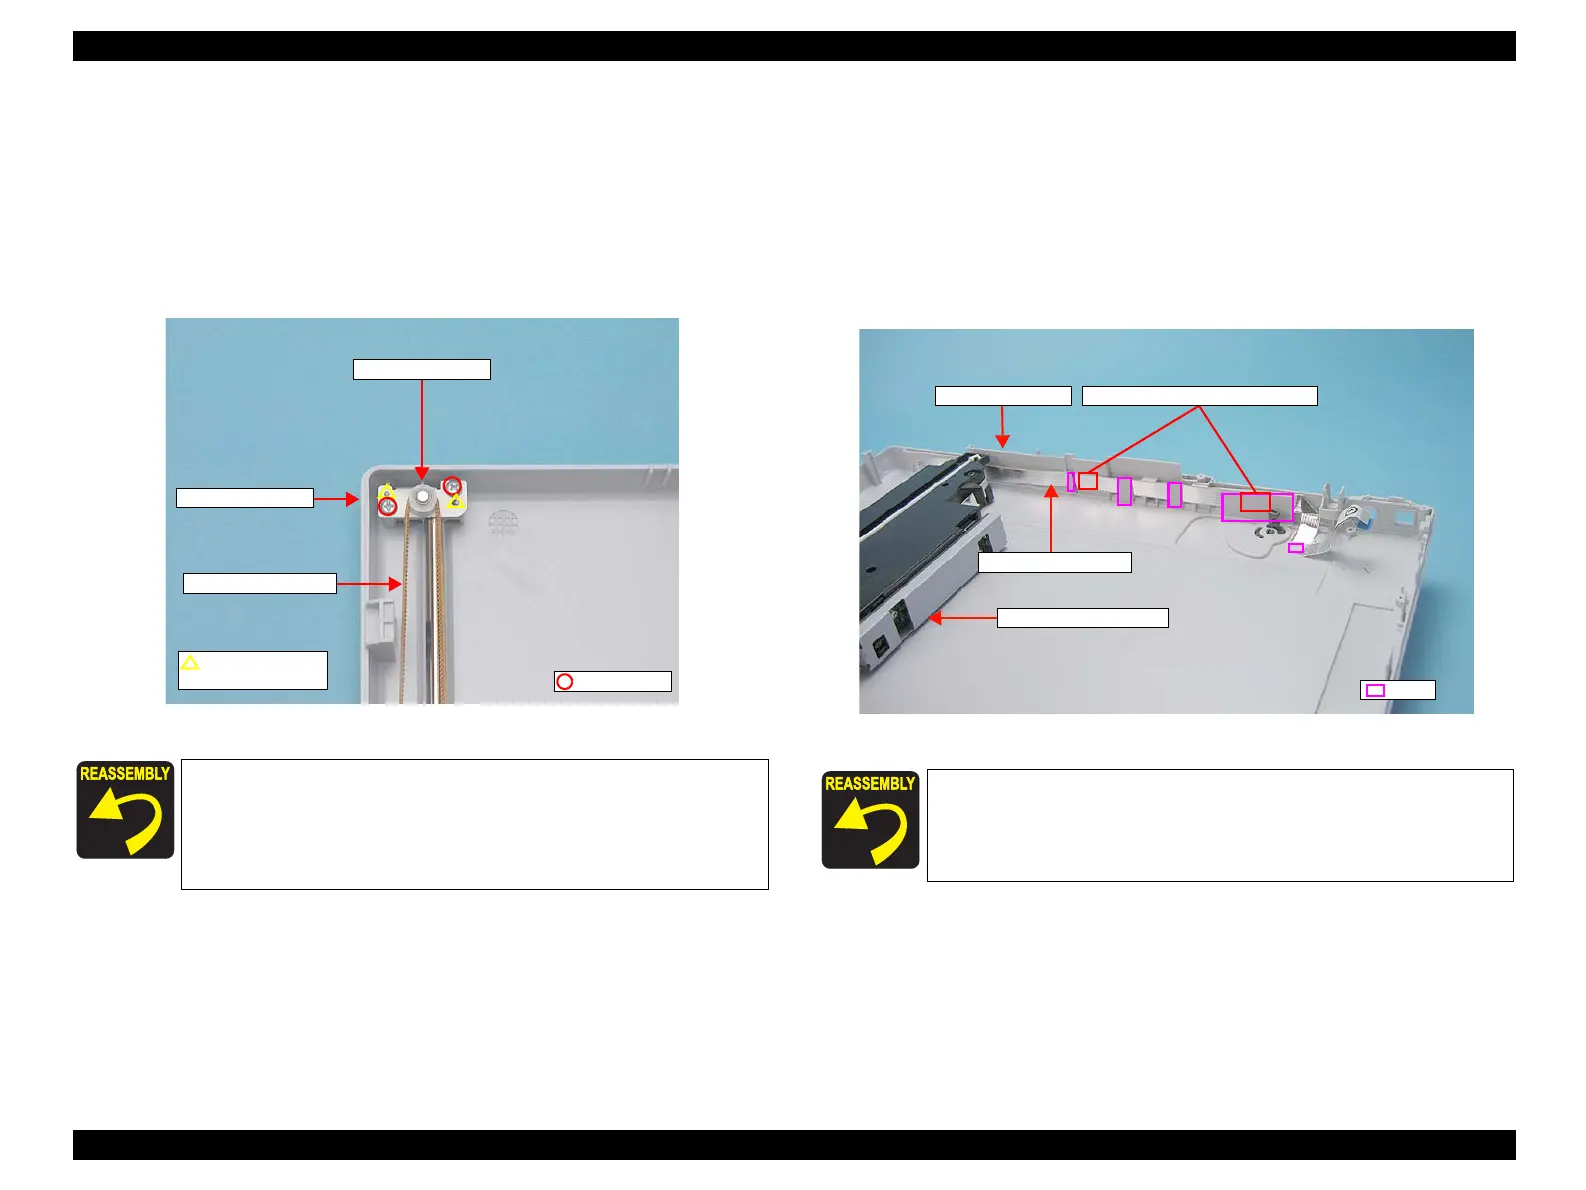
4.3.8 Driven Pulley
1. Remove the Upper Housing.
(4.3.3 Upper Housing on page 35)
2. Remove the two screws (C.B.P. 3x8, 5-7 kgf.cm) that secure the Driven Pulley.
3. Remove the Timing Belt from the Driven Pulley, and remove the Driven Pulley
from the Lower Housing.
Figure 4-19. Removing the Driven Pulley
4.3.9 Carriage Unit
1. Remove the Main Board. (4.3.6 Main Board on page 37)
2. Remove the CR Motor. (4.3.7 CR Motor on page 39)
3. Remove the Driven Pulley. (4.3.8 Driven Pulley on page 41)
4. Remove the Carriage FFC that is secured to the Lower Housing with double-sided
tape, and release the Carriage FFC from the rib of the Lower Housing.
Figure 4-20. Removing the Carriage FFC
After replacing the Driven Pulley, make sure to apply G-45
grease to the specified area. (Chapter 6 "MAINTENANCE"
P58)
When installing the Driven Pulley, match the guide pin and the
positioning hole.
C.B.P. 3x8
Timing Belt
Driven Pulley
Lower Housing
Guide pin and
positioning hole
Route the Carriage FFC through the ribs of the Lower Housing
and secure with double-sided tape, referring to figure 4-20.
Rib
Carriage FFC
Double-sided tape position
Carriage Unit
Lower Housing
 Loading...