EPSON Perfection V10/V100 Photo/V200 Photo/V350 Photo Revision B
DISASSEMBLY/ASSEMBLY Disassembly of Main Unit 42
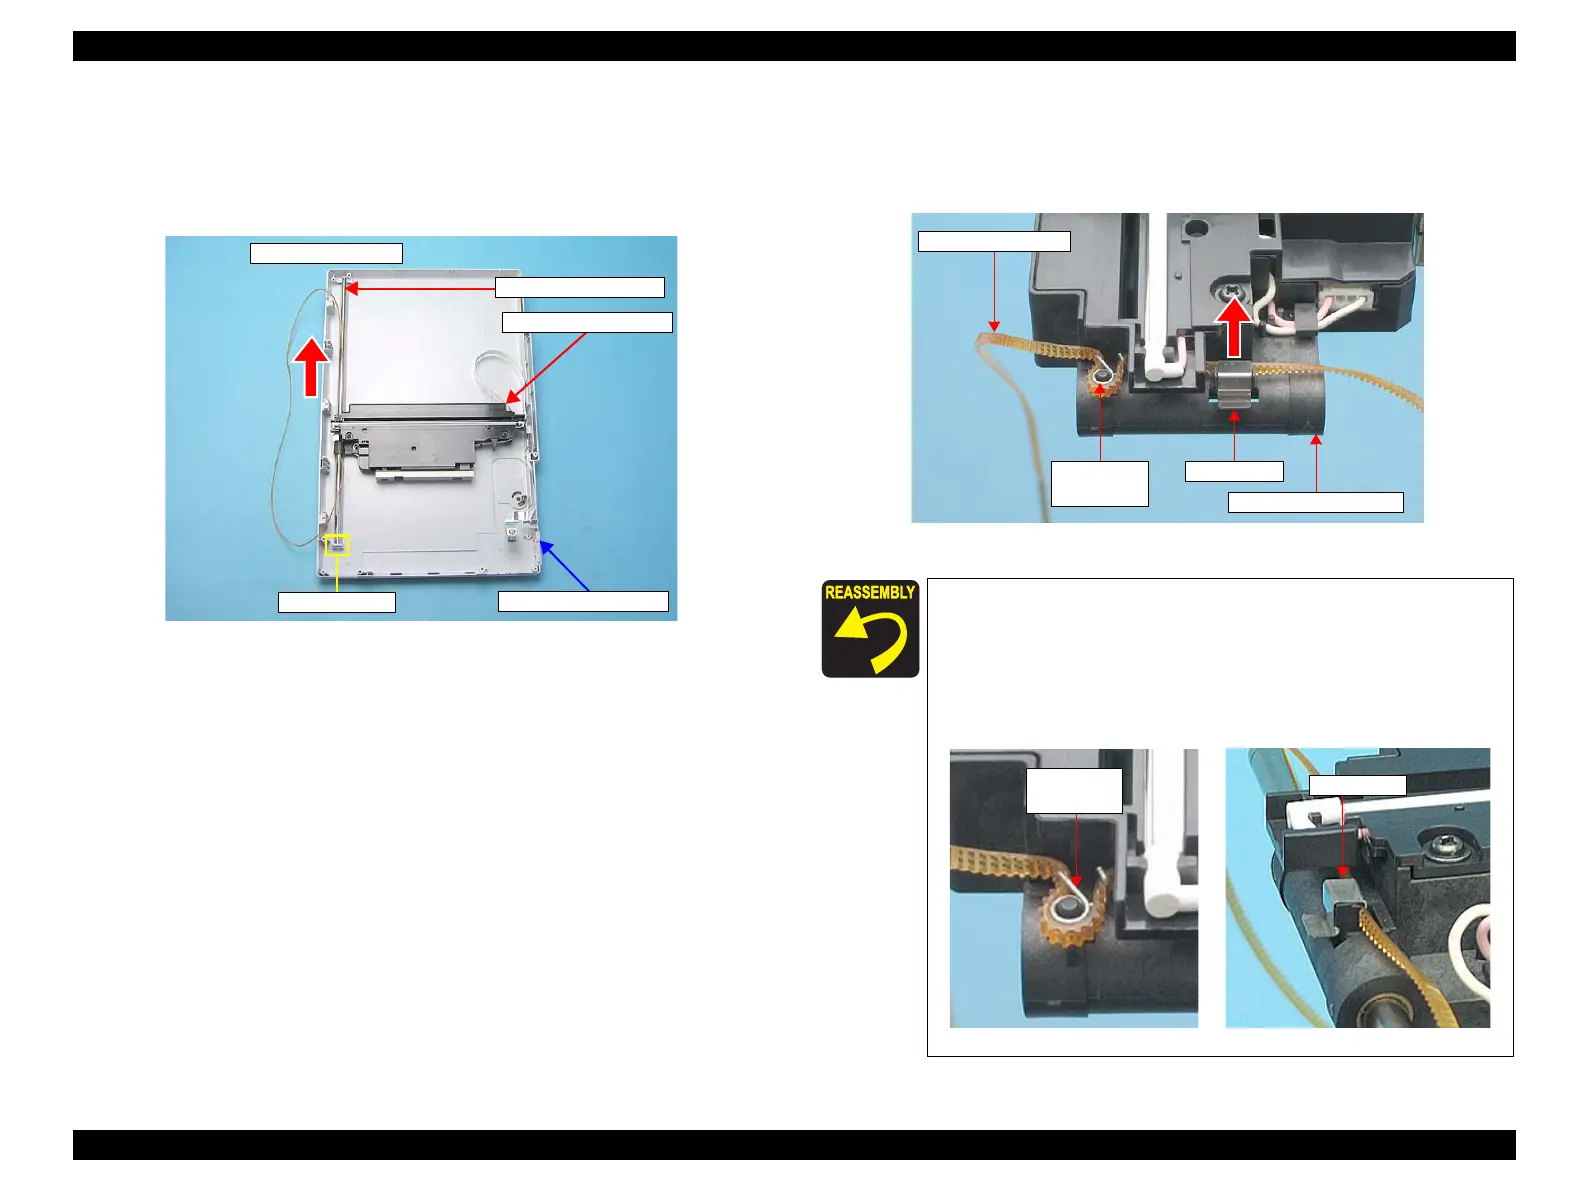
5. Remove the Carriage Unit from the Lower Housing following the steps below.
1. Lift up the Carriage Shaft from the Driven Pulley side, and move it in the
direction of the arrow, to get it out from the shaft holder.
2. Remove the Carriage Shaft from the Carriage Unit.
Figure 4-21. Removing the Carriage Unit
6. Remove the Clamp that secures the Timing Belt to the Carriage Unit in the
direction of the arrow.
7. Remove the Torsion Spring, and remove the Timing Belt.
Figure 4-22. Removing the Timing Belt
Driven Pulley side
Shaft holder
Carriage Shaft
Lower Housing
Carriage Unit
After replacing the Carriage Unit, make sure to apply G-45
grease to the specified area. (Chapter 6 "MAINTENANCE"
P58)
Install the Timing Belt and the Torsion Spring, as shown below.
Attach the wavy side of the Timing Belt against the Carriage
Unit, and secure it with the Clamp.
Figure 4-23. Installing the Timing Belt
Timing Belt
Torsion
Spring
Clamp
Carriage Unit
Torsion
Spring
Clamp
 Loading...