Using the Projector on a Network 49
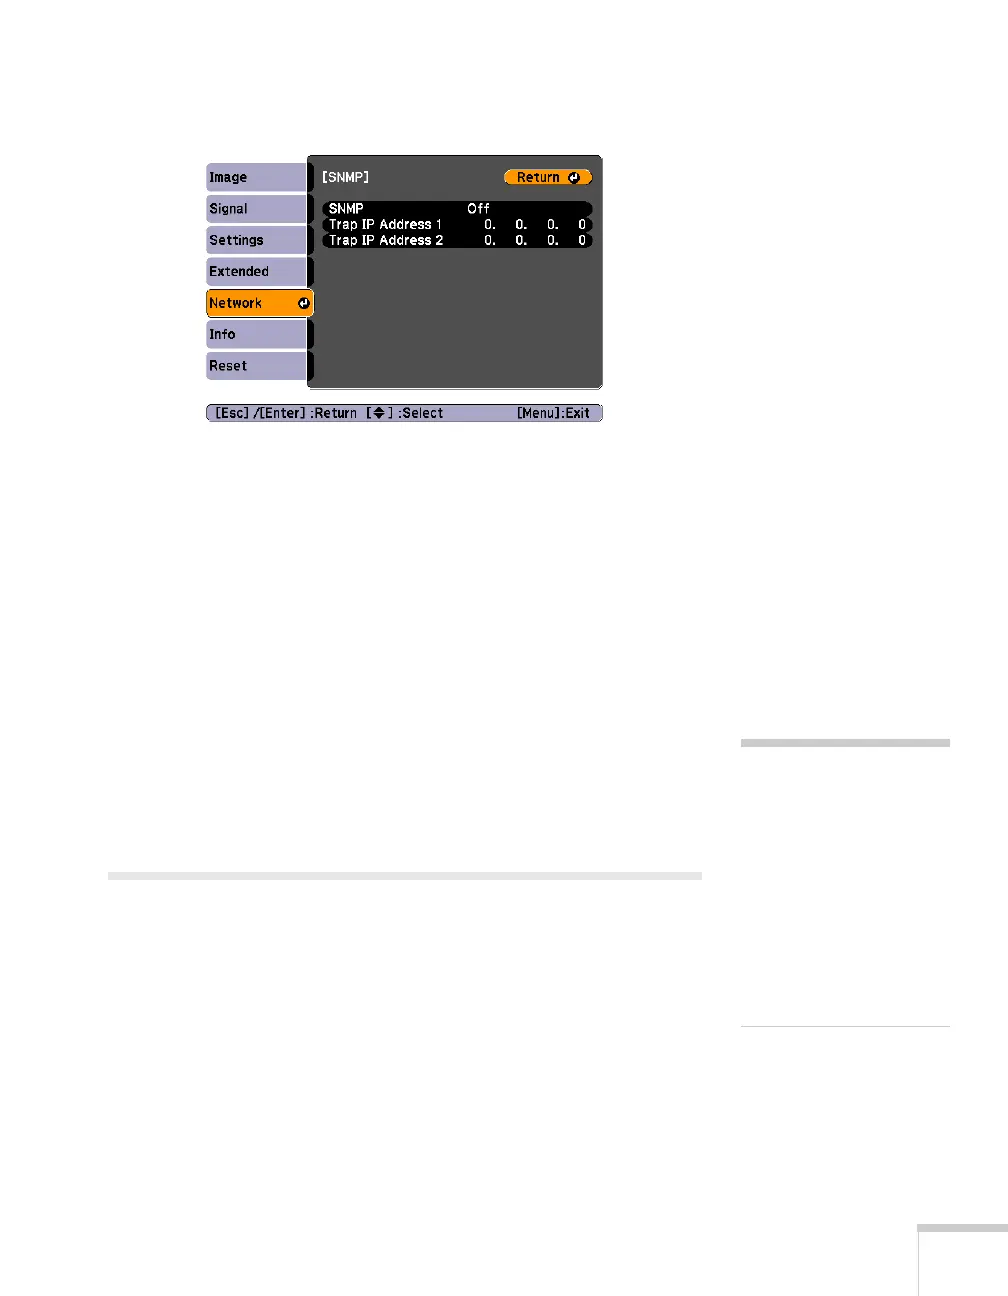
2. Choose SNMP and press Enter. You see the following screen:
3. Turn on the
SNMP setting.
4. Enter up to two IP addresses for notification.
You can enter a number from 0 to 255 in each field of the address.
However, the following IP addresses cannot be used: 127.x.x.x,
224.0.0.0 to 255.255.255.255 (where x is a number from 0 to
255).
5. When you’re done making all necessary changes, highlight the
Return button at the top of the screen, then press Enter.
6. If your network environment uses an AMX controller, select
On
to allow the projector to be detected by AMX Device Discovery.
7. Press
Menu to exit.
Using a Browser to Control the Projector
You can use a standard web browser to monitor and control the
projector through the network.
1. Make sure that the projector is set up for your network, as
described on page 44.
2. Open your web browser and enter the IP address of the projector
you want to monitor in the browser window.
If you’re not sure what the address of the projector is, turn the
projector on and select
Wired LAN from the Network menu to
note
When using a browser to
access the projector, you
cannot connect through a
proxy server.
Standby Mode in the
Extended menu should be
set to
Communication On
to monitor the projector in
standby mode.
 Loading...