SC-F9200 Series Revision B
DISASSEMBLY & ASSEMBLY Disassembly and Assembly Procedure 213
SE Group Confidential (Related Staff Only)
3.4.6.3 PF Motor
1. Remove the Left Rear Cover. (p110)
2. Remove the Left Upper Cover. (p111)
3. Remove the Left Cover. (p114)
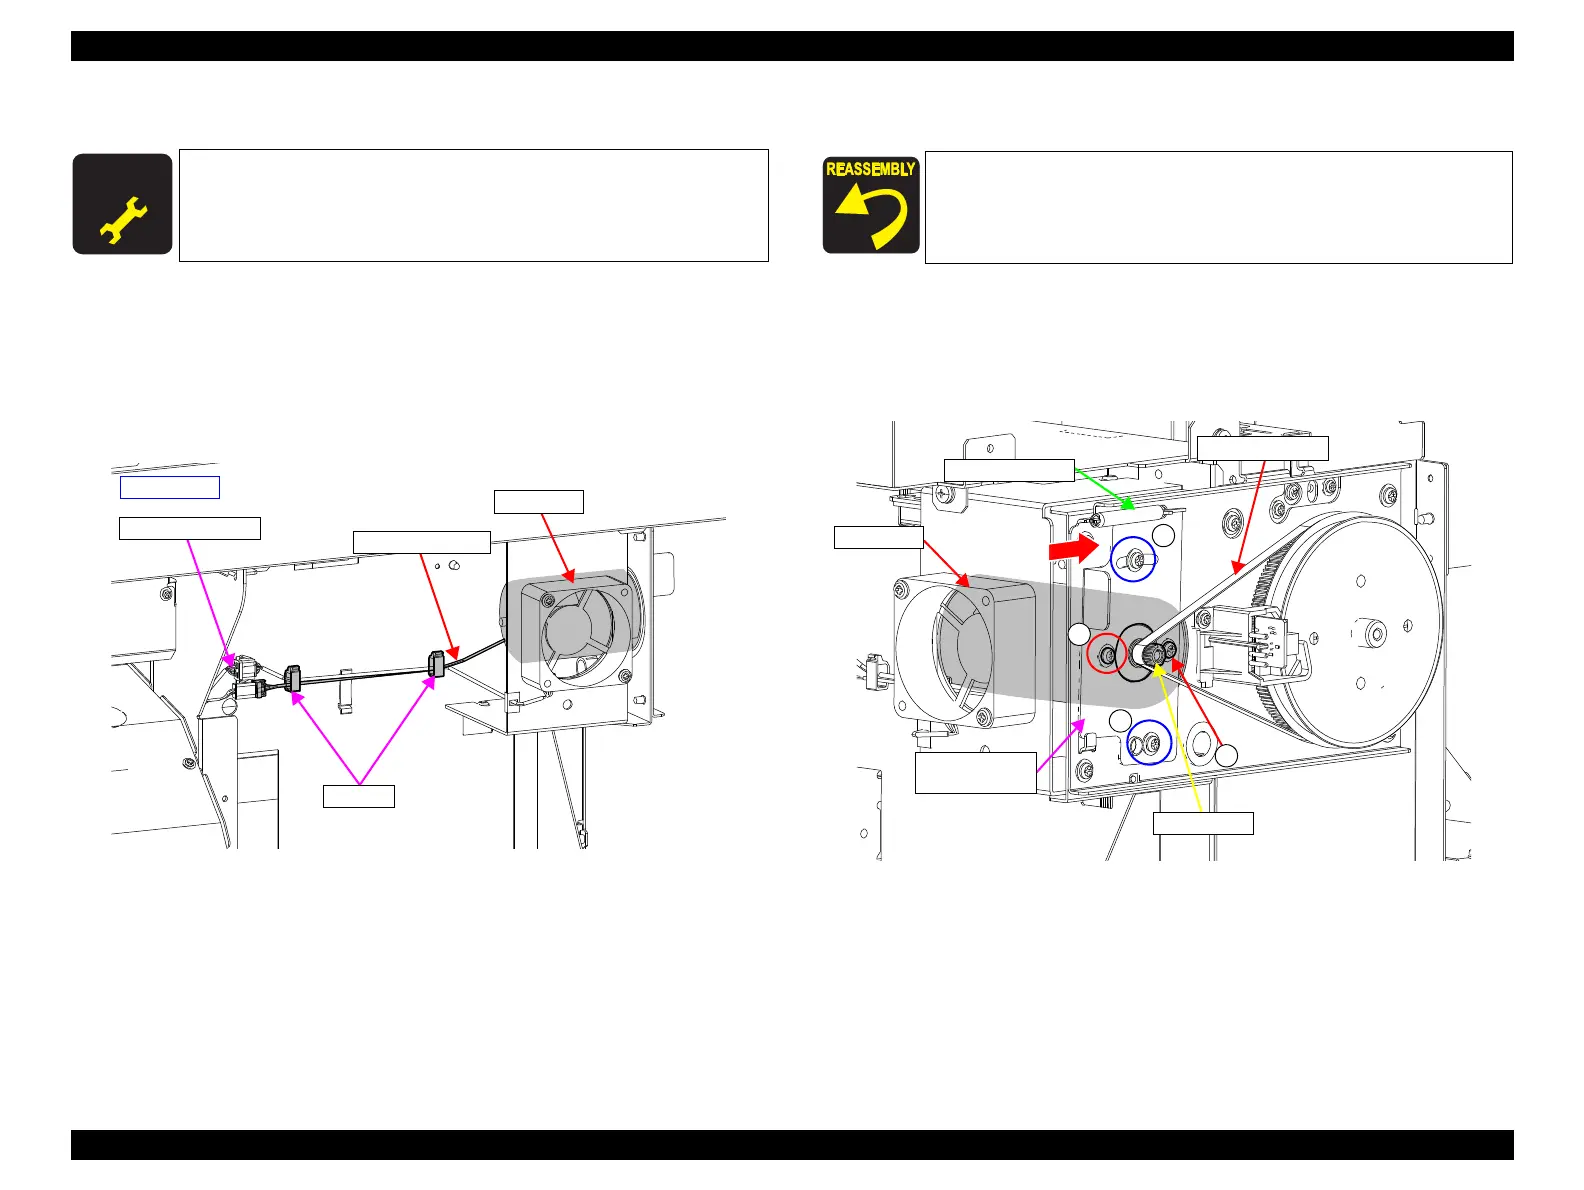
4. Disconnect the PF Motor Cables from the relay connector.
5. Release the PF Motor Cables from the two clamps.
Figure 3-162. Releasing the Cable
6. Loosen the two screws (A) that secure the PF Motor Mounting Plate.
7. While pressing the mounting plate in the direction of the arrow, loosen the tension
of the PF Timing Belt, and remove the belt from the pinion gear of the PF Motor.
8. Remove the two screws, and remove the PF Motor.
E) Silver M3x6 screw with built-in washer: 2 pcs
Figure 3-163. Removing the PF Motor
A D J U S T M E N T
R E Q U I R E D
When replacing/removing this part, refer to “4.1.2 Adjustment
Items and the Order by Repaired Part” (p260) and make sure to
perform the specified operations including required adjustment.
- Rear side -
Relay Connector
PF Motor
Clamps
PF Motor Cable
Before tightening the screw A, move the PF Motor Mounting Plate
frontward and rearward several times, and make sure that the
plate moves smoothly and tension of the tension spring is applied
properly.
A
A
B
B
PF Timing Belt
Tension Spring
PF Motor
Pinion gear
PF Motor
Mounting Plate

 Loading...


