EPSON Stylus COLOR 860/1160 Revision C
Disassembly and Assembly Disassembly Procedures 90
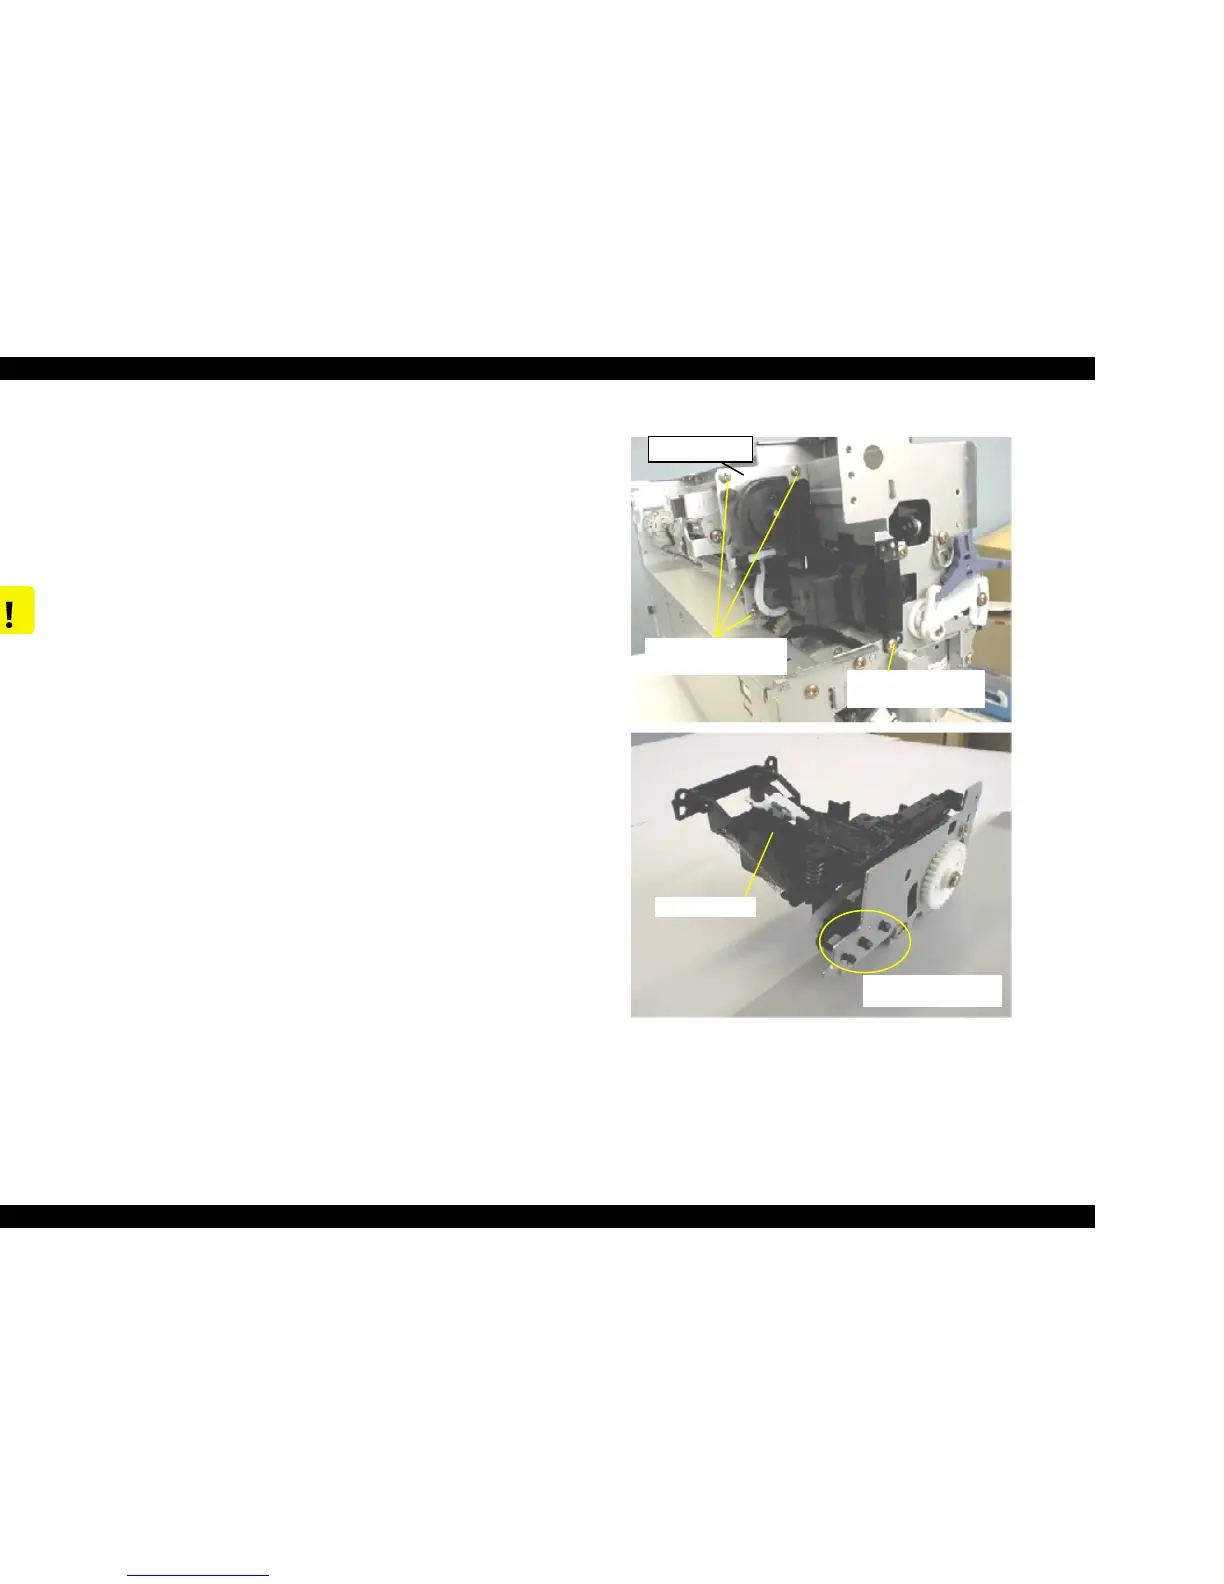
6) From the Middle Frame, remove three screws (No.1) securing the Pump
Assembly in the Ink System Assembly.
Then, from the Right Frame, remove one screw (No.1) securing the Cap
Assembly in the Ink System Assembly. Refer to Figure 4-14.
7) Release three hooks fixing the Cap Assembly to the Metal plate for Ink
System Assembly and remove the Cap Assembly.
Refer to Figure 4-14.
8) Remove the ink tube carefully from the Cap Assembly.
Figure 4-14. Removing the Pump Assembly & Cap Assembly
CAUTION
1. When replacing the cleaner head built in the Pump
assembly, be careful of the following points.
n Do not touch the cleaner head with your bare hands.
Use gloves or tweezers.
n Do not smear the head cleaner with oil or grease.
n When installing the cleaner head, set the rubber side
(black side) toward the right side of the frame.
2. When replacing the Cap Assembly, do not touch the
sealing rubber portion of the Cap Assembly.
3. The components parts of the Pump Assembly are no
individually supplied as ASP. So please replace the whole
Pump Assembly when the Pump Assembly needs
replacing.
Cap Assembly
Three hooks fixing the
Cap Assy.
No.1 Screw securing
the Cap Assy.
No.1 Screws securing
the Pump Assembly
Middle Frame

 Loading...


