EPSON Stylus COLOR 860/1160 Revision C
Disassembly and Assembly Disassembly Procedures 91
Figure 4-15. Setting the Ink Absorption Pad
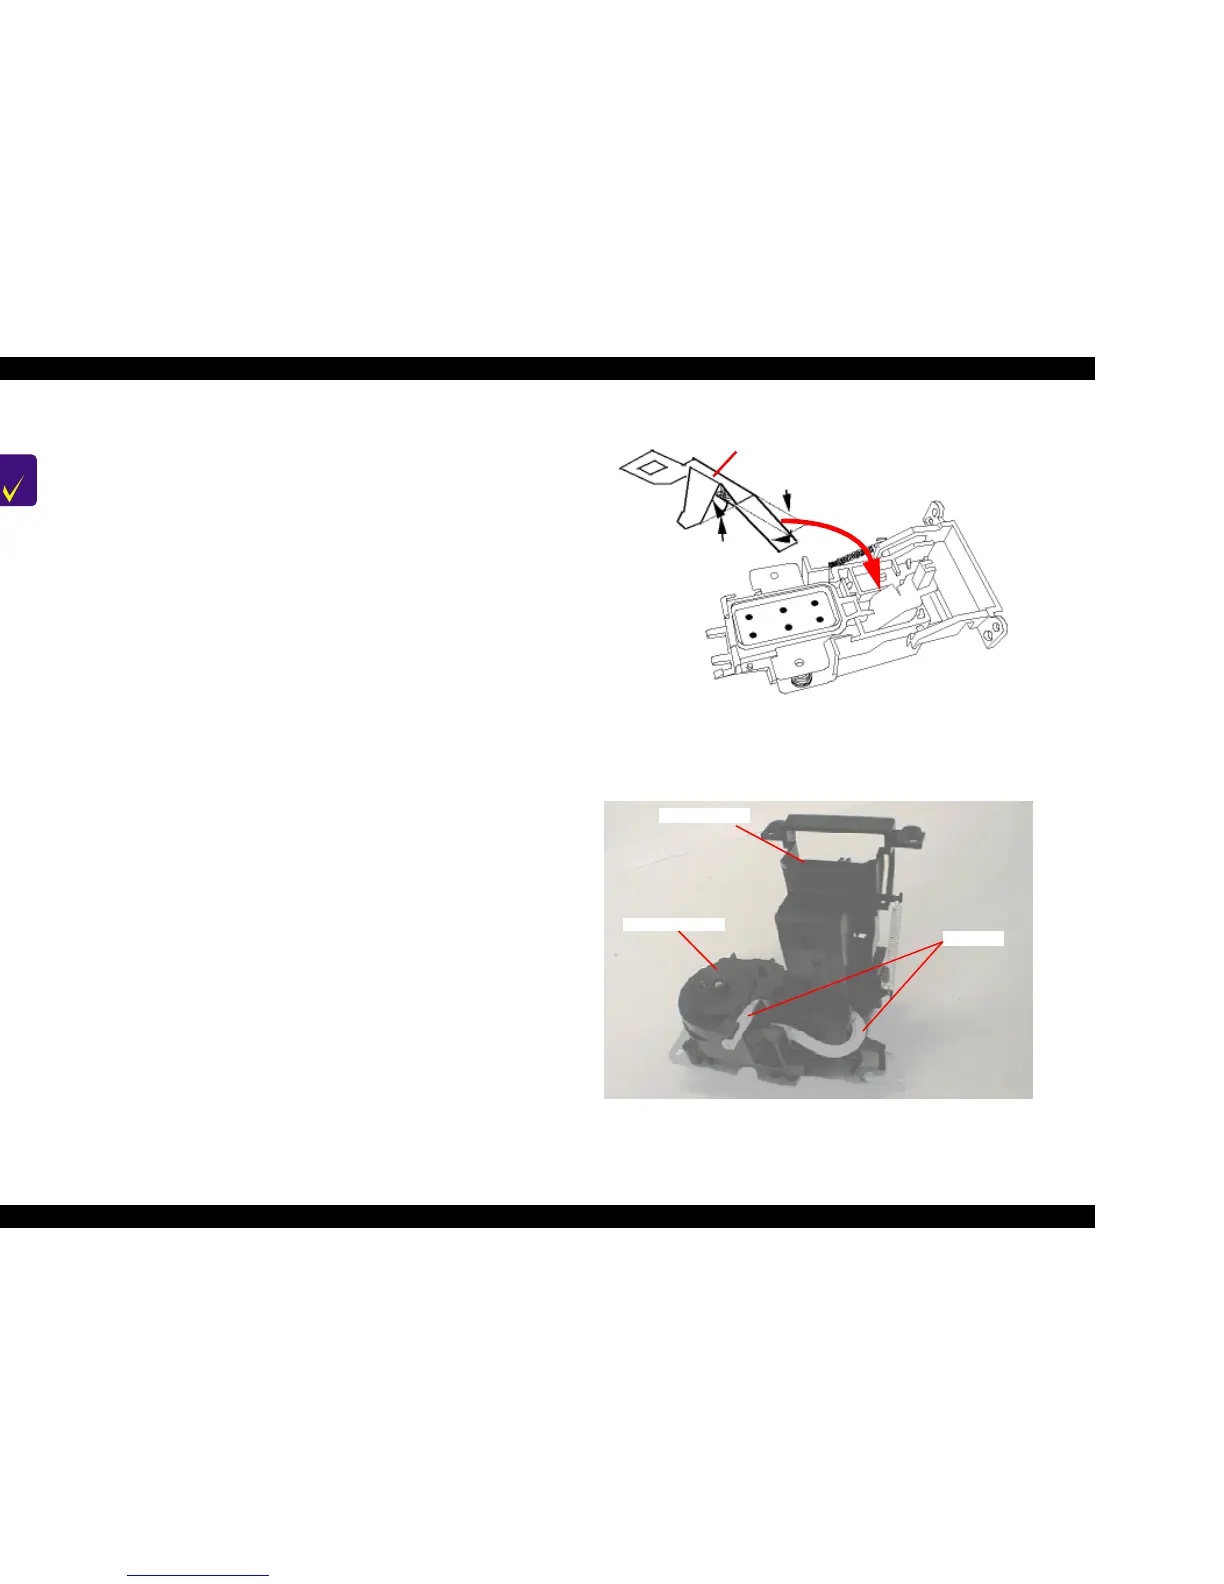
Figure 4-16. Placing the Ink Tube in the Ink System
CHECK
POINT
n Since the spring is included among the gears in the pump
assembly, make sure that the parts do not pop out during
disassembly and assembly.
n When assembling the Cap Assembly to the Ink System
Assembly, make sure that the Ink absorption Pad has been
set in the Cap Assembly. Refer to Figure 4-15.
n When assembling the printer, be careful not to crush or leave
any stress on the ink tube connecting the pump assembly
and the cap assembly.
n Check that the ink tube is connected securely to the connect
portion of the Cap Assembly. Refer to the Figure 4-16.
n Check that the ink tube is placed correctly in the Ink System
Assembly. Refer to Figure 4-16.
n After installing the Pump Assembly, ensure that the cleaner
parts move back and forth by rotating the Gear.
n After setting the three protrusions of Cap Assembly to the
suitable fixing holes of the metal plate, secure the Ink
System Assembly to the Middle Frame with the screws.
See Figure 4-14.
Ink Absorption Pad
About 45
°
About 60-90°
Cap Assembly
Pump Assembly
Ink Tube

 Loading...


