EPSON Stylus CX3500/CX3600/CX3650/CX4500/CX4600 Revision A
DISASSEMBLY AND ASSEMBLY Disassembly 124
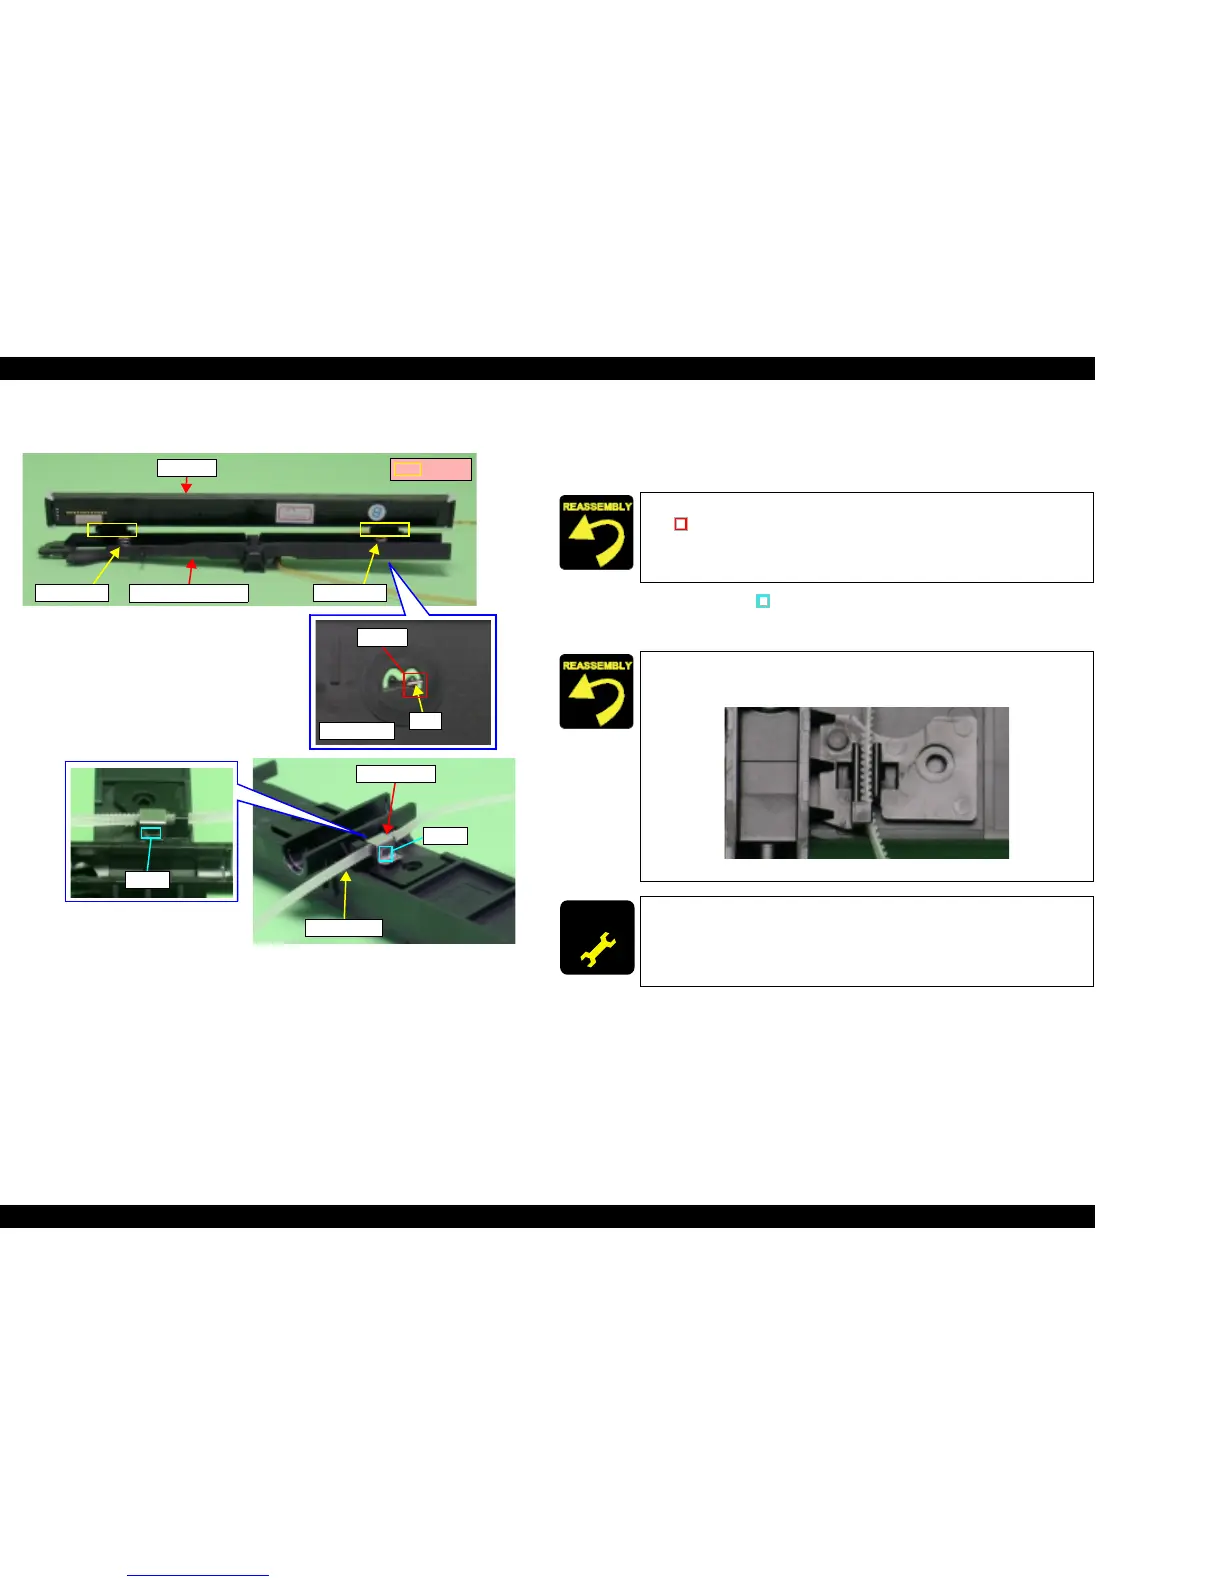
V External View (4)
Figure 4-10. Scanner Carriage Unit Removal (2)
4. Remove CIS Unit from Scanner CR Holder with opening and shifting it to the
right direction.
5. Remove CIS Spring (x2) from Scanner CR Holder.
6. Release the hooks (x2, ) for securing Belt Clamp by using a tweezers.
7. Remove Timing Belt from Scanner Carriage Unit.
Belt Clamp
Timing Belt
Hook
Hook
Scanner CR Holder
CIS Spring CIS Spring
Shafts
CIS Unit
Leg
Dowel
Bottom side
Install CIS Spring by fastening the leg of CIS Spring to the dowel
(x1, ) of Scanner CR Holder.
Install the location on Timing Belt having the teeth on both sides into
Scanner Carriage Unit.
Figure 4-11. Installation of Timing Belt
ADJUSTM ENT
REQUIRED
After changing the Scanner Carriage Shaft for a new one, always
apply grease G-26 to the specified portions.
T Refer to Chapter 6, Figure 6-4 (p.177)

 Loading...


