EPSON Stylus CX4300/CX4400/CX5500/CX5600/DX4400/DX4450 Revision A
DISASSEMBLY/ASSEMBLY Printer Section 67
4.3.4 Scanner Unit/Middle Case/Panel Unit
Part/Unit that should be removed before removing Scanner Unit /Middle
Case /Panel Unit
Document Cover / ASF Cover / Support Arm
Removal Procedure
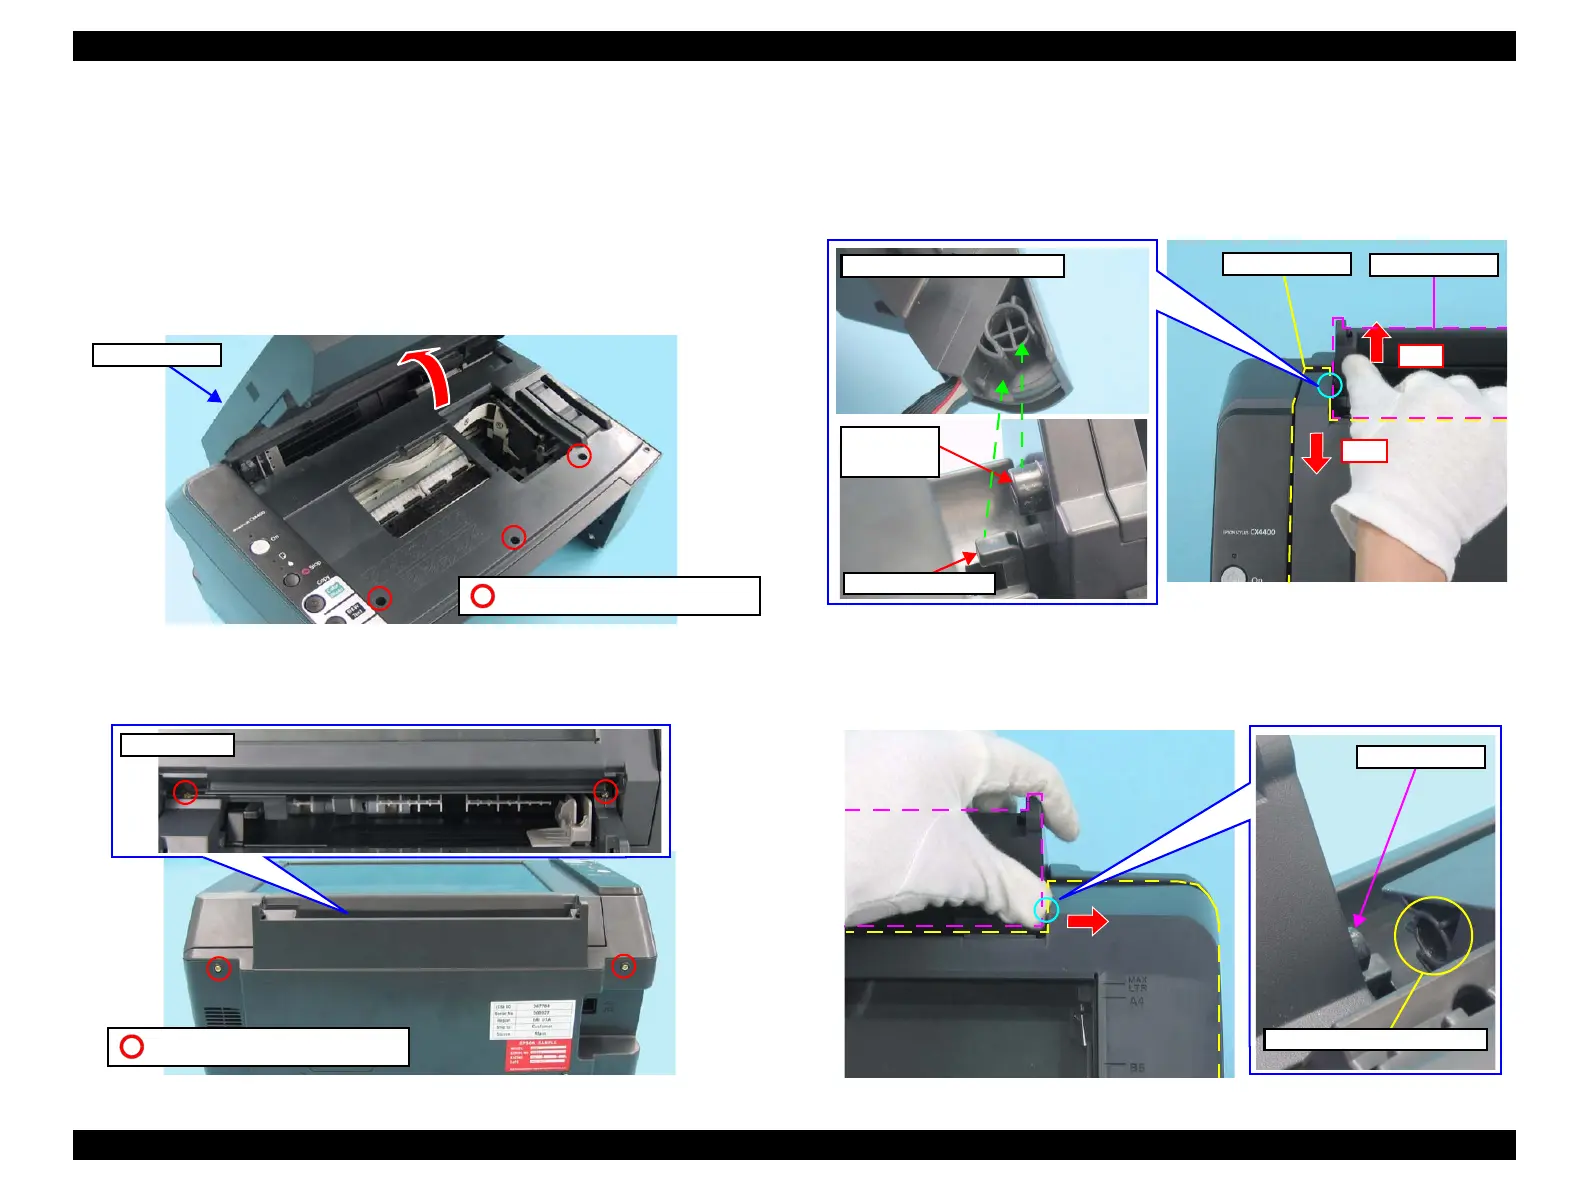
1. Remove the screws (x7) that secure the Middle Case.
1-1. Open the Scanner Unit, and remove the screws (x3).
Figure 4-9. Removing Screws securing Middle Case (front side)
1-2. Remove the screws (x2) on the rear and the screws (x2) on the both ends of
the ASF.
Figure 4-10. Removing Screws securing Middle Case (rear side)
2. While pushing the Lower Case with your thumb in the direction of the arrow, pull
the Scanner Unit toward you to release it from the following pin and hook.
The left guide pin (x1) on the Lower Case.
The hook (x1) on the Middle Case.
Figure 4-11. Removing Scanner Unit /Middle Case /Panel Unit (1)
3. Push the Scanner in the direction of the arrow to release it from the following pin.
The right guide pin (x1) on the Lower Case.
Figure 4-12. Removing Scanner Unit /Middle Case /Panel Unit (2)
C.B.P 3X10 (Torque: 6±1Kgf.cm)
Scanner Unit
C.B.P 3X10 (Torque: 6±1Kgf.cm)
Top view
Lower Case
Push
Pull
Scanner Unit
Guide Pin on
Lower Case
Hook on Middle Case
Hinge section of Scanner Unit
Guide Pin
Scanner Unit attached position

 Loading...


