EPSON Stylus CX4300/CX4400/CX5500/CX5600/DX4400/DX4450 Revision A
DISASSEMBLY/ASSEMBLY Scanner Section 97
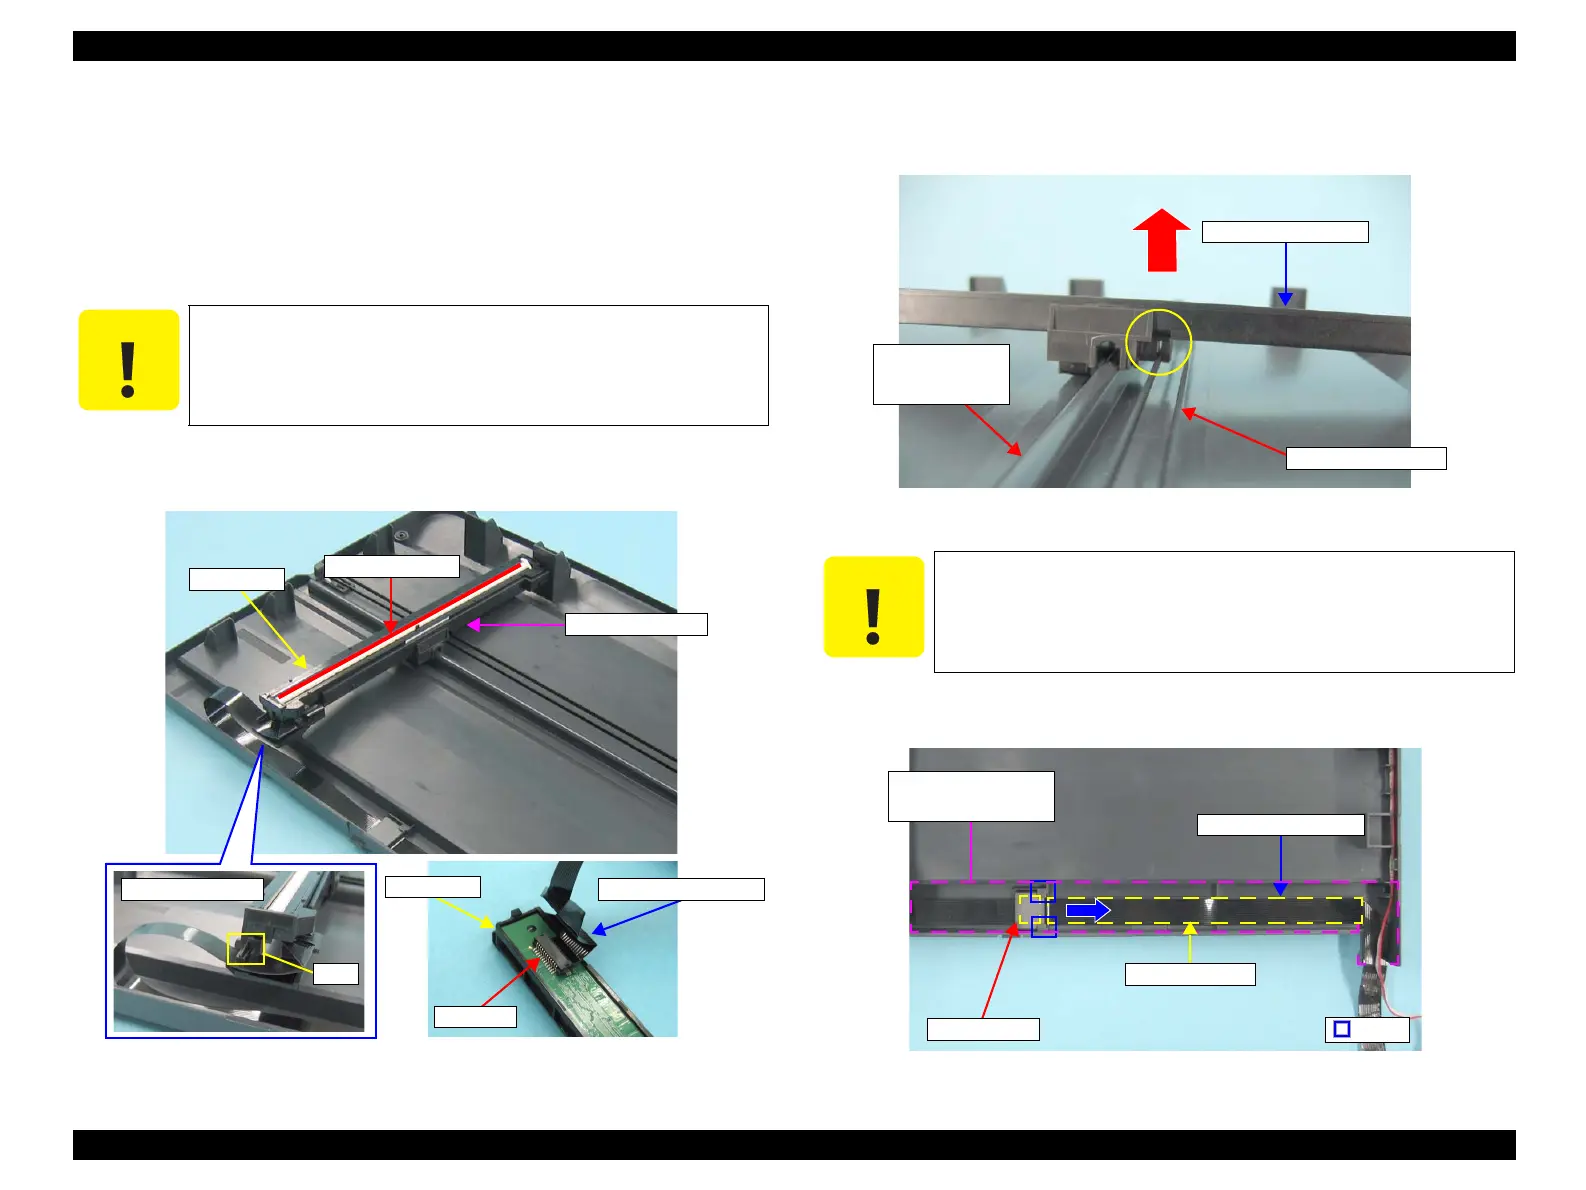
4.8.2 CIS Assy./CIS Carrier Assy./Scanner FFC
Part/Unit that should be removed before removing Scanner CIS Assy./CIS
Carrier Assy./Scanner FFC
Document Cover / ASF Cover / Support Arm / Scanner Unit / Upper Scanner
Housing
Removal procedure
1. Remove the CIS Assy. from the CIS Carrier Assy.
2. Disconnect the Scanner FFC from the CIS Assy., and remove the CIS Assy.
Figure 4-97. Removing CIS Assy.
3. Remove the CIS Carrier Assy. from the Timing Belt and the Guide Rail of the
Lower Scanner Housing.
Figure 4-98. Removing CIS Carrier Assy.
4. Shift the Ferrite Core in the direction of the arrow to release it from the tabs
(x2), and remove the Scanner FFC from the Lower Scanner Housing.
Figure 4-99. Removing Scanner FFC
C A U T I O N
Do not scratch the Rod Lens Array when removing the CIS Assy.
Rod Lens Array
CIS Carrier Assy.
CIS Assy.
FFC route
Tab
Connector
CIS Assy.
Scanner FFC
C A U T I O N
Do not damage the Scanner FFC as it is secured with double-sided
tape.
Guide Rail of the
Lower Scanner
Housing
Scanner Timing Belt
CIS Carrier Assy.
Scanner FFC
Groove on the Lower
Scanner Housing
Ferrite Core Tab
Tape Position

 Loading...


