EPSON Stylus CX4300/CX4400/CX5500/CX5600/DX4400/DX4450 Revision A
DISASSEMBLY/ASSEMBLY Removing Printer Mechanism 71
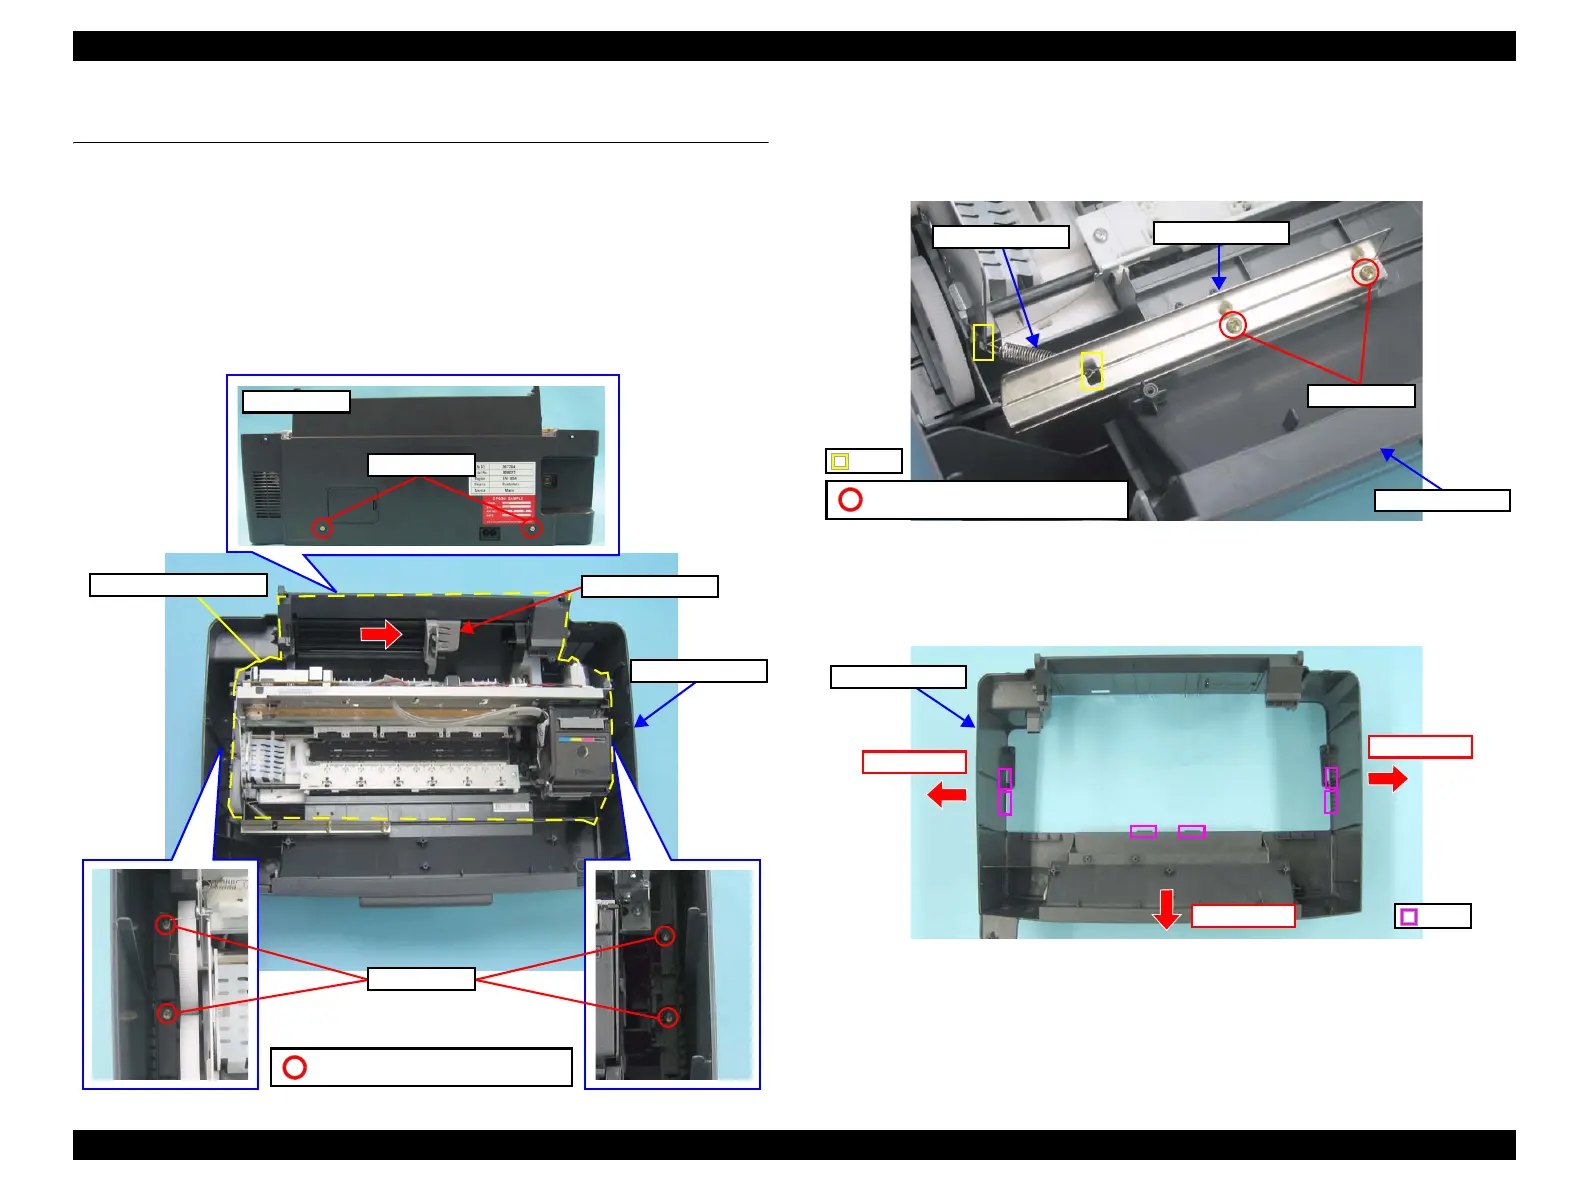
4.4 Removing Printer Mechanism
Part/Unit that should be removed before removing Printer Mechanism
Document Cover / ASF Cover / Support Arm / Scanner Unit / Middle Case /
Panel Unit
Removal Procedure
1. Remove the screws (x6) that secure the Printer Mechanism to the Lower Case.
2. Move the Paper Guide to the right side.
Figure 4-23. Removing Printer Mechanism (1)
3. Release the Grounding Spring from the hooks (x2) and remove it
4. Remove the screws (x2) that secure the Shield Plate, and remove it from the Lower
Case.
Figure 4-24. Tab Position on Lower Case
5. The tabs (x6) on the Lower Case shown below are securing the Printer
Mechanism. Push outward on the left, right, and front sides of the Lower Case to
widen it, and release the Printer Mechanism from the tabs (x6).
Figure 4-25. Tab Position on Lower Case
Printer Rear
Screw
Screw
Printer Mechanism
Paper Guide
Lower Case
C.B.P 3X6 (Torque: 6±1Kgf.cm)
Lower Case
Screw
Hooks
Grounding Spring
Shield Plate
C.B.S 3X10 (Torque: 6±1Kgf.cm)
Tabs
Push outwards
Push outwards
Push outwards
Lower Case

 Loading...


