EPSON Stylus CX4300/CX4400/CX5500/CX5600/DX4400/DX4450 Revision A
DISASSEMBLY/ASSEMBLY Disassembling Printer Mechanism 93
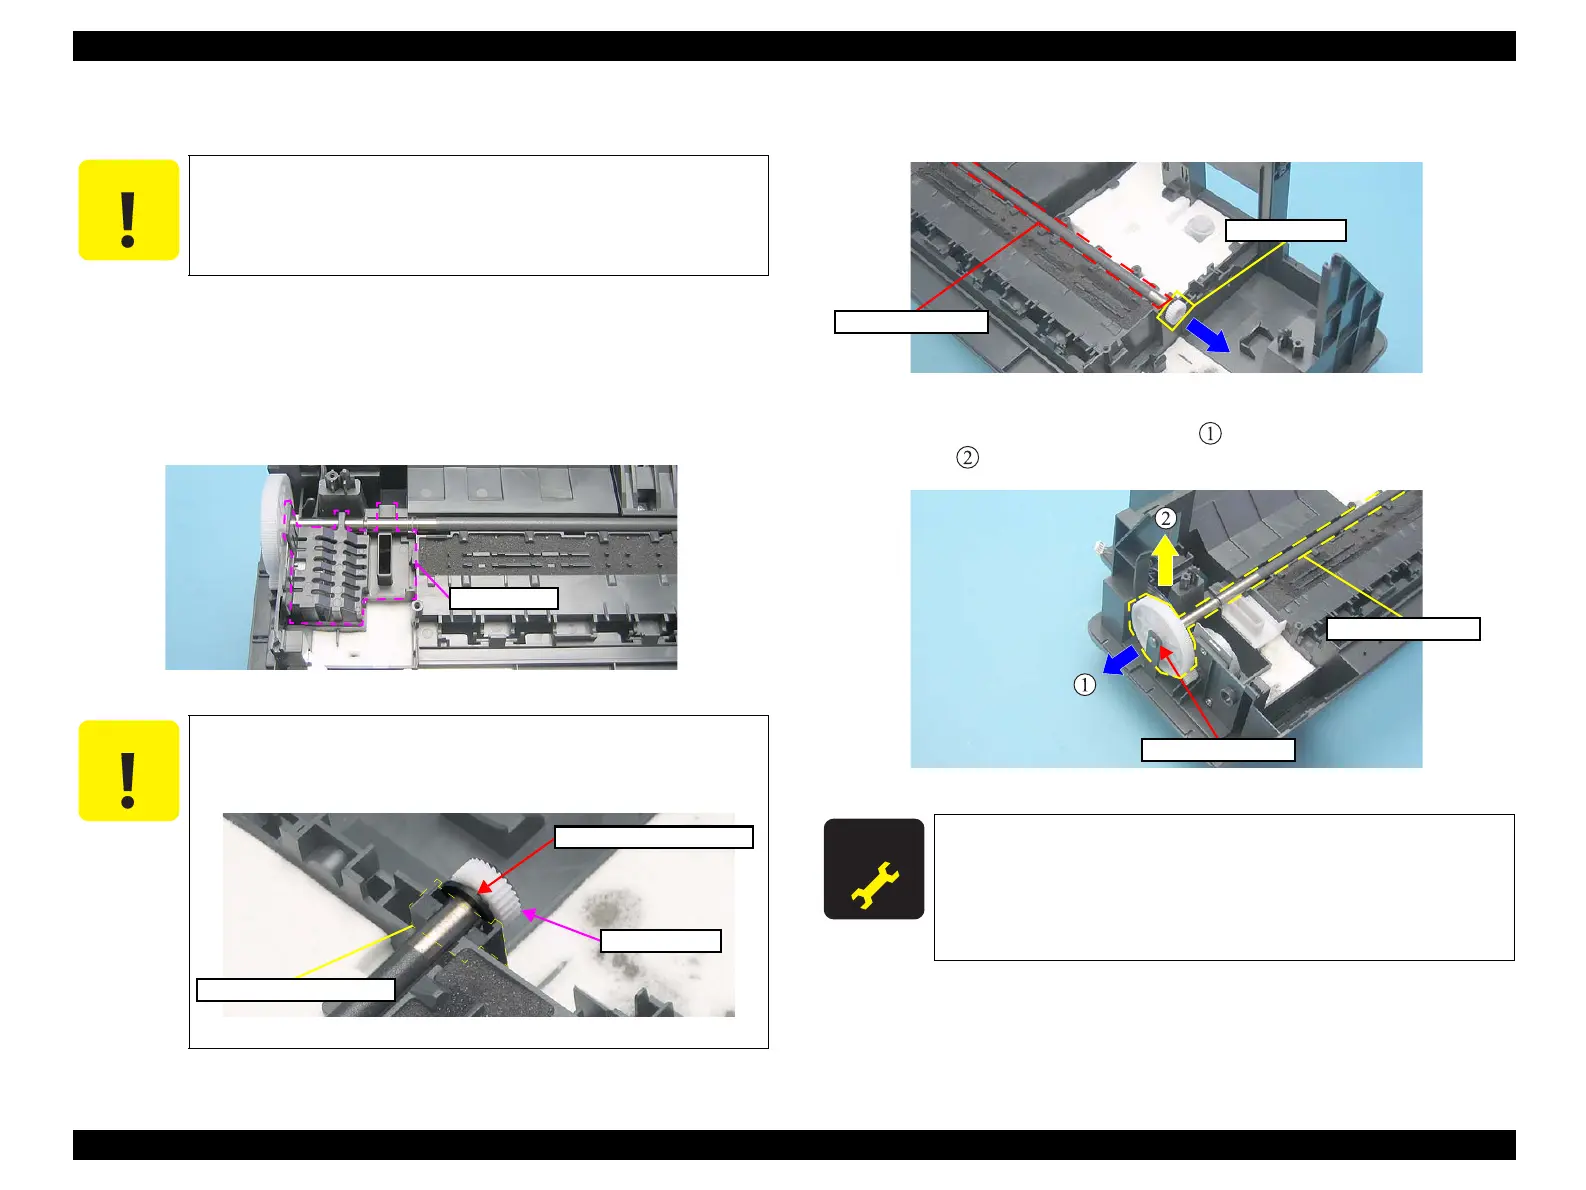
4.6.12 PF Roller
Part/Unit that should be removed before removing PF Roller
Document Cover / ASF Cover / Support Arm / Scanner Unit / Middle Case /
Panel Unit / Printer Mechanism / Hopper / Main Board / Main Frame / EJ Frame
Assy. / Print Head / CR Scale / CR Motor / CR Unit / Timing Belt / Ink System
Removal procedure
1. Remove the FB Cover.
Figure 4-87. Removing PF Roller (1)
2. Remove the Spur Gear, 13.5 from the PF Roller with a flathead screw driver
or the like.
Figure 4-89. Removing PF Roller (2)
3. <Pull open the bearing slightly (Arrow ), and remove the PF Roller Assy
(Arrow
).
Figure 4-90. Removing PF Roller (3)
C A U T I O N
Do not touch or damage the coated area of the PF Roller Assy.,
when performing the following work.
When installing the Spur Gear, 13.5, be sure to install a new
one. The Spur Gear 13.5 cannot be reused.
C A U T I O N
When removing (prying) the Spur Gear, 13.5 with a flathead screw
driver or the like, do not use the fragile upper half of the bearing as
a pivot point, but use the firmer lower half instead.
Figure 4-88. Removing Spur Gear, 13.5
FB Cover
Spur Gear, 13.5
Lower half of the Bearing
Upper half of the Bearing
A D J U S T M E N T
R E Q U I R E D
When the PF Roller is reassembled, perform the required
lubrication. (Refer to Chapter 6 “ MAINTENANCE (p108)”)
Spur Gear, 13.5
PF Roller Assy.
Bearing
PF Roller Assy.

 Loading...


